Garden Gates Direct - How To Fit Your Aluminium Pedestrian Gate Onto Posts
- Gates
- Railings
- Fencing
- Accessories
& Fitting- Sheds
& Storage- Garden Structures
- Design
& StyleMetal Gates & Railings- Info
& HelpHow to Install Your Aluminum Pedestrian Gate on Posts
Please refer to the installation guidelines in the illustrations below if you need help installing one of our aluminium pedestrian gates onto posts.
Installation Guide
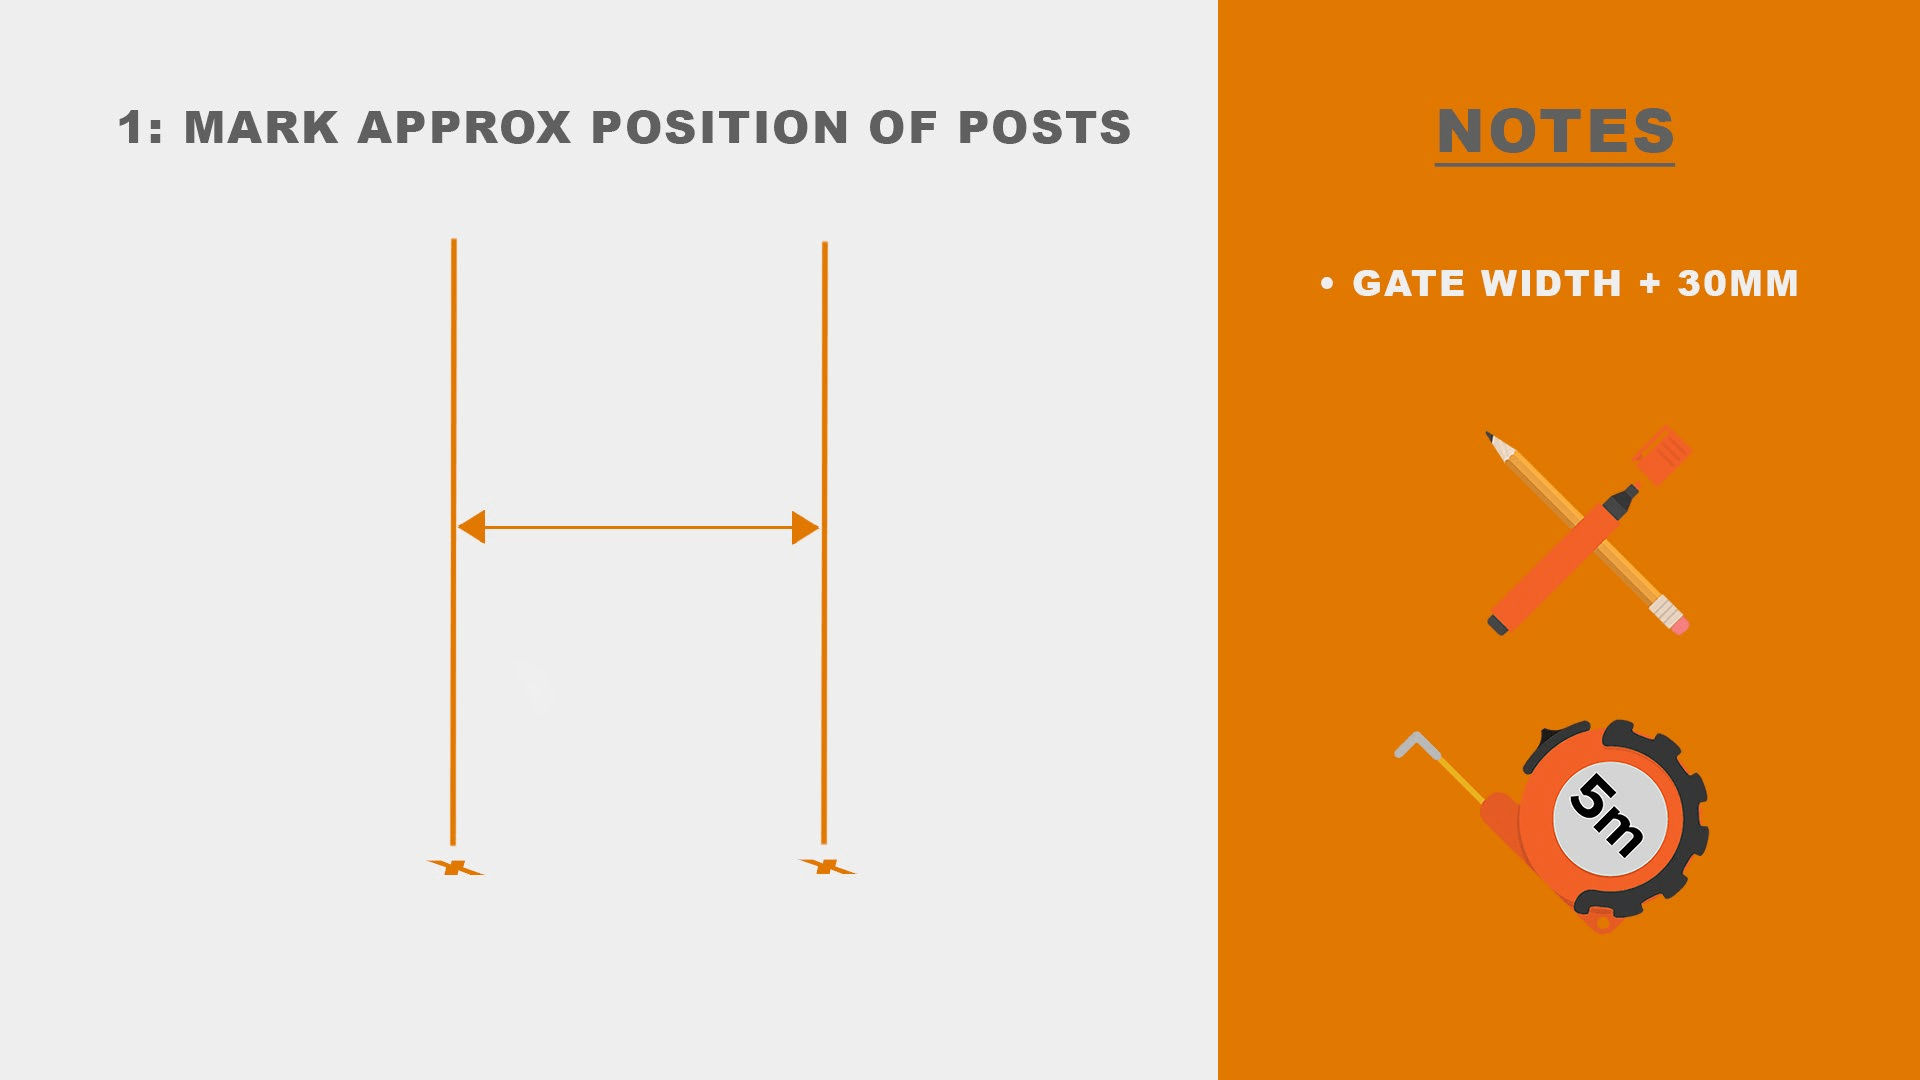
Begin the installation by marking the position of your posts. The gap between them should be 30mm wider than the gate you have ordered.
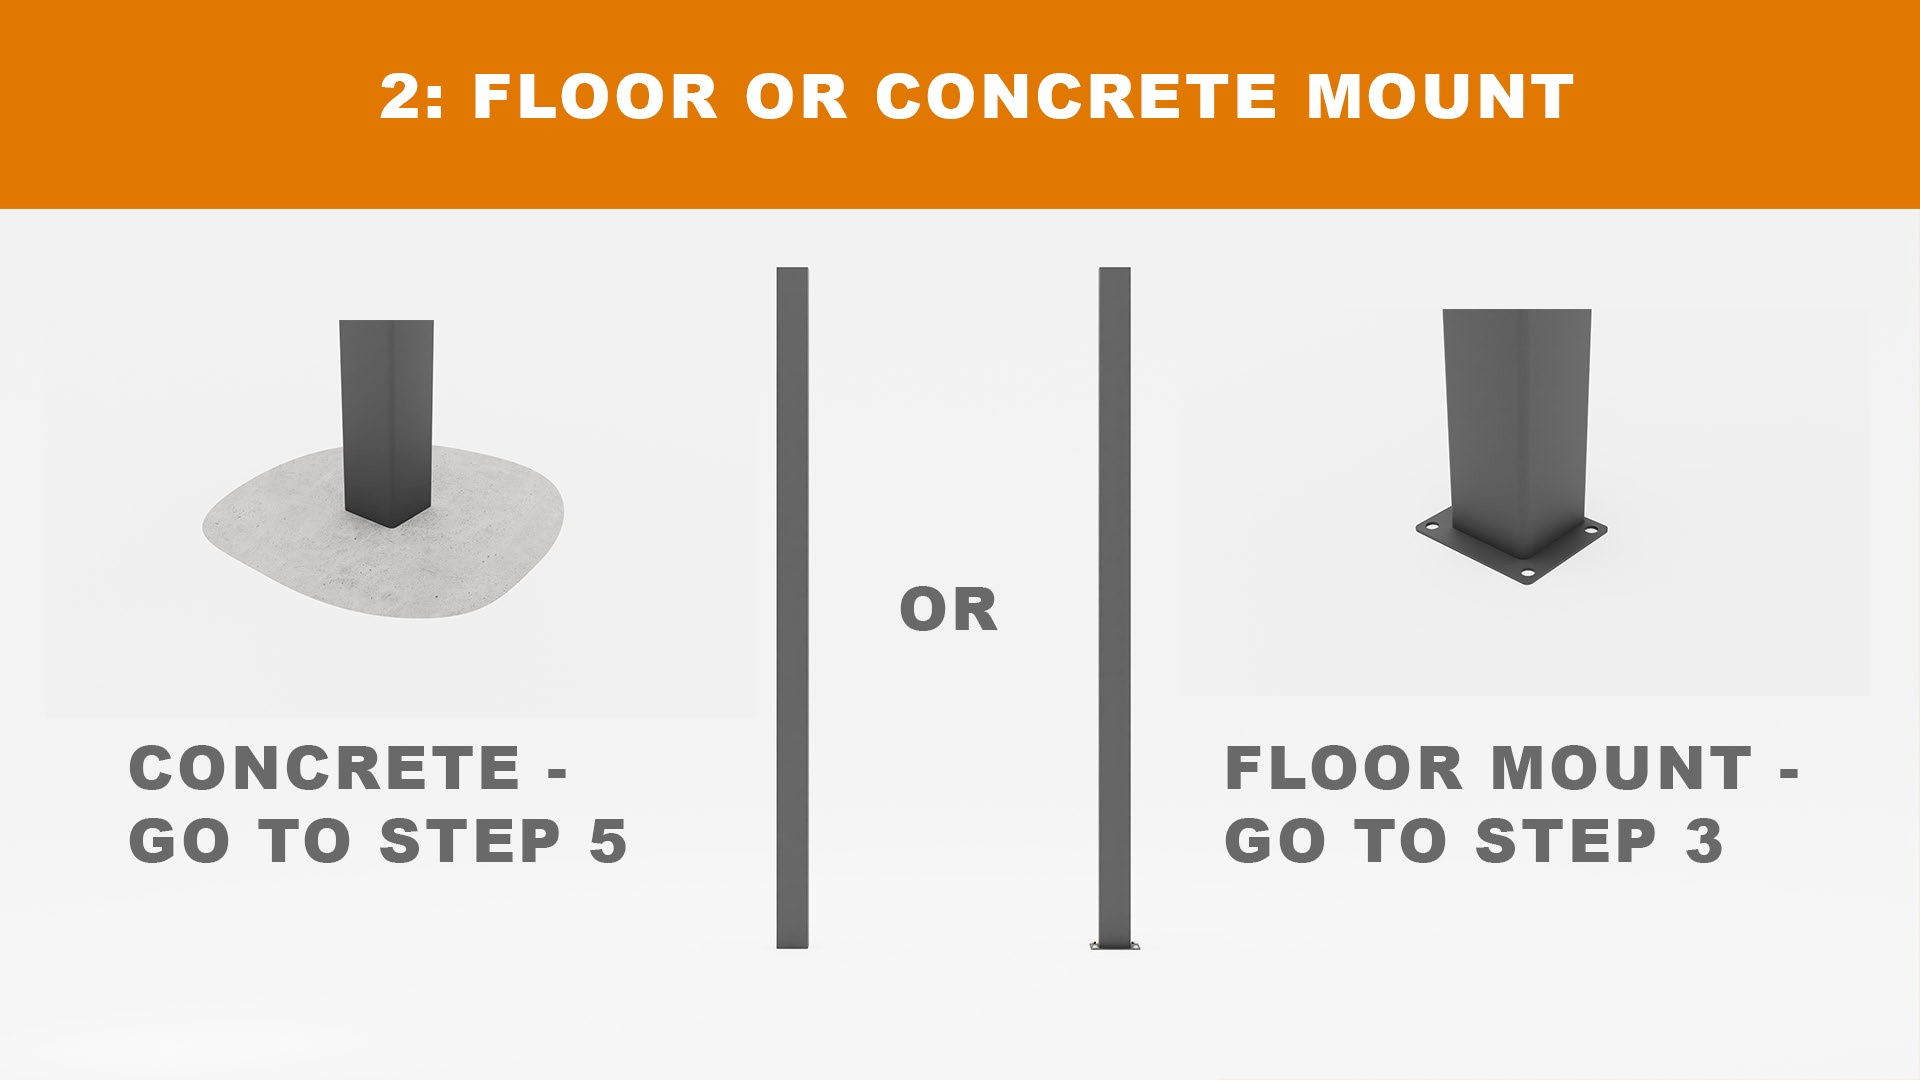
Depending on your installation requirements, go to step 5 for "concrete in" applications or step 3 for "floor mounted" installations.
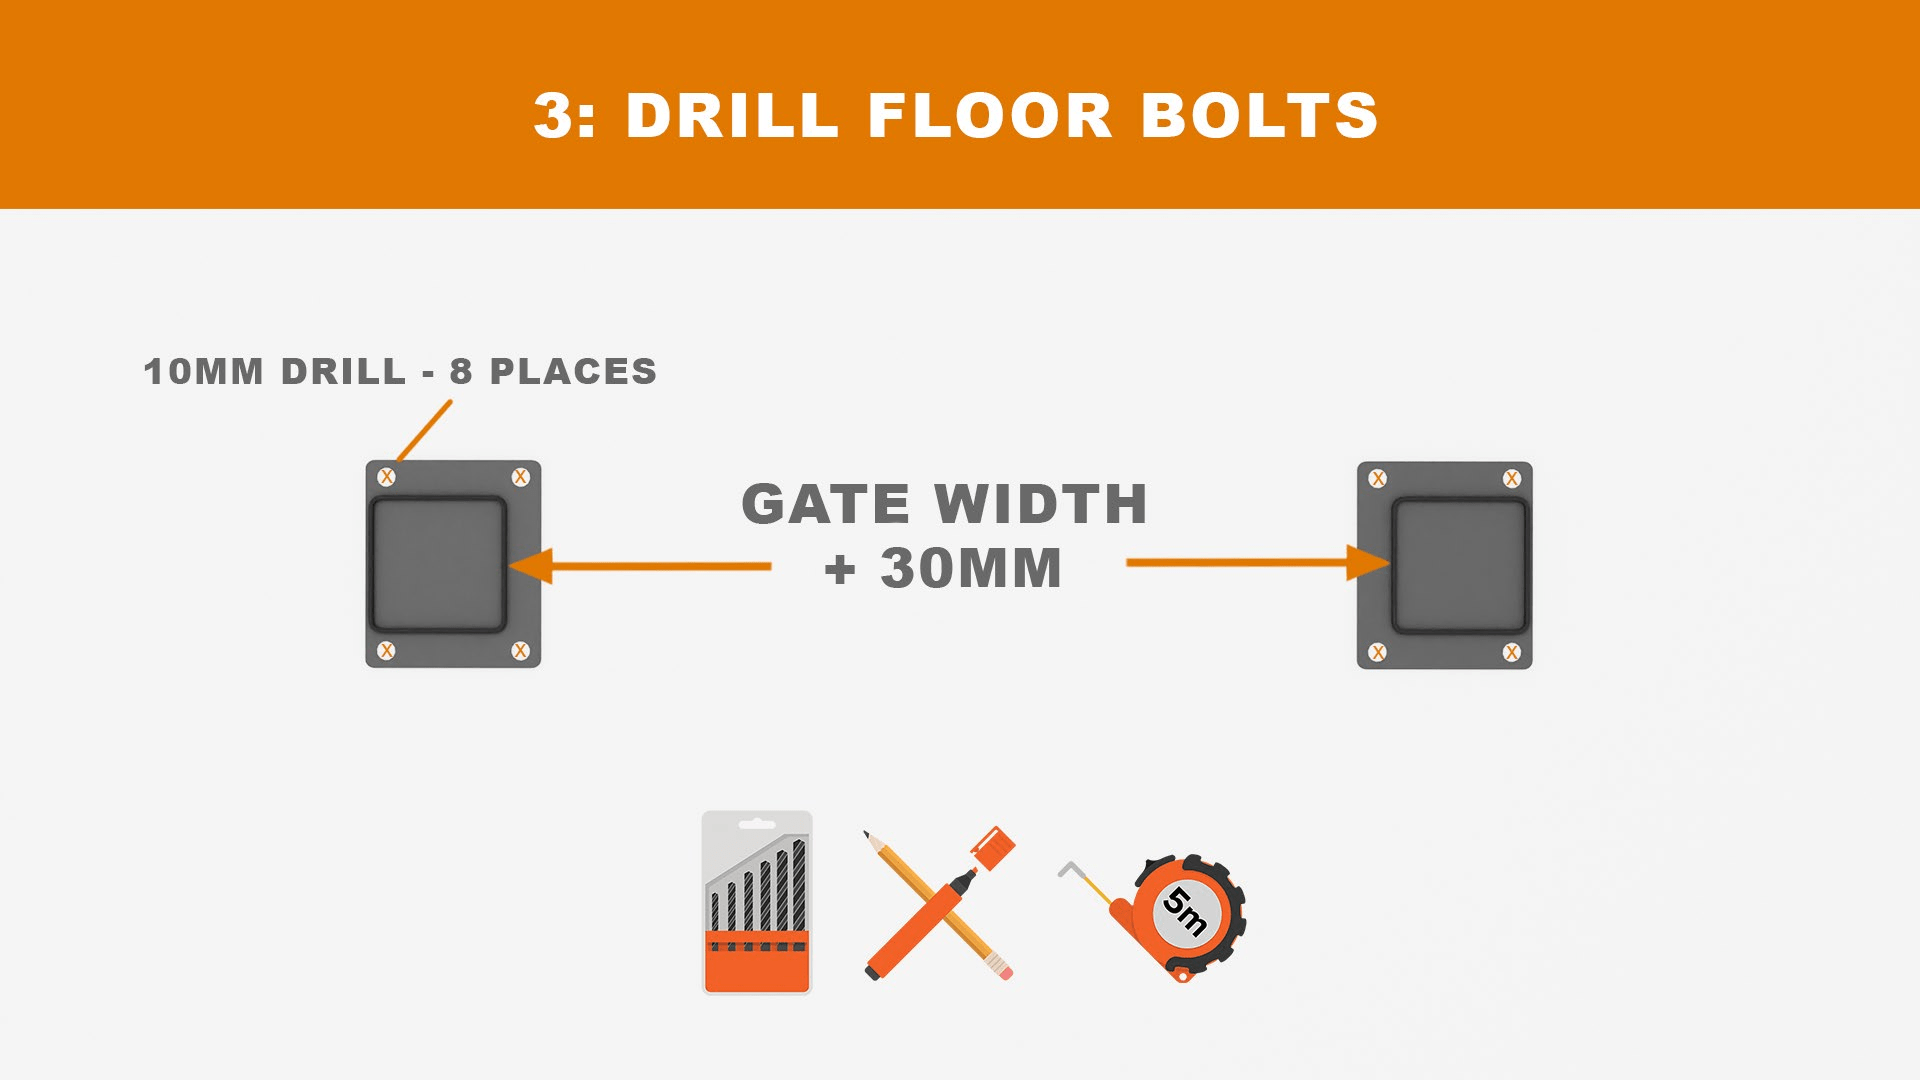
When you are happy with the position of the posts and have the correct spacing, you can mark the fixing points and drill the holes. Make sure you use the right size drill bit.
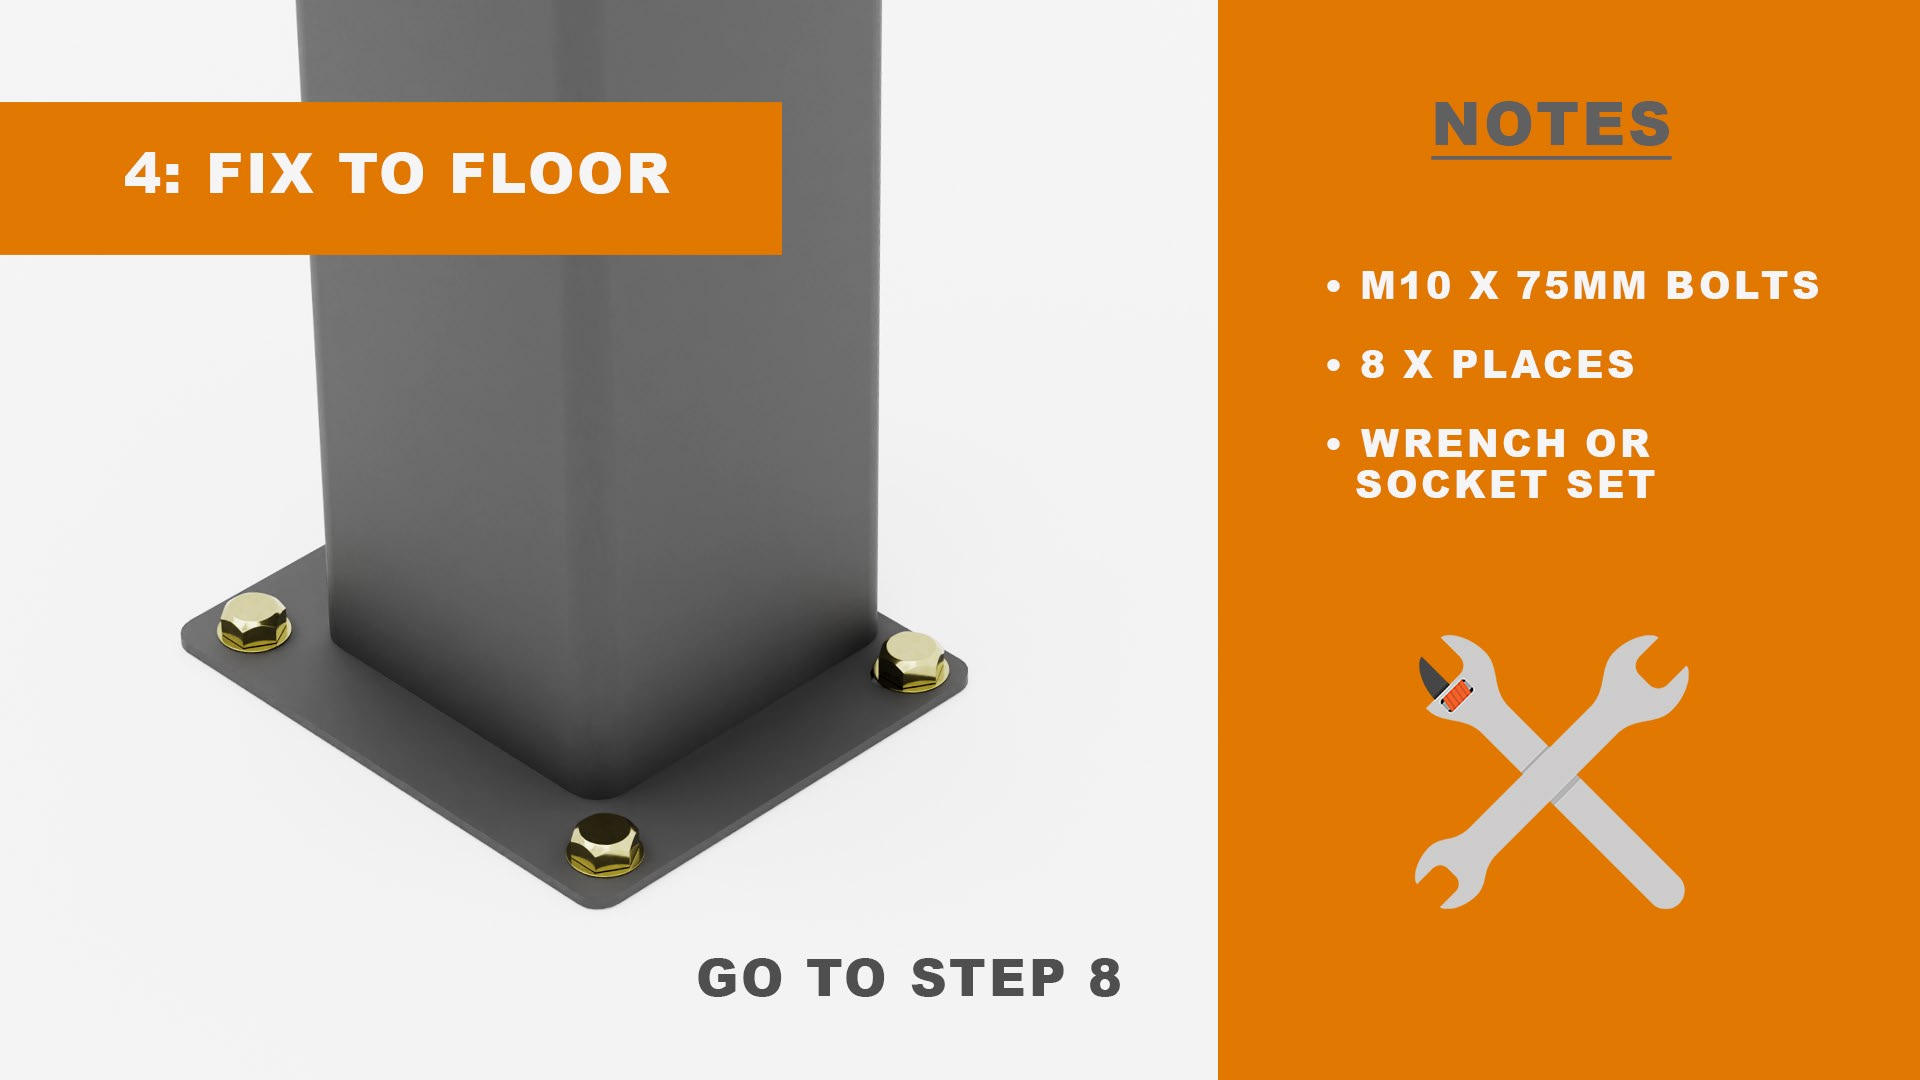
Once you have drilled the holes, you can securely mount the posts to the ground using appropriate fixings. Now go to step 8.
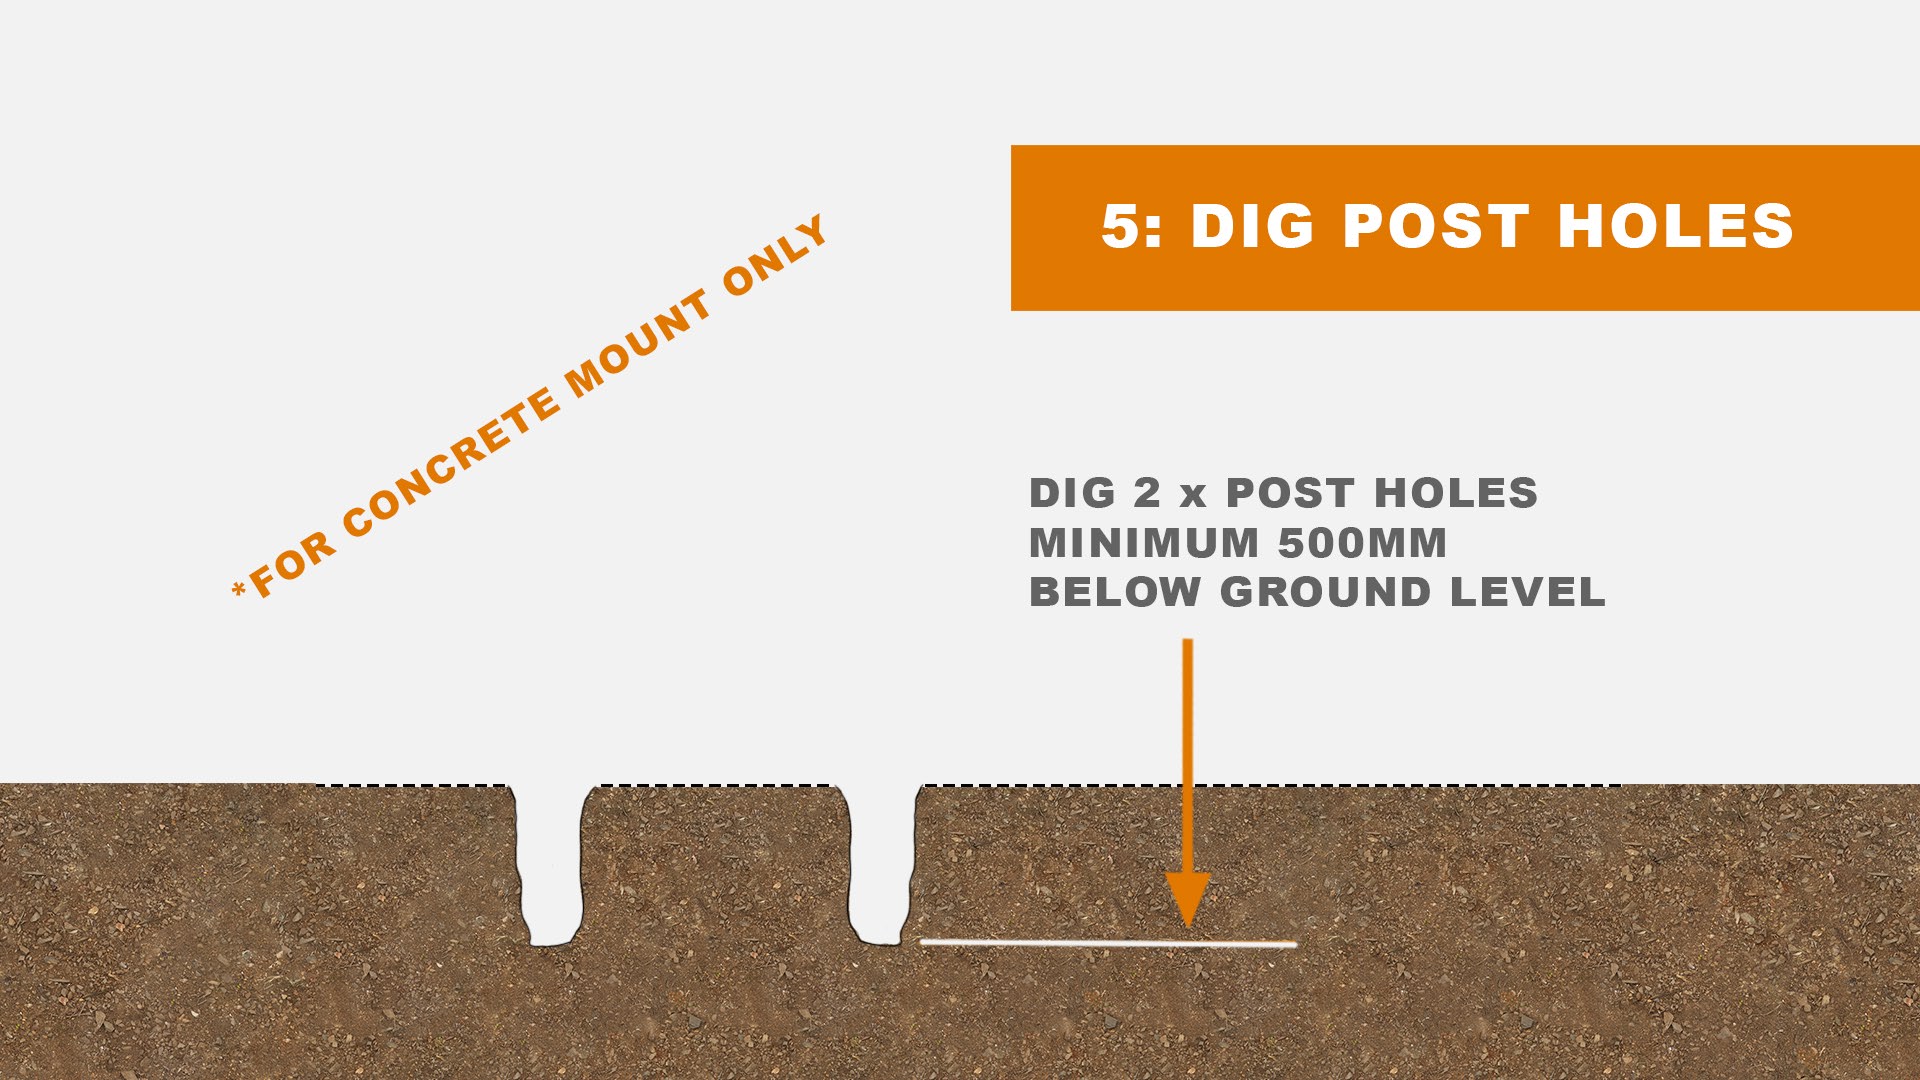
If you need to set the posts in the ground, dig the post holes to a suitable depth (depending on ground conditions). Please note they will need to be a minimum of 500mm into the ground to provide adequate support.
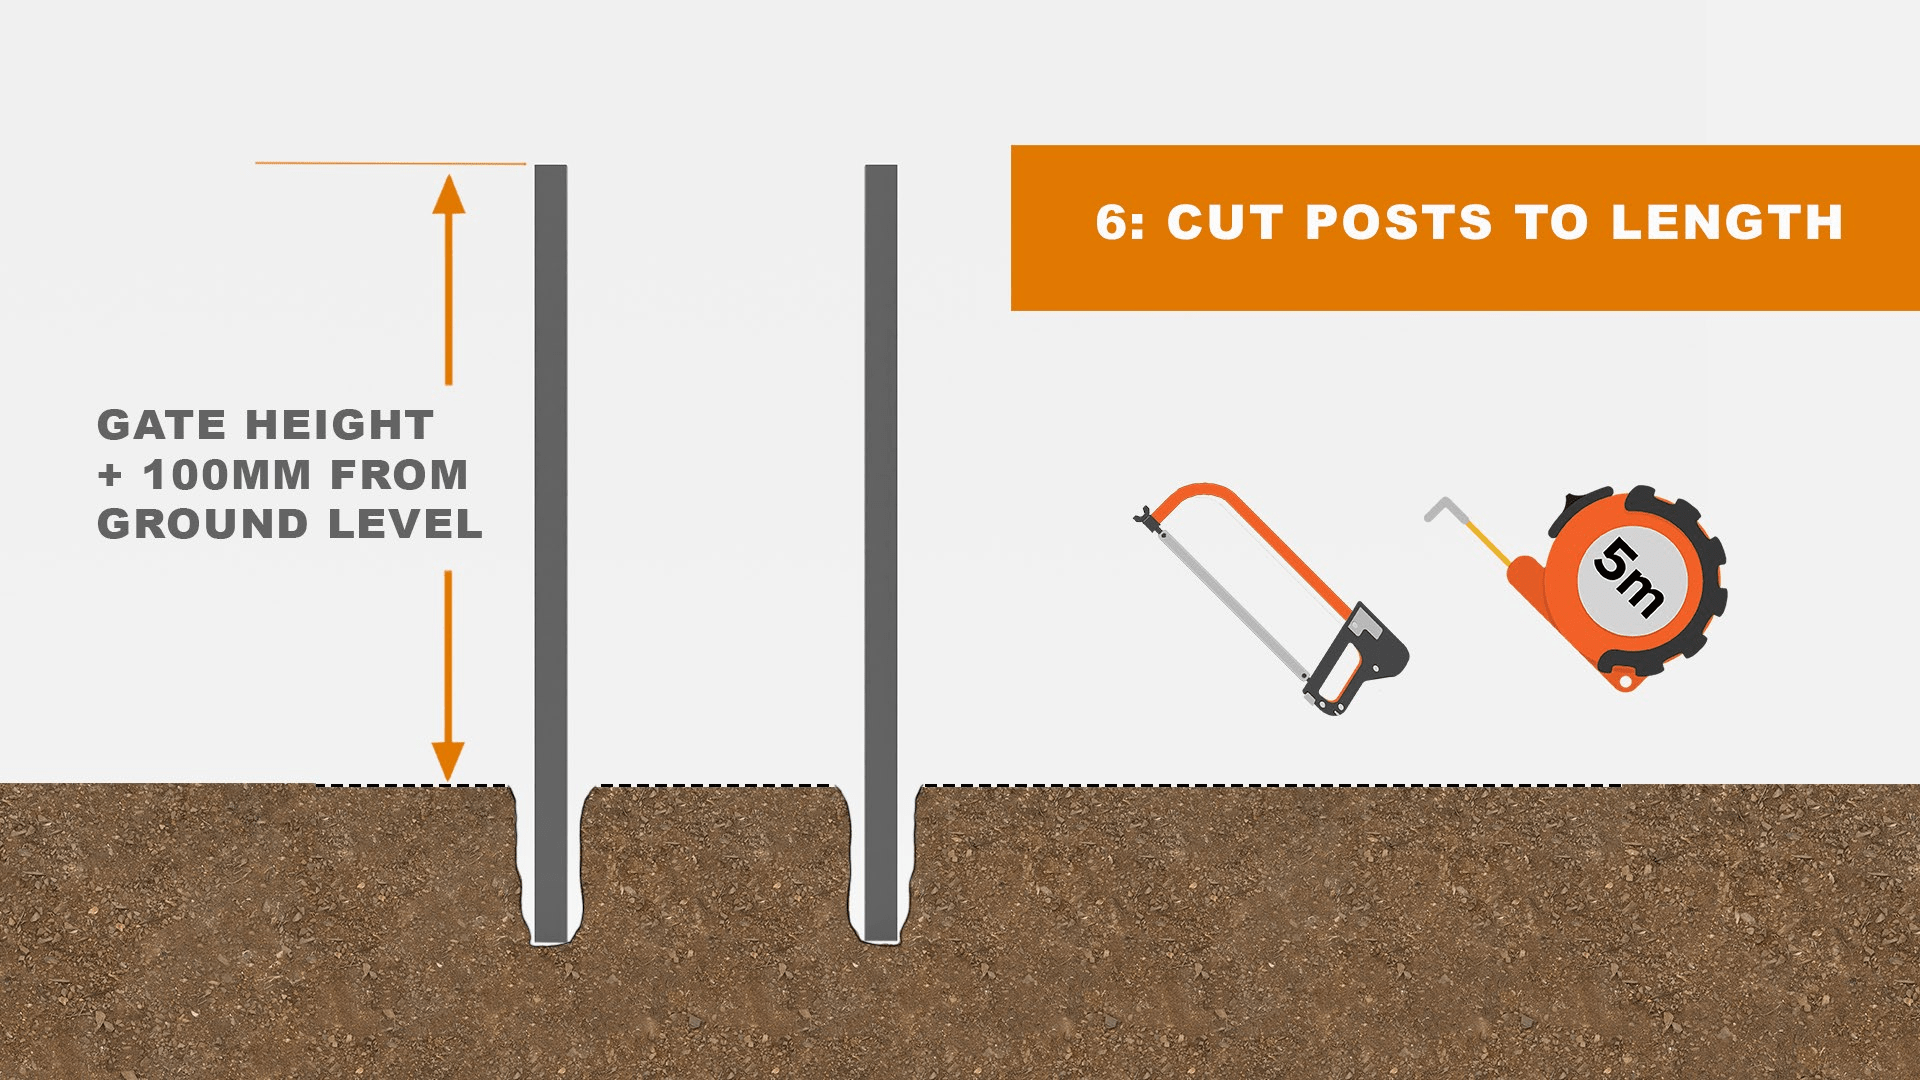
If necessary, cut the posts to the correct length.
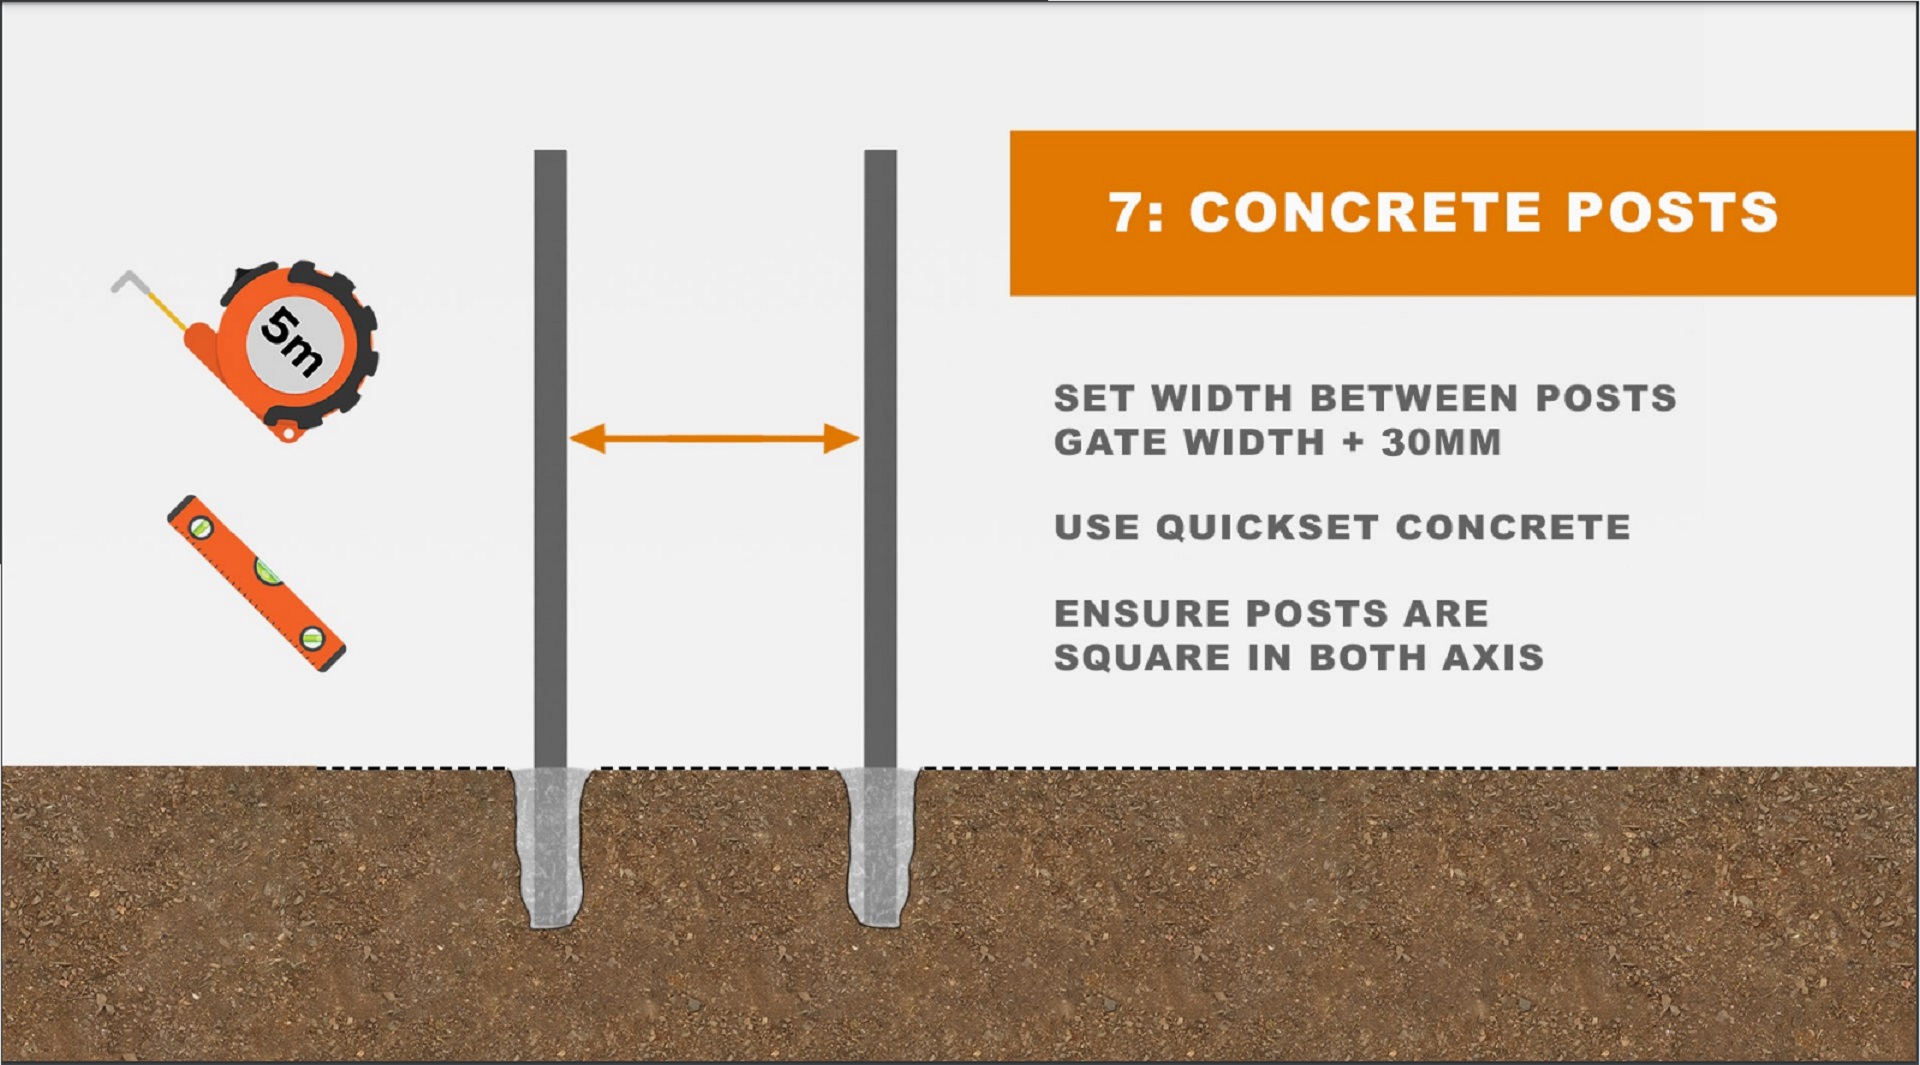
Place the posts into the ground and position them with the correct spacing and sitting level with each other. Secure the posts into position using quick-set concrete. Check for plumb on both axis and make adjustments until you reach the desired position.
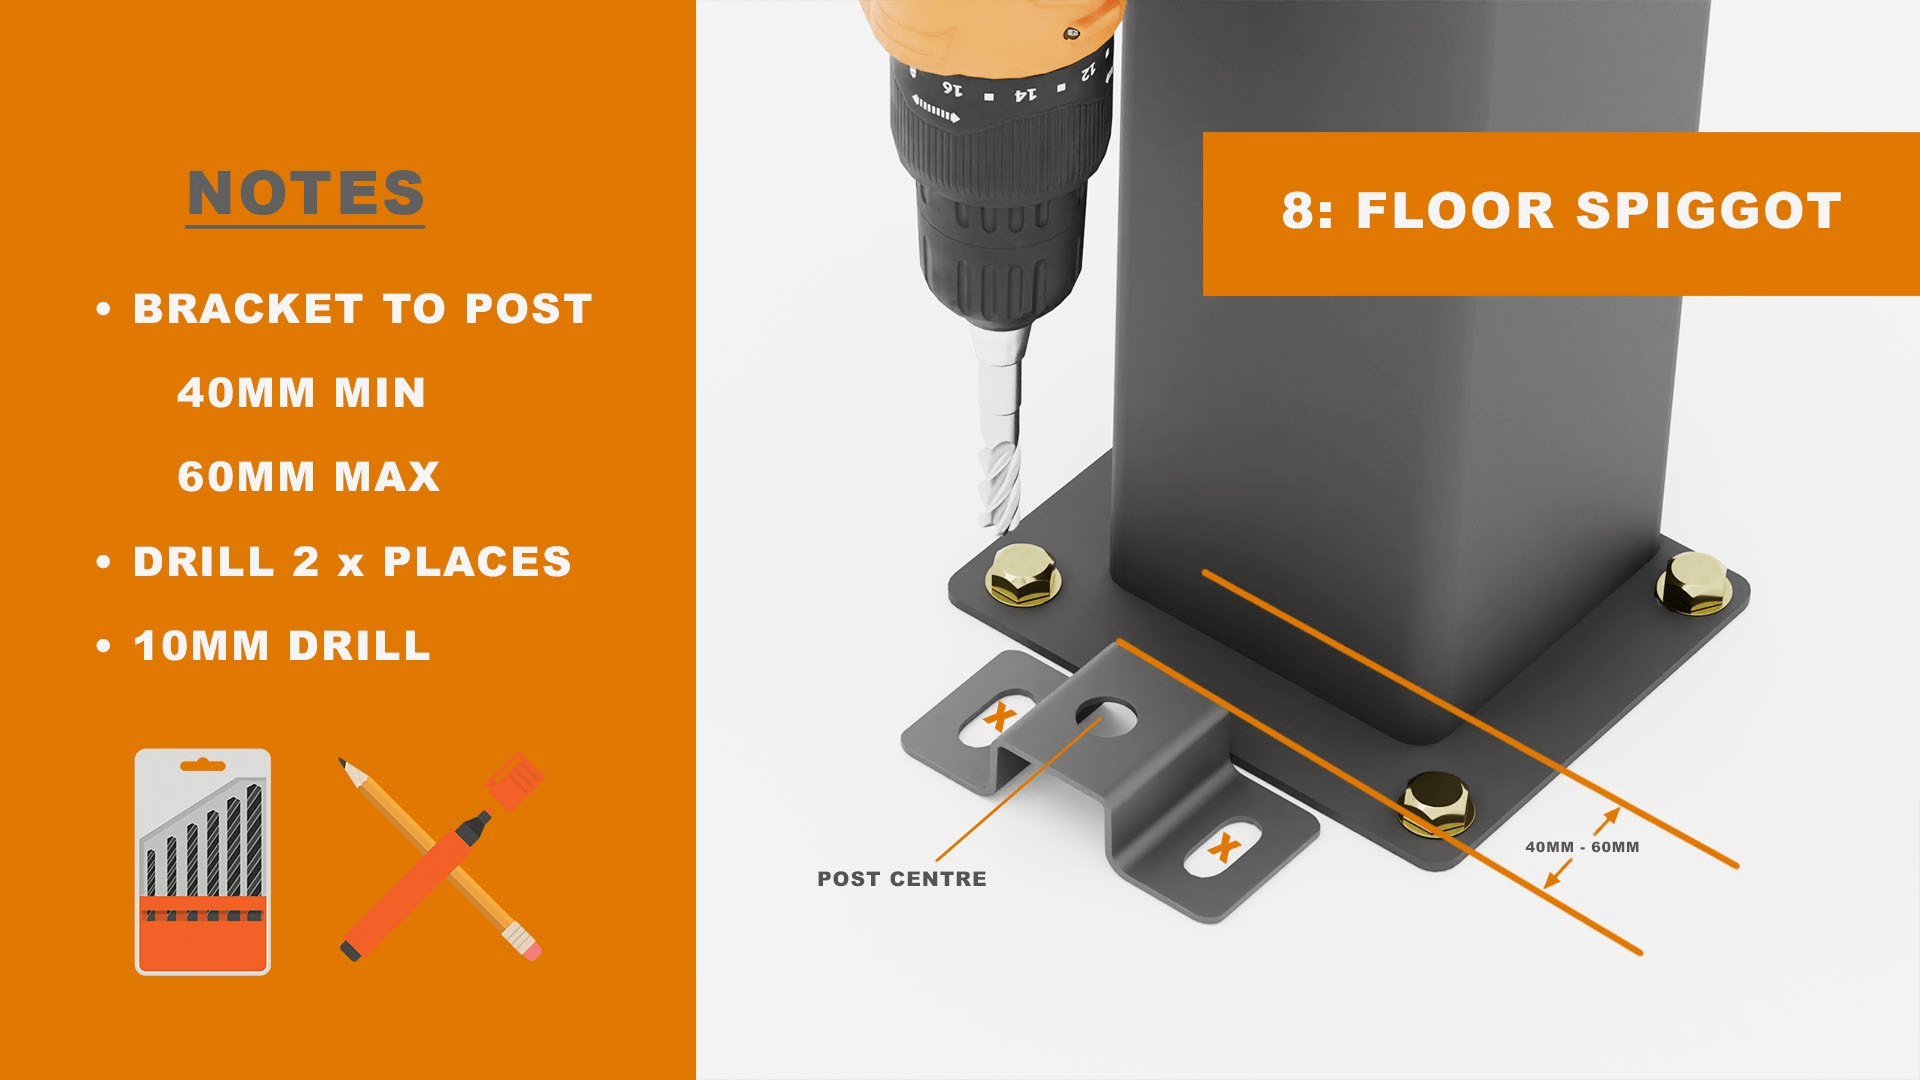
Align the bottom hinge bracket with the centre of the posts, leaving a gap of 40-60mm, as illustrated. Mark the position of the fixing holes and drill to the required size.
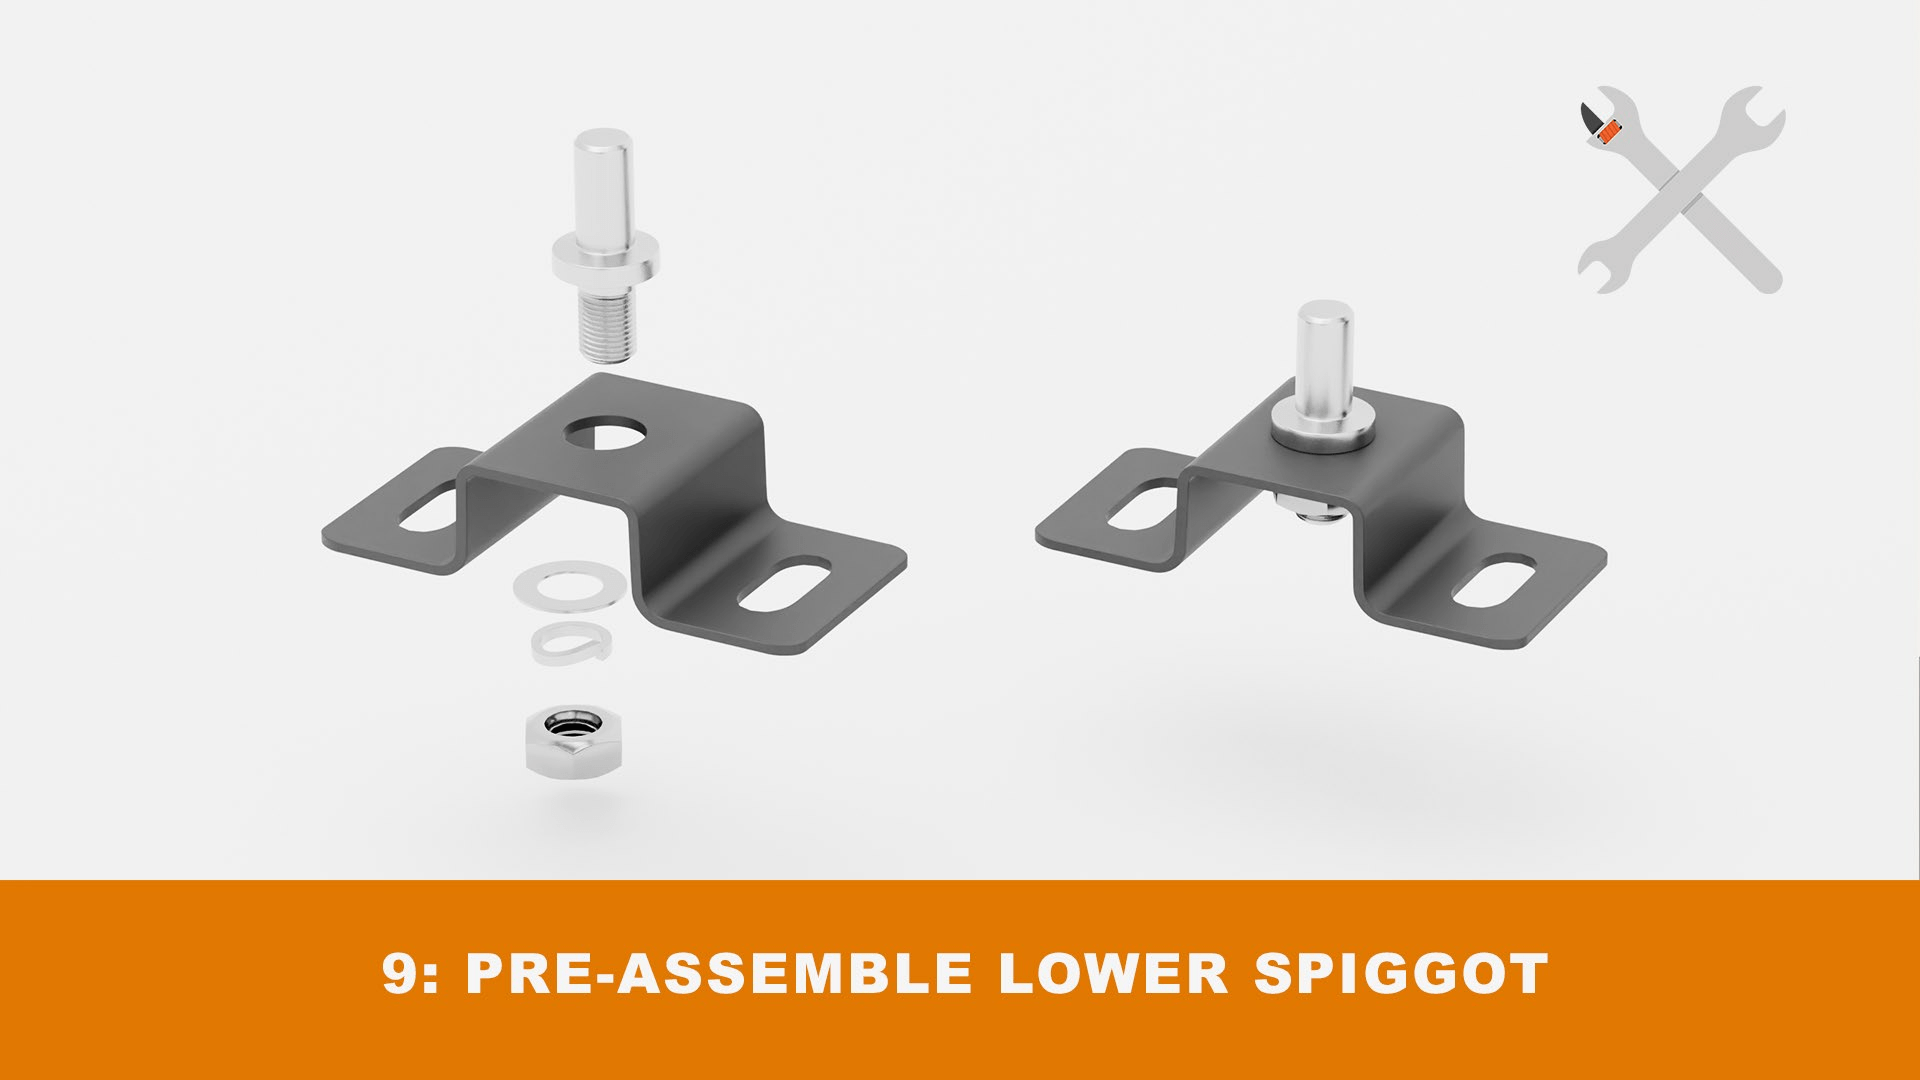
Connect the spigot to the bottom hinge bracket as shown.
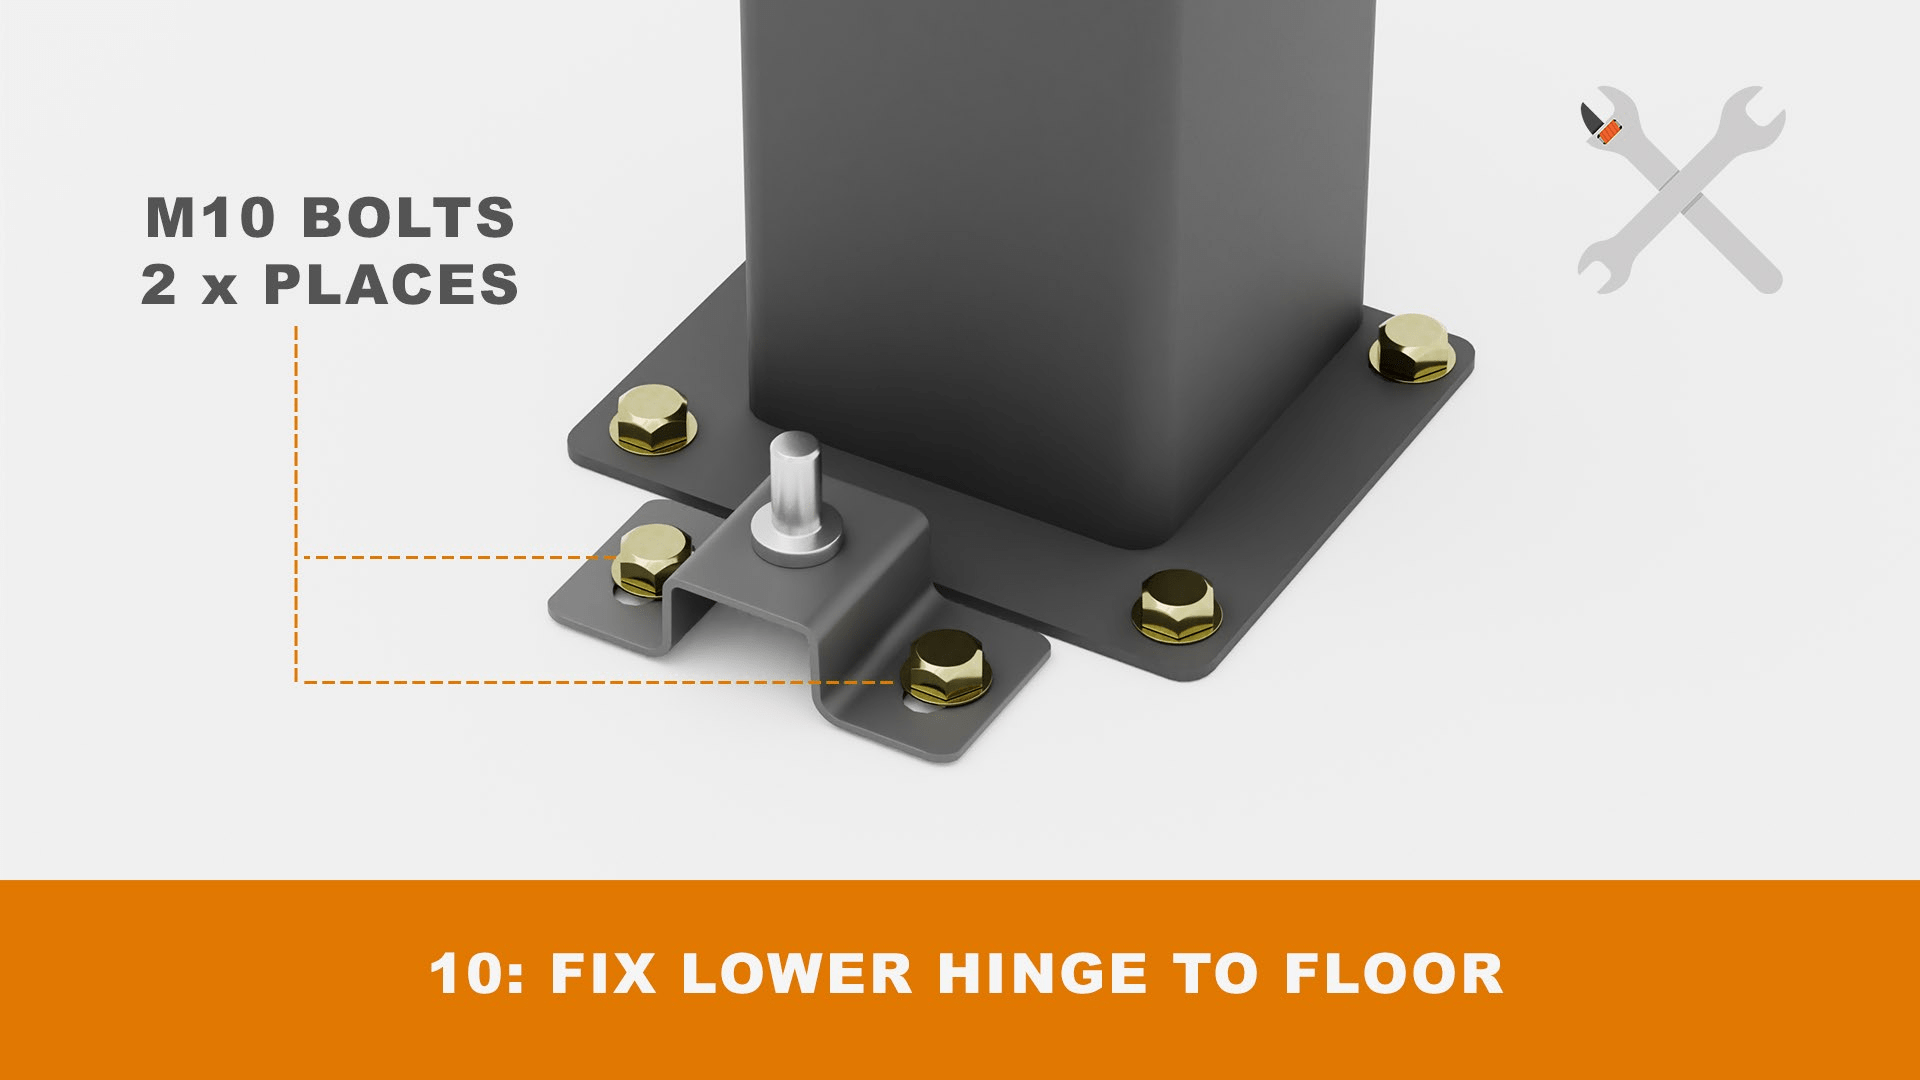
Securely attach the bottom hinge bracket to the ground using appropriate fixings.
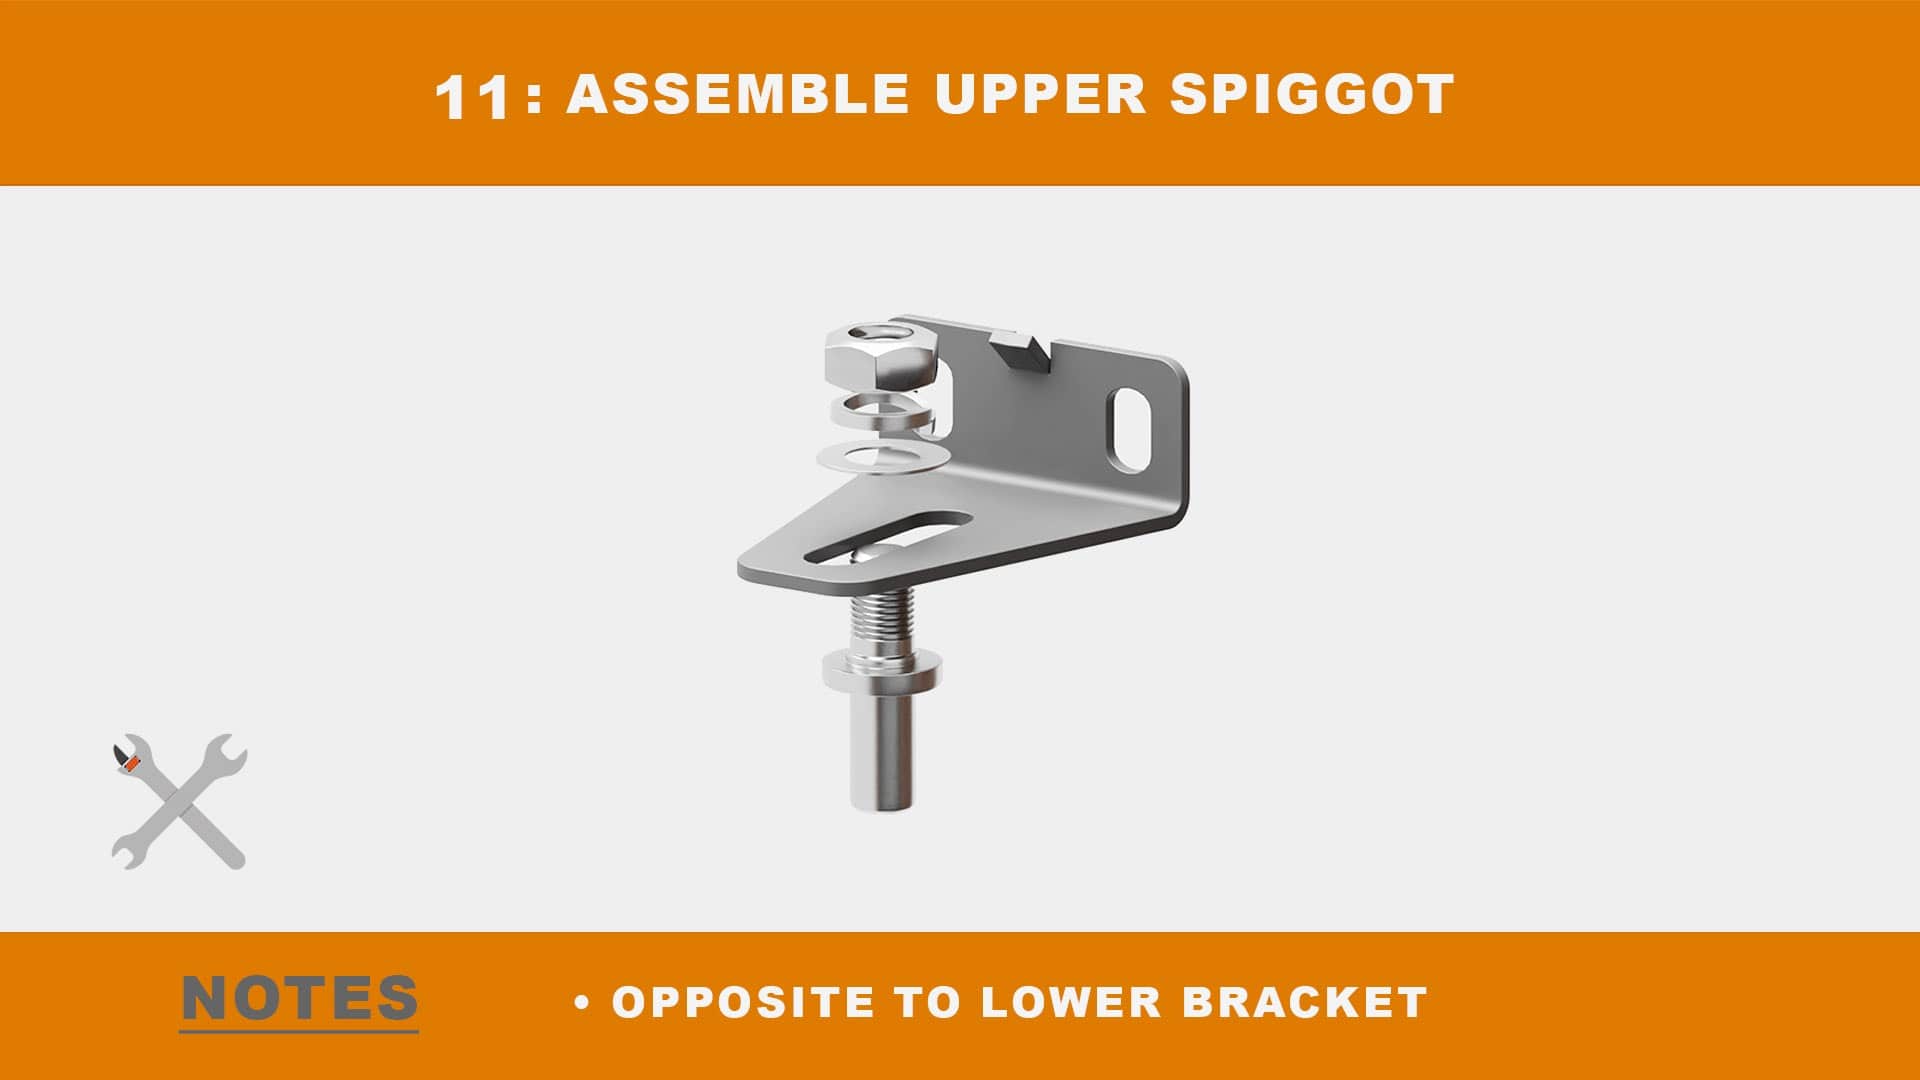
Mount the spigot onto the top hinge bracket, as illustrated.
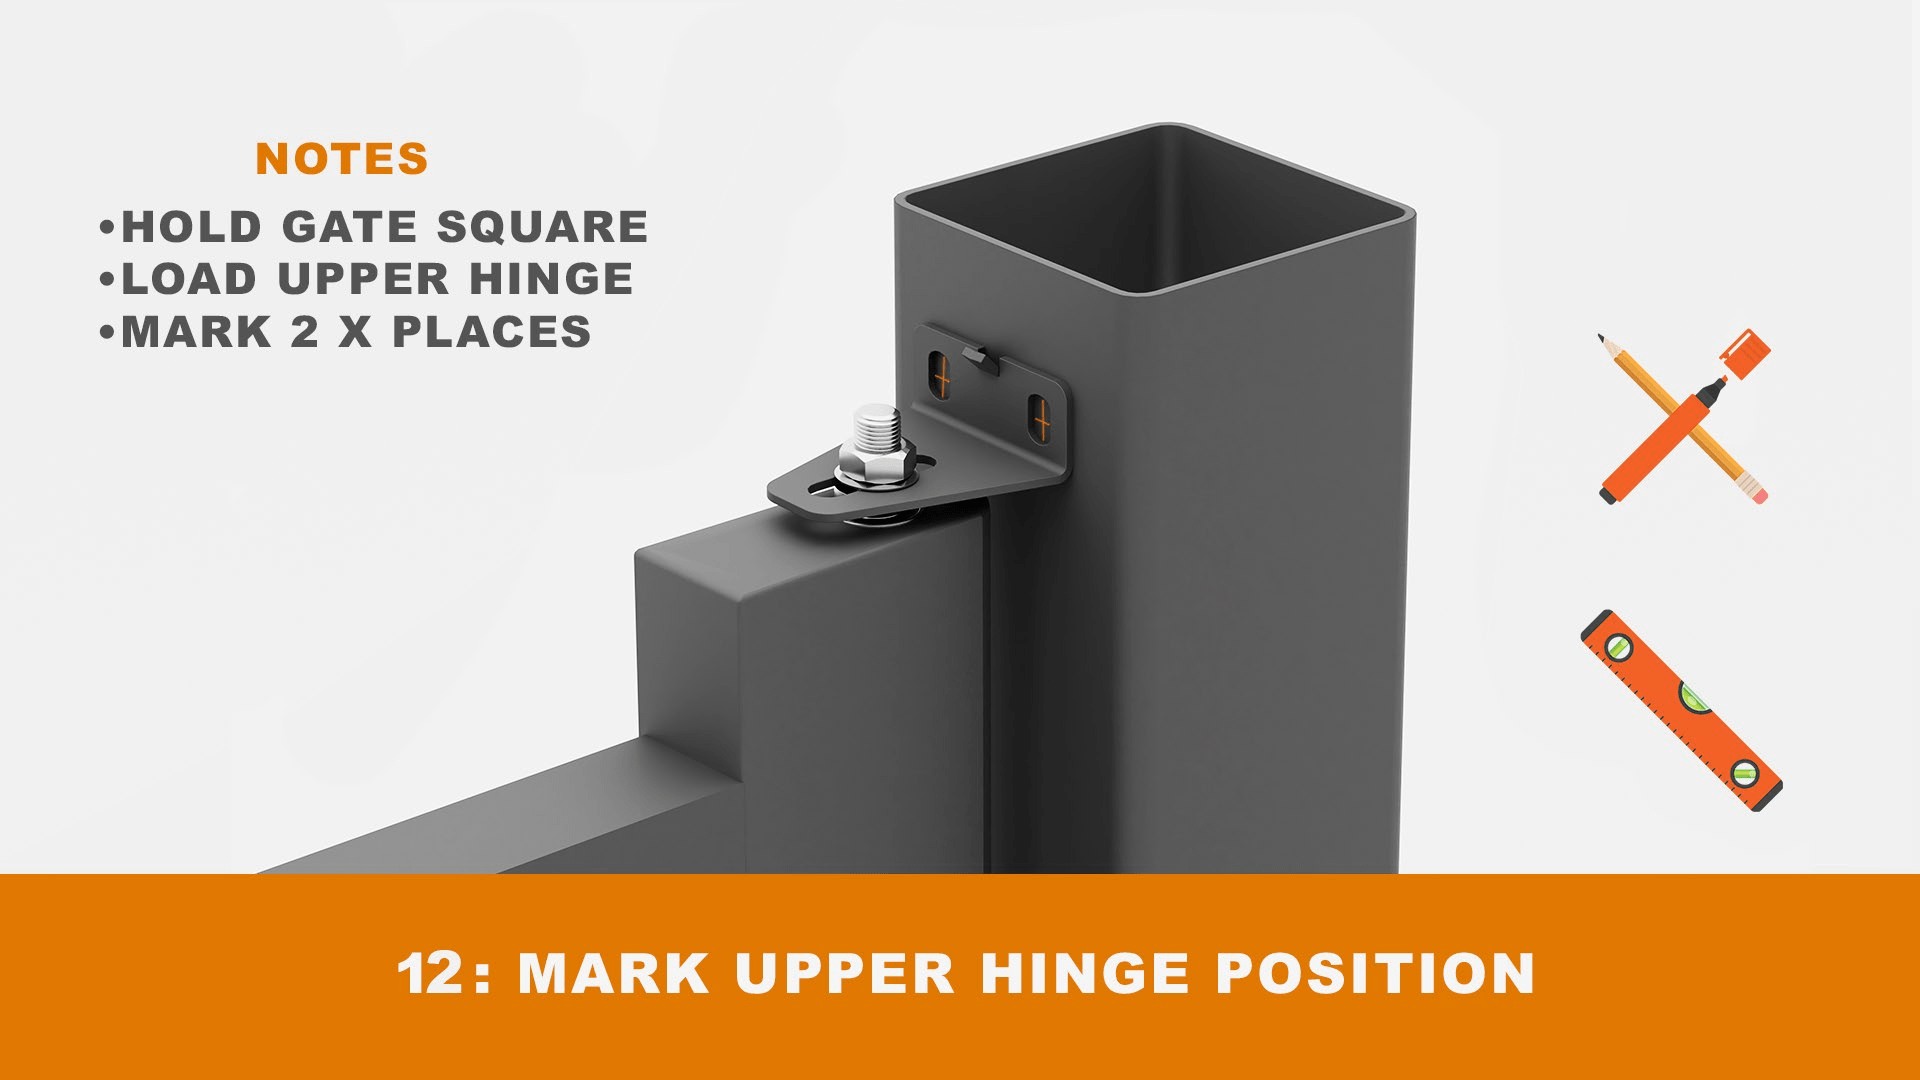
Carefully slot the spigot into the hole in the underside of the gate and place and load the top spigot. Then holding the gate square (checking for plumb), mark the position of the fixing holes on the post.
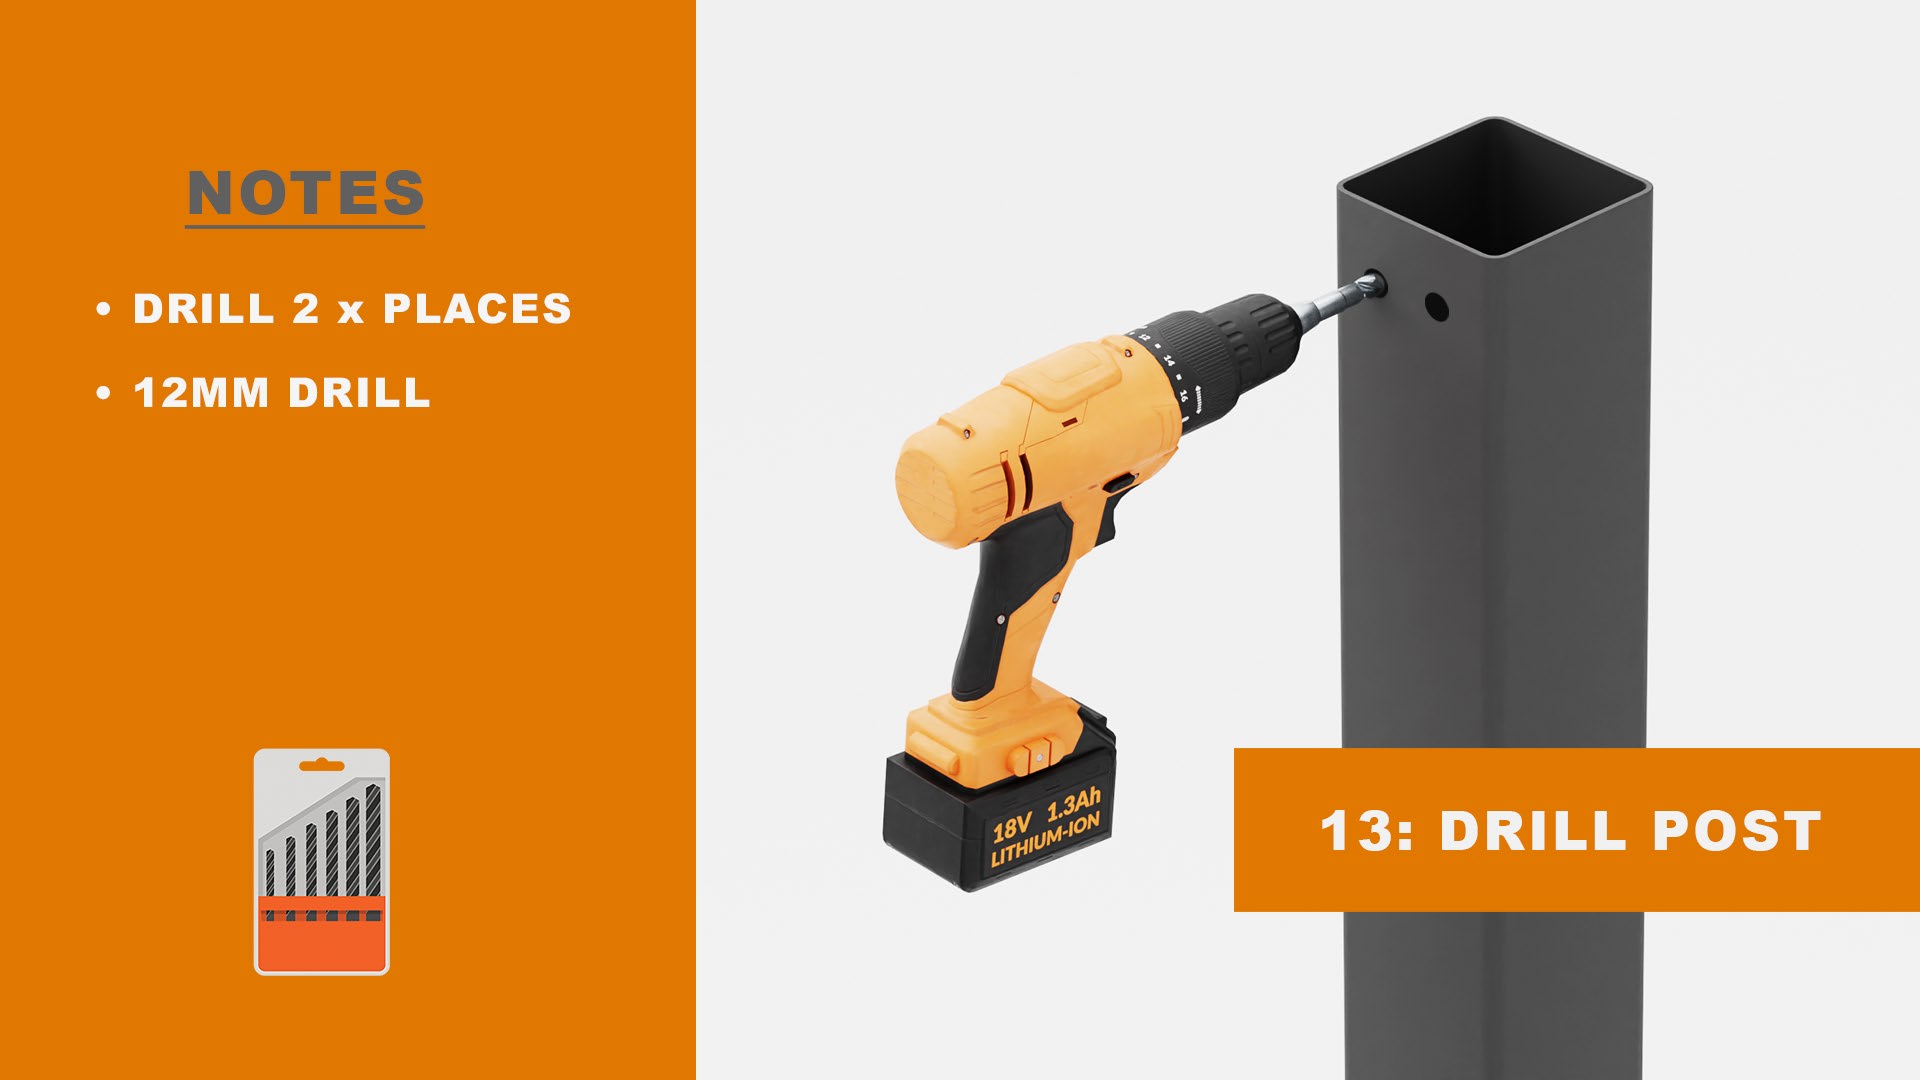
Drill the holes for the top hinge bracket using the appropriate size drill bit.
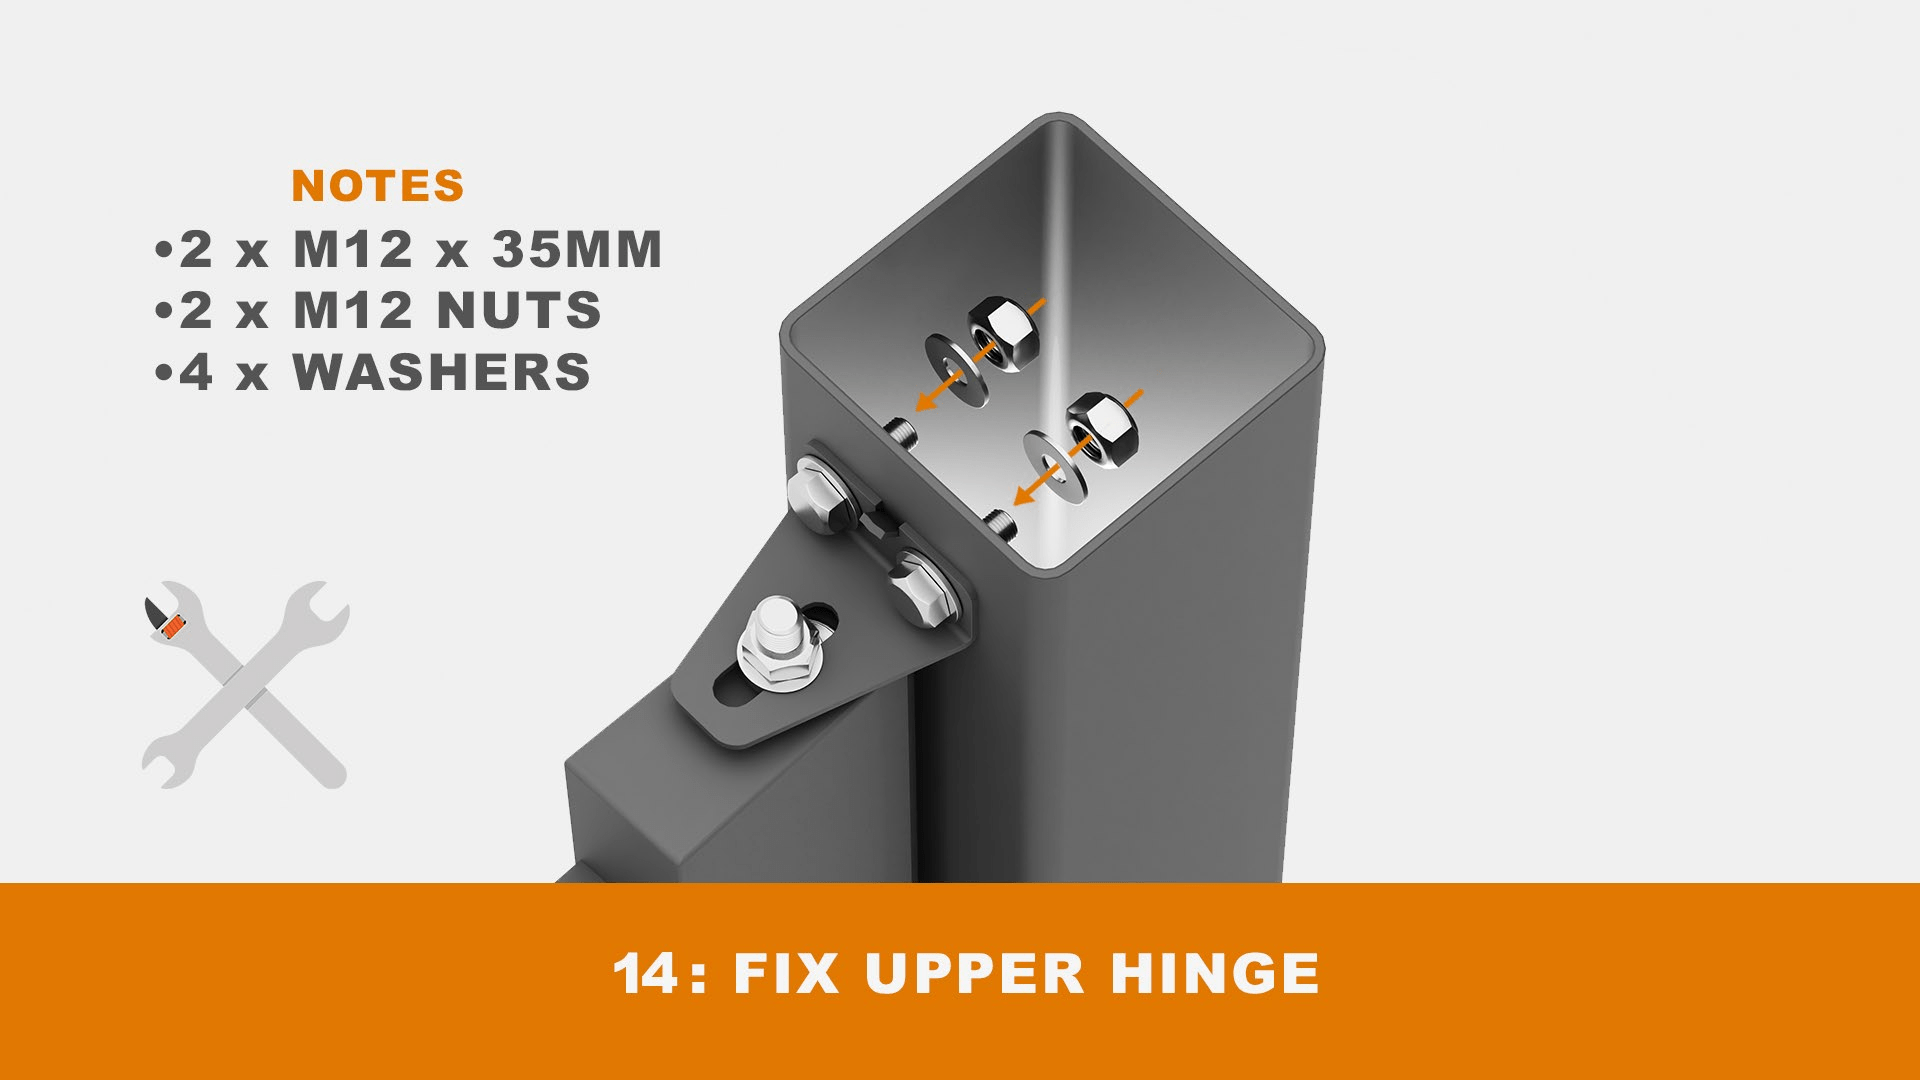
Attach the top hinge bracket onto the posts, as shown in the illustration.
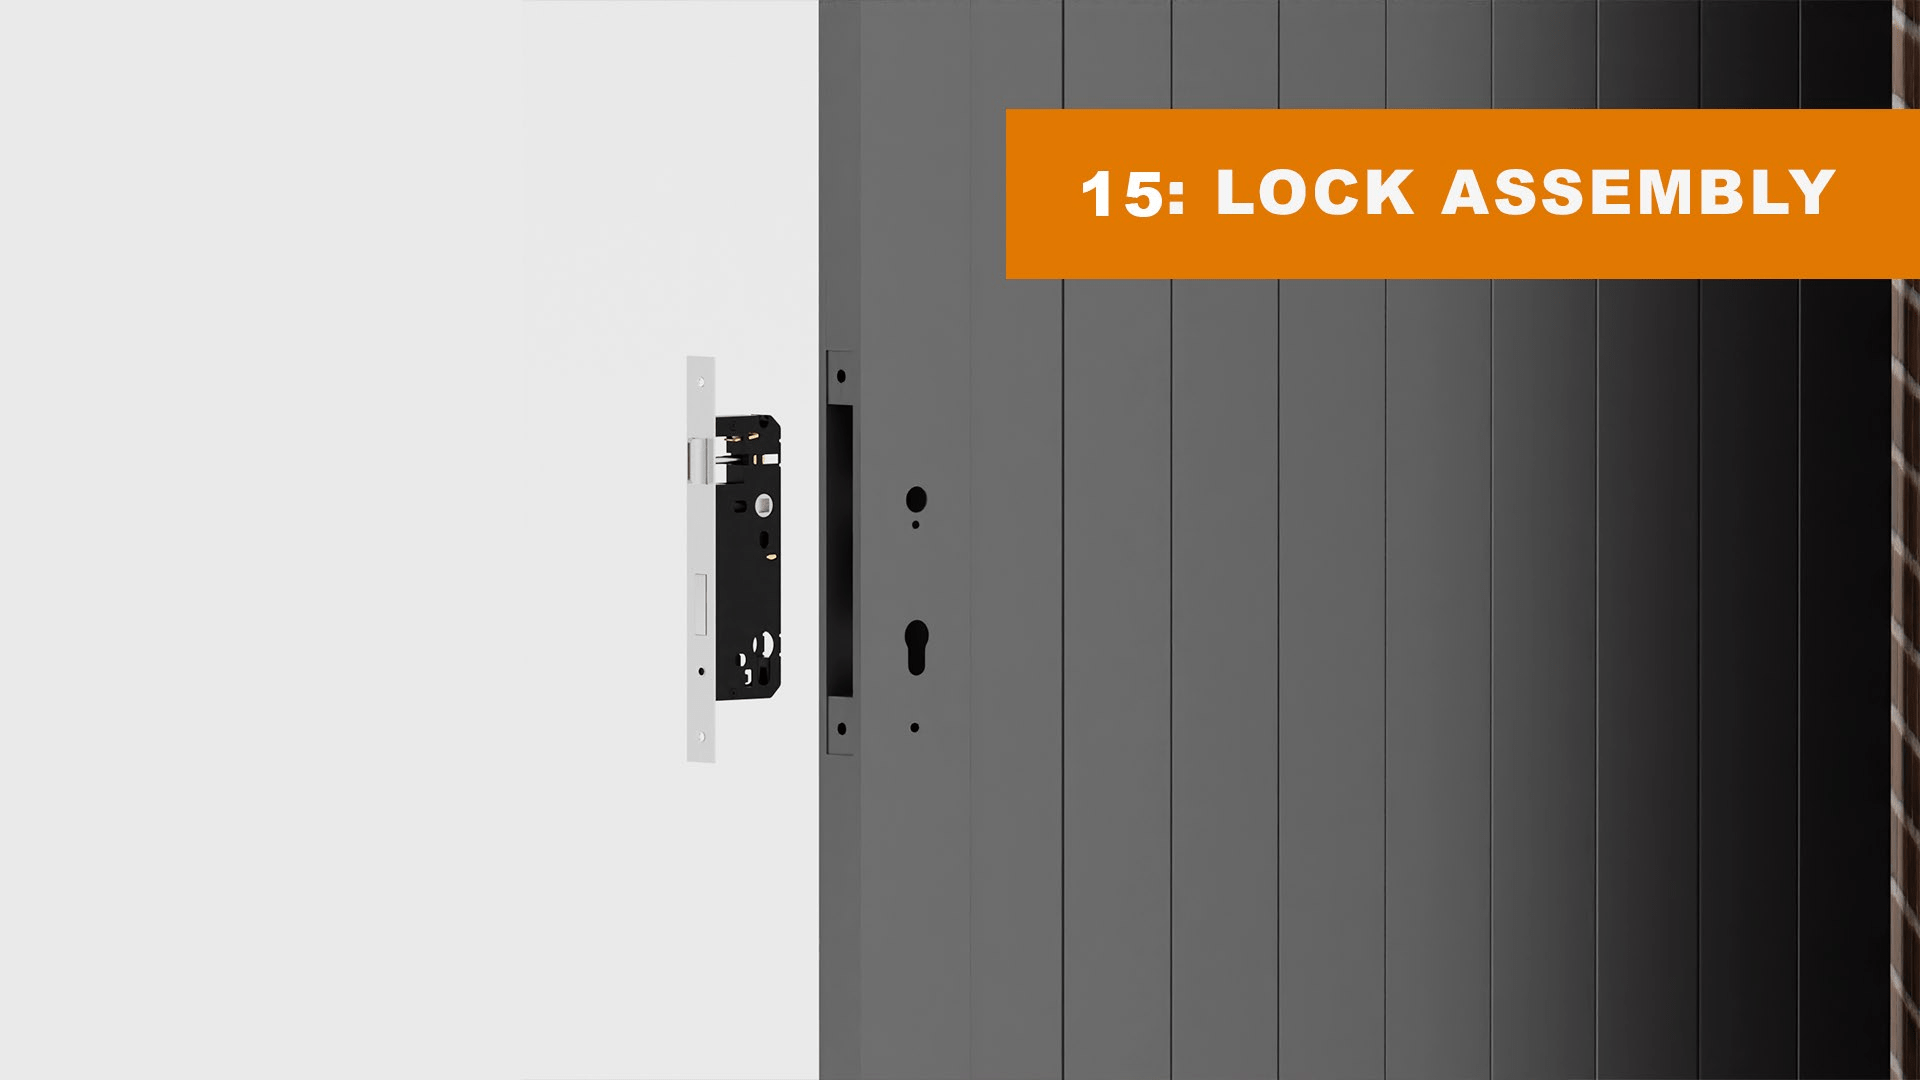
You can now install the lock and latch mechanism.
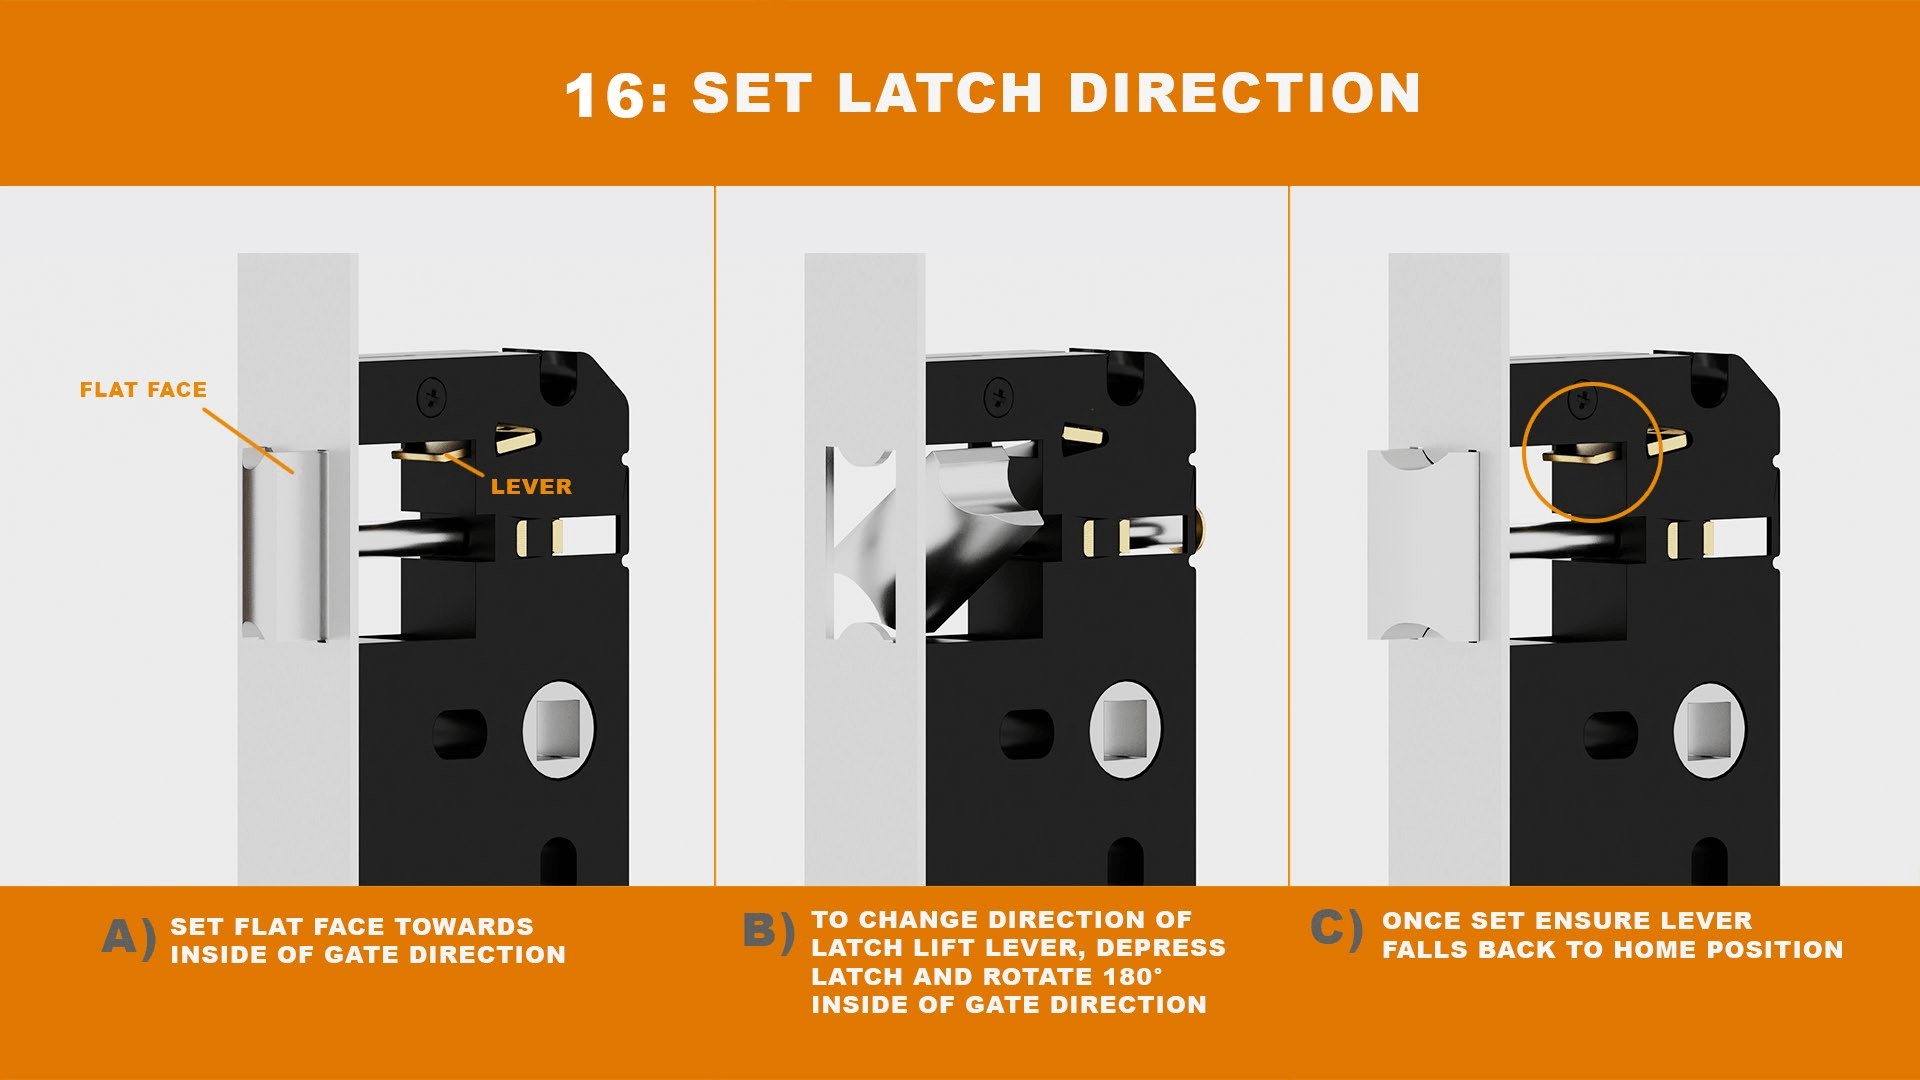
You might need to change the orientation of the latch to achieve the opening direction you desire. To achieve this, please refer to the example above.
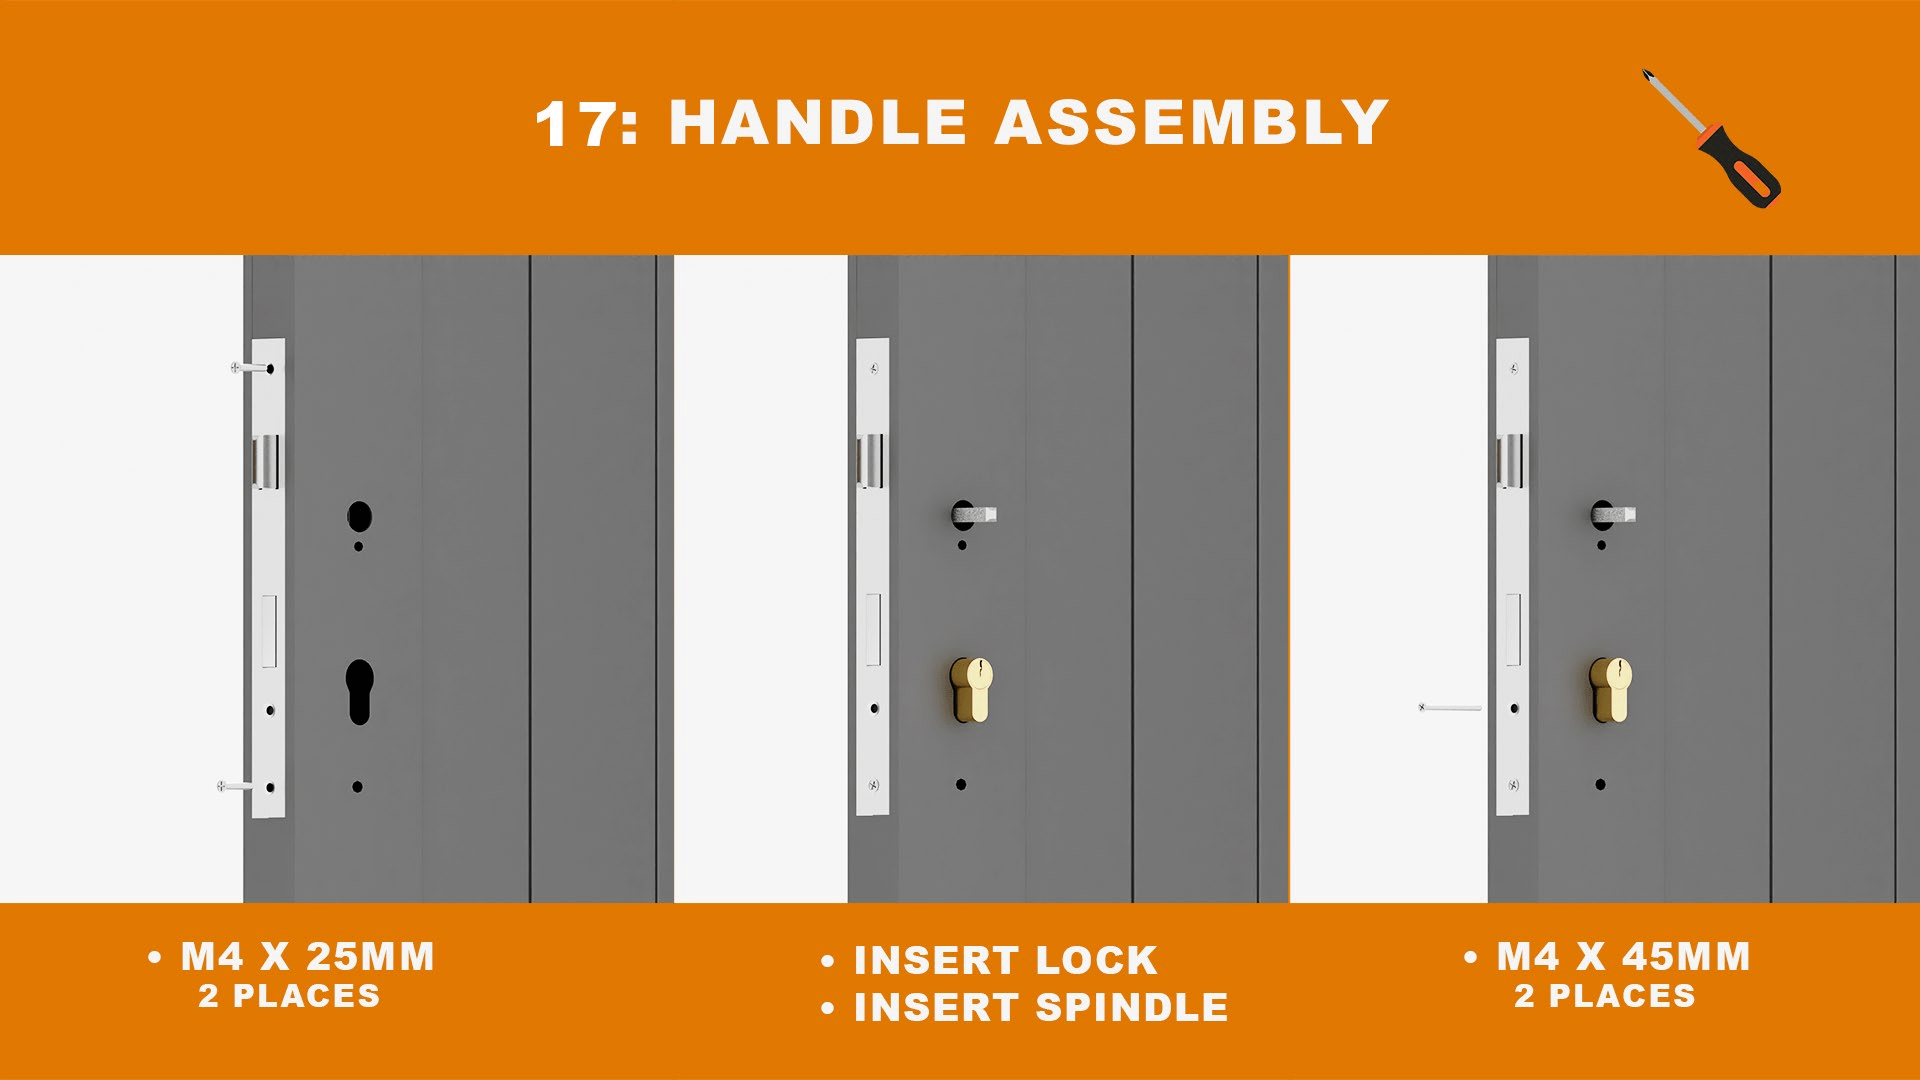
Utilizing two screws, insert the lock mechanism into the gate's pre-cut slot. The lock and handle spindle must then be inserted and fastened using the appropriate screws.
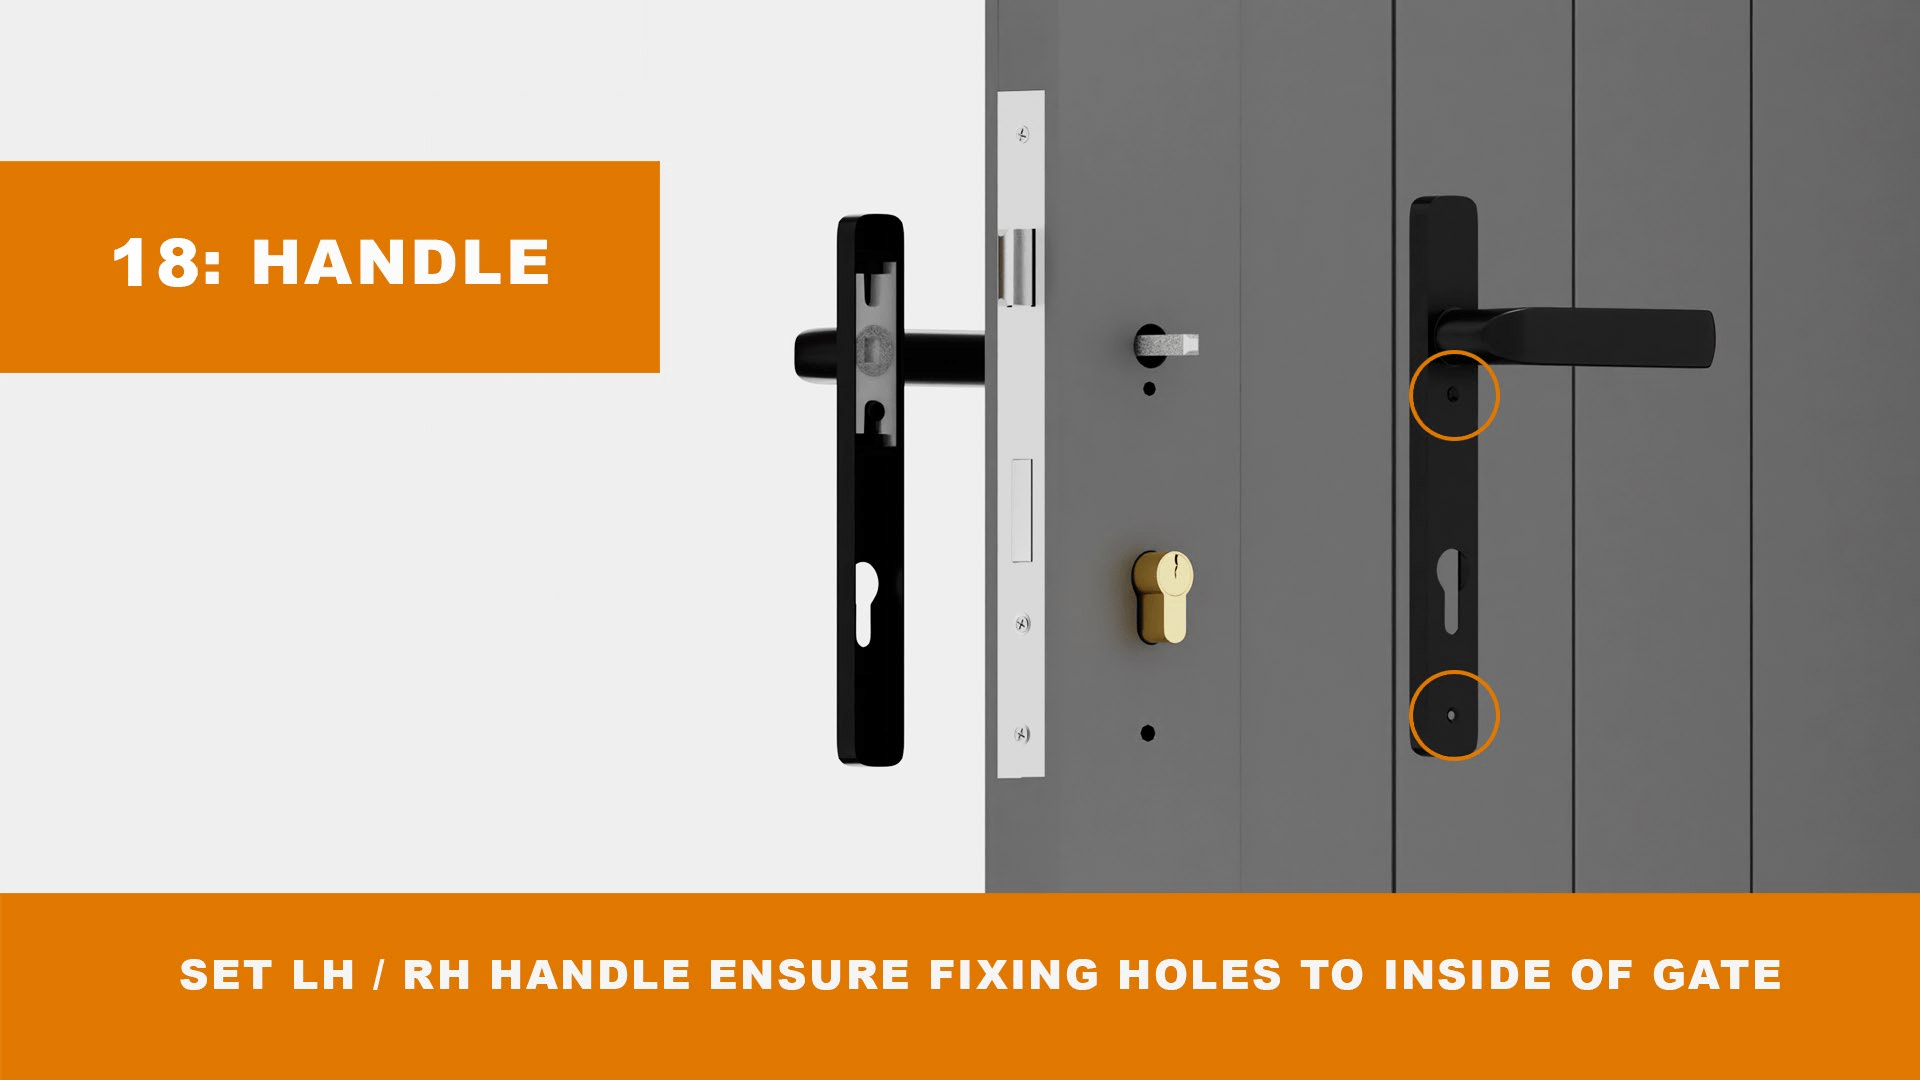
With the screws on the inside (safe side) of the aperture, you can now attach the handle to the gate. Doing so will prevent tampering with them.
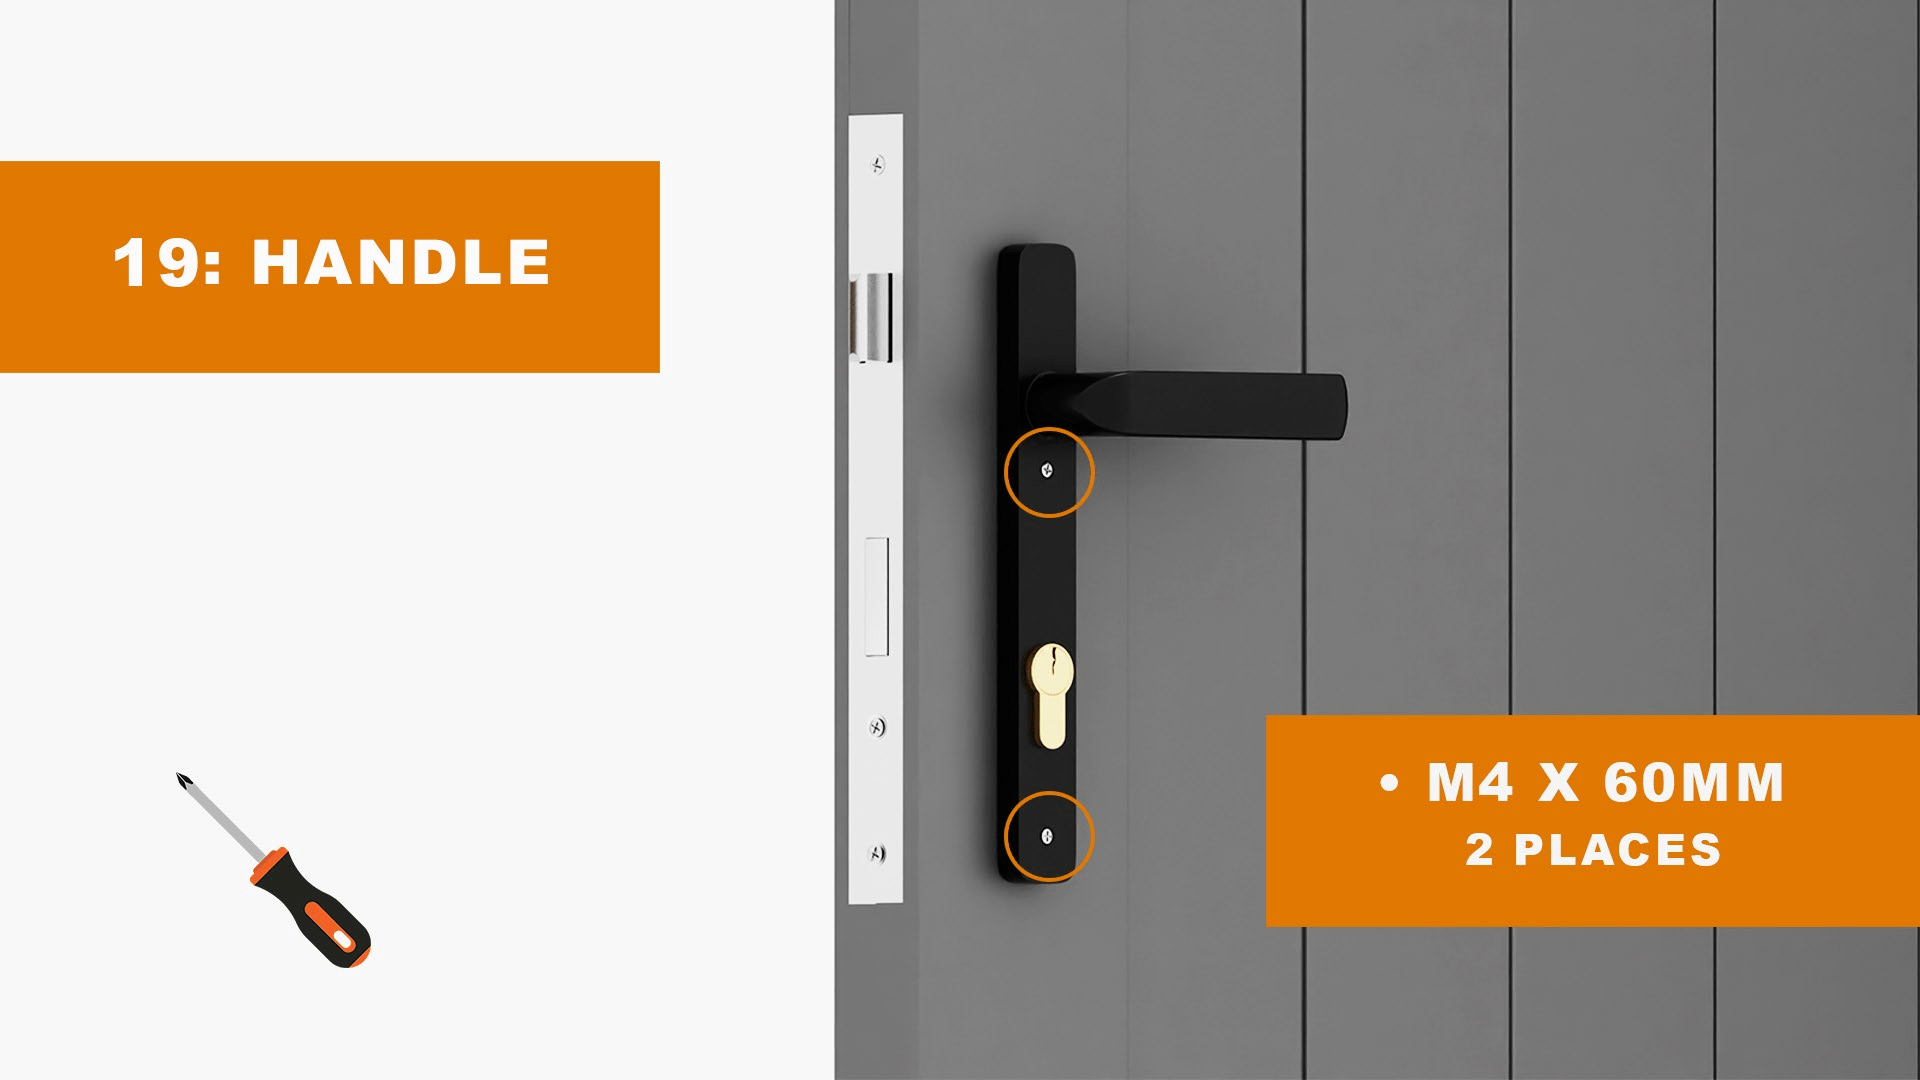
Use the included mounting screws to fix the handle in place.
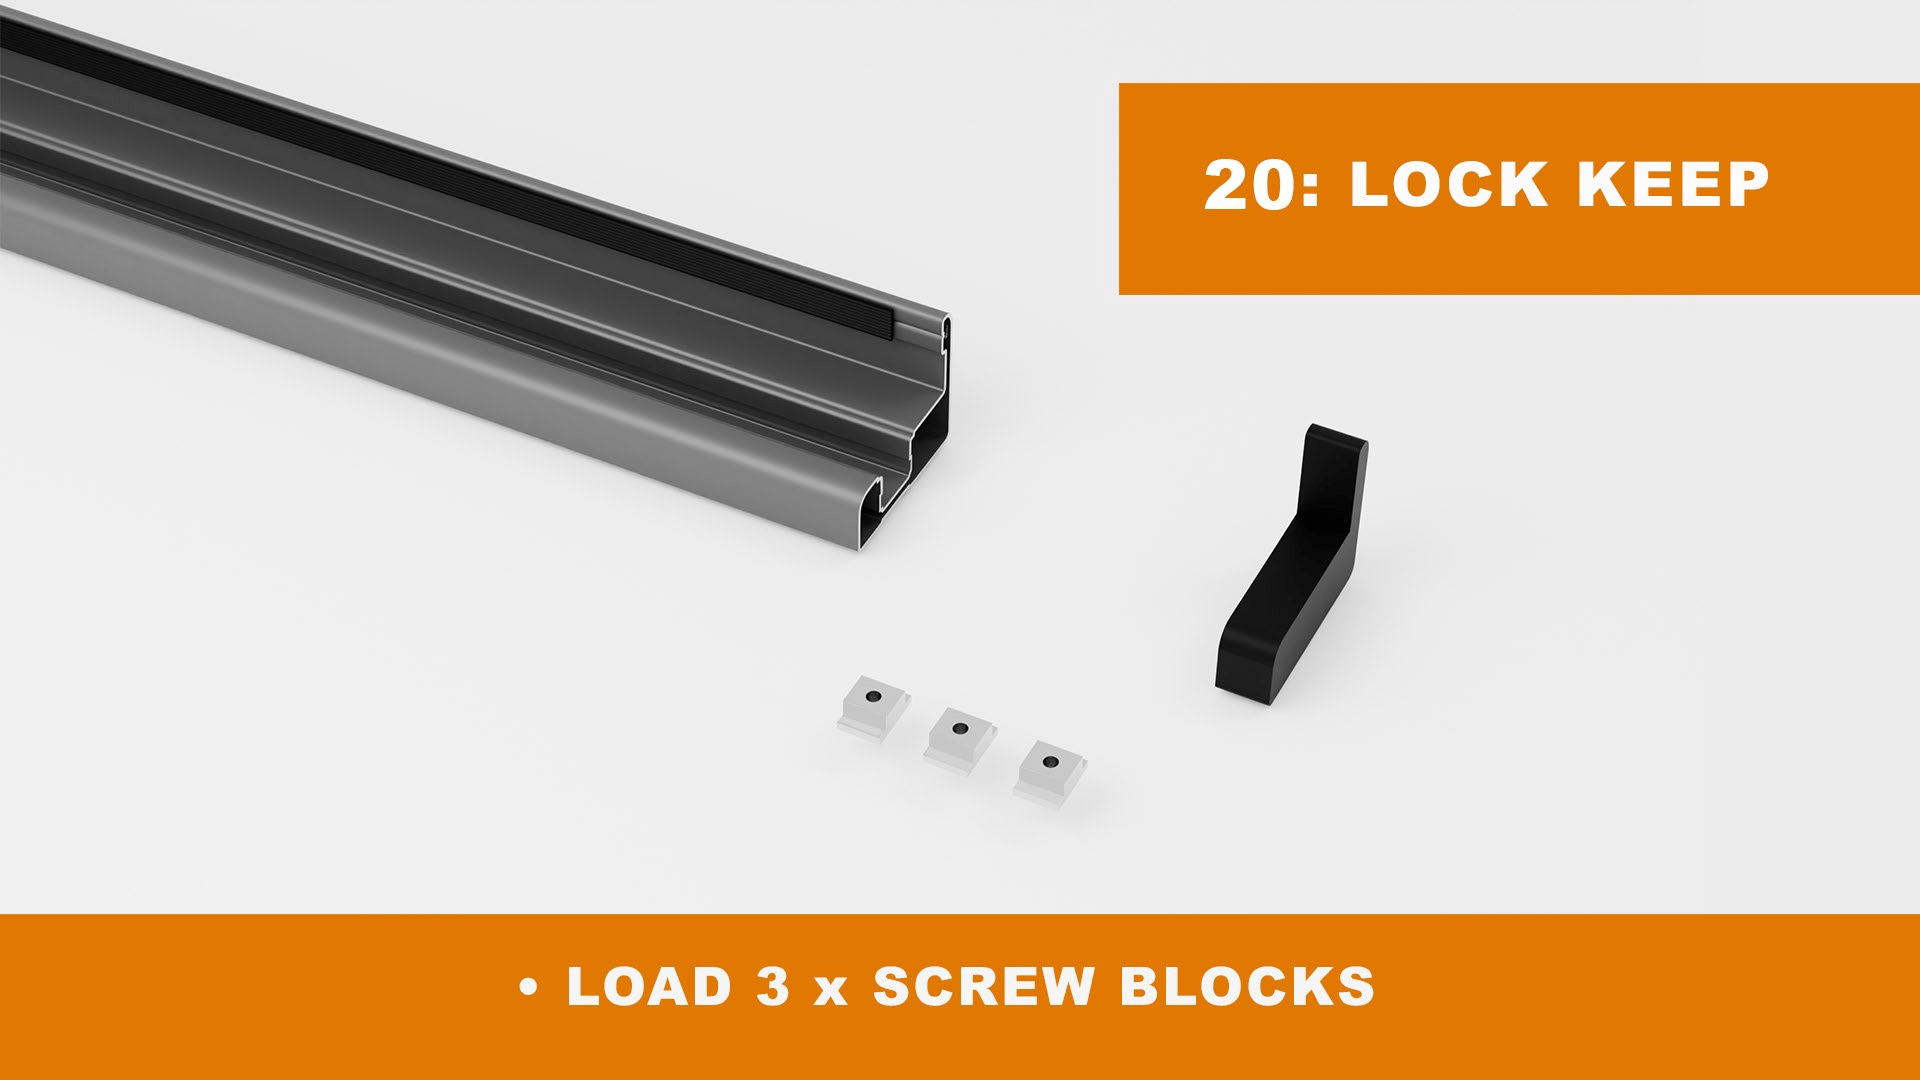
Slide the 3 x screw blocks into the slot found in the lock keeper and then insert the plastic end cap.
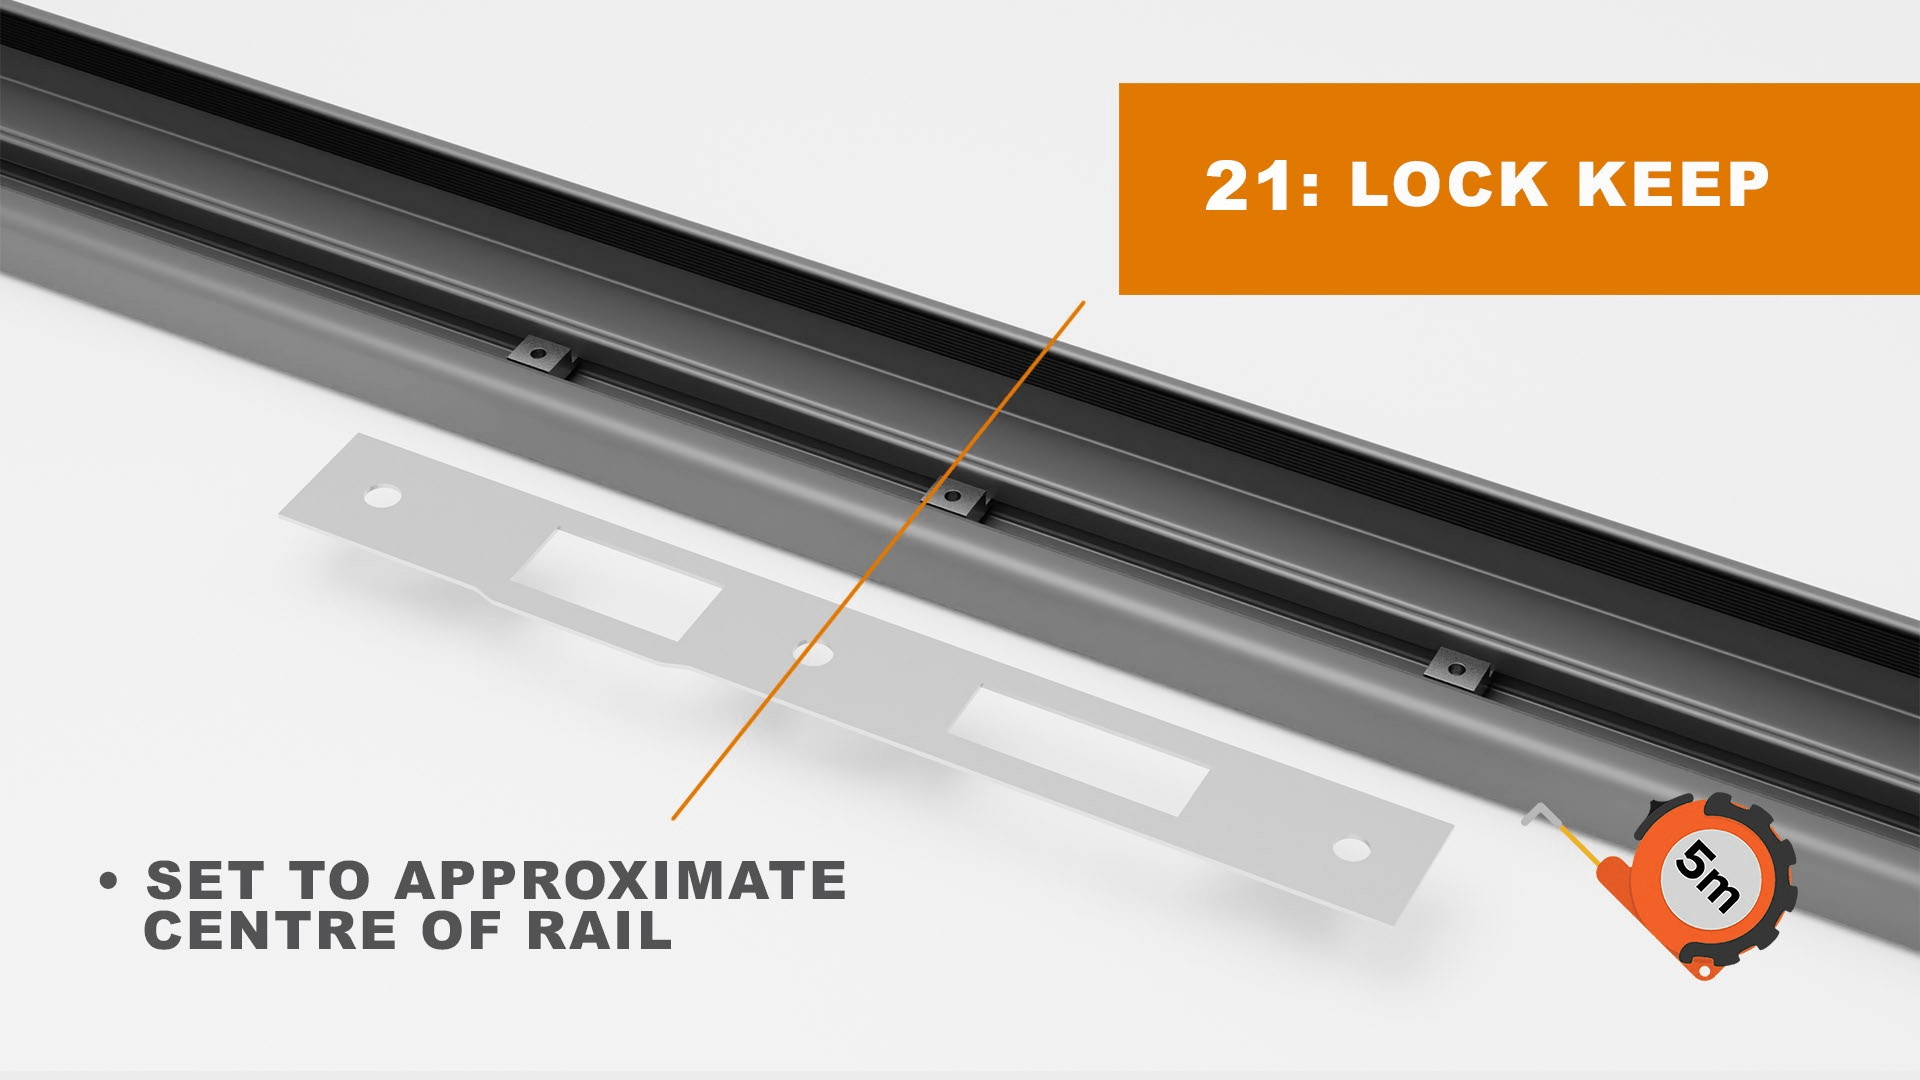
Place the screw blocks roughly in the keep's centre.
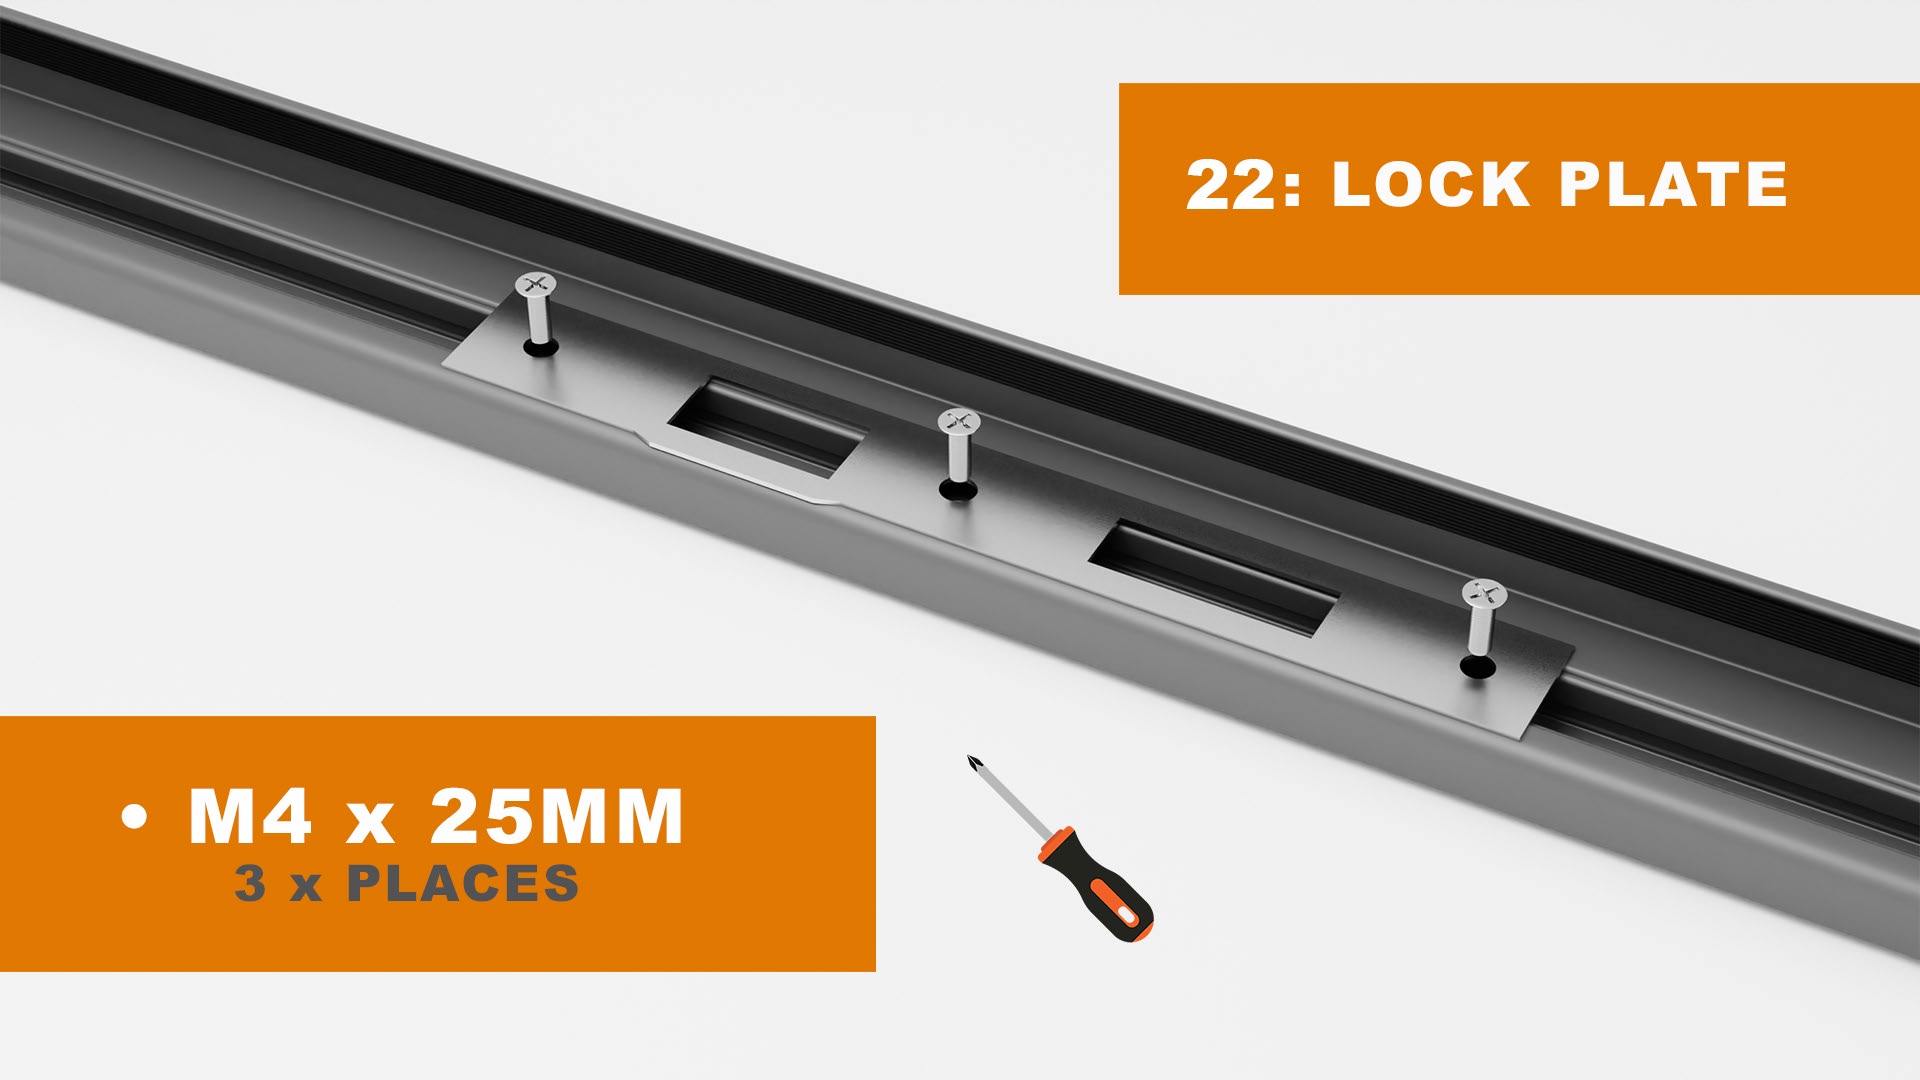
Screw the blocks into place after arranging them to align with the holes in the lock plate.
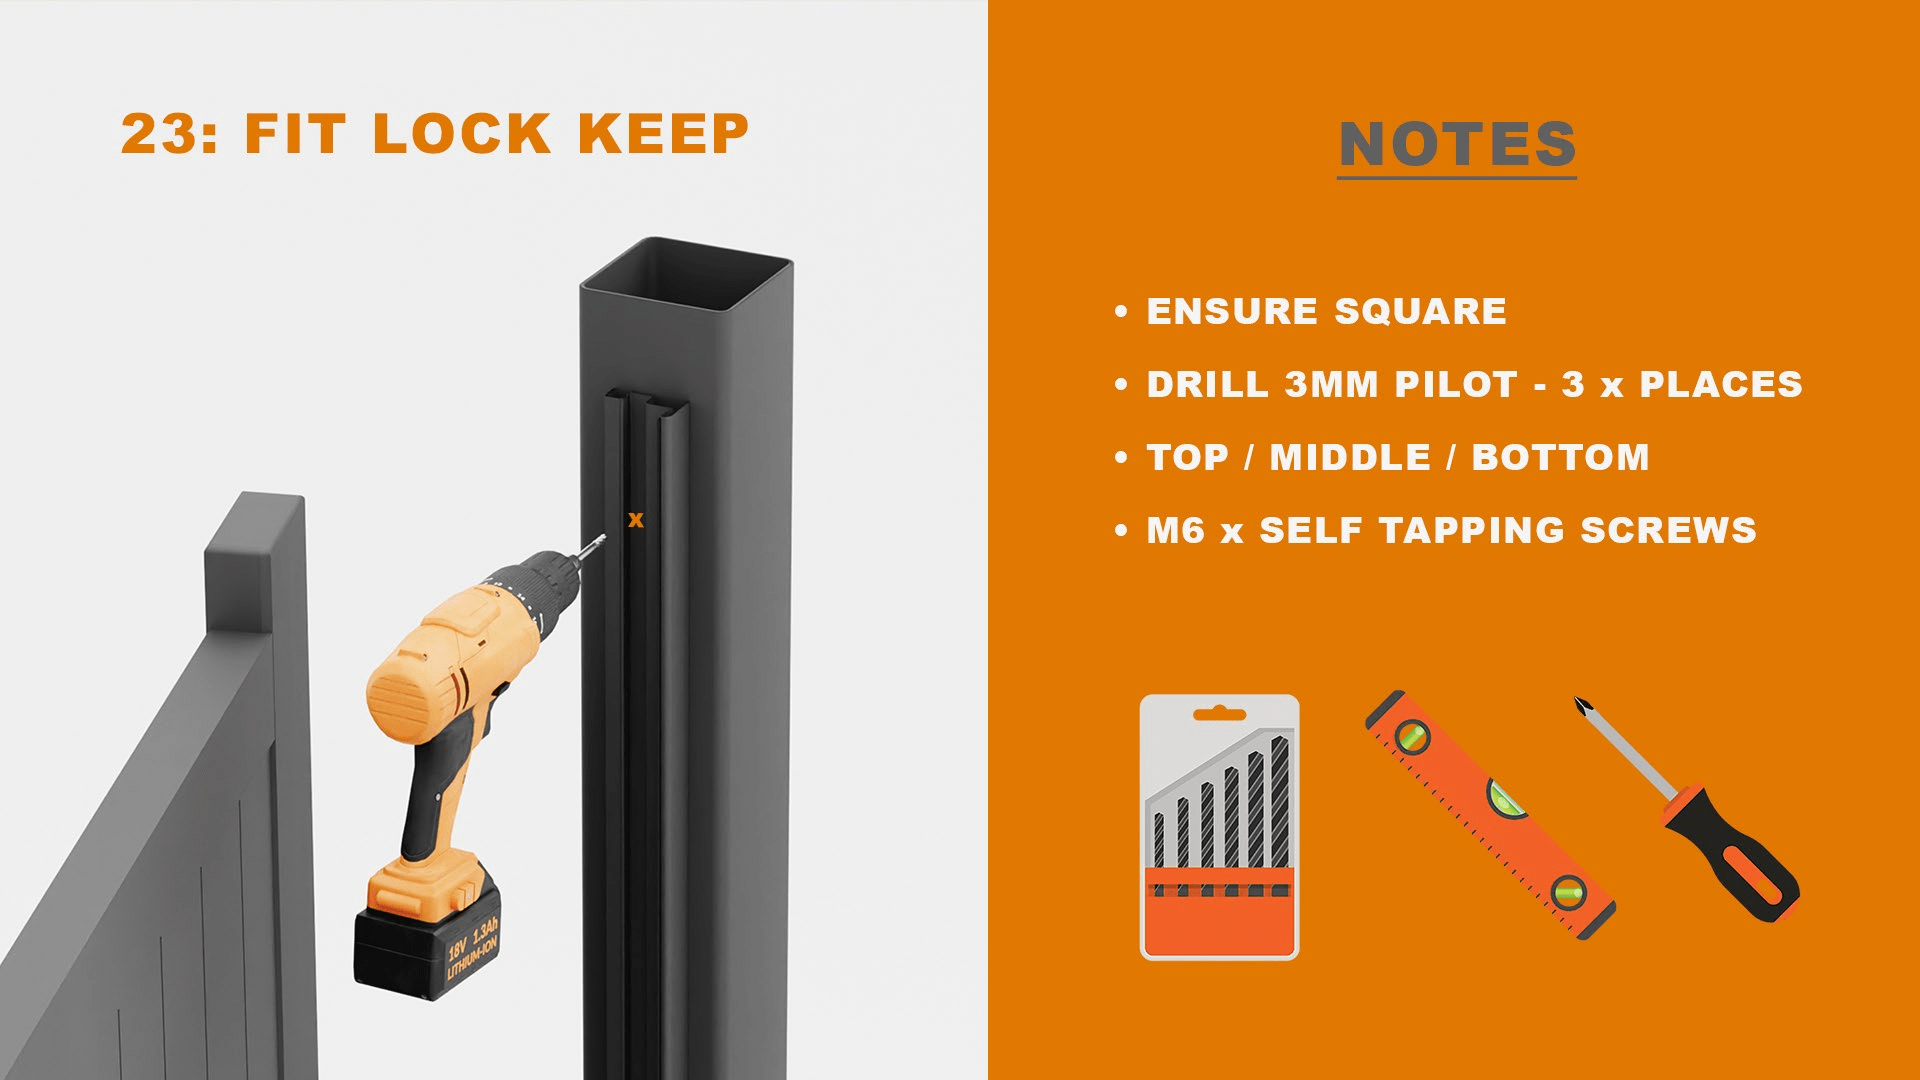
Place the keeper against the post with caution, making sure it is plumb and adequately centred on lining up with the gate. You may use self-tapping screws to secure it to the post after you are satisfied with where it is.
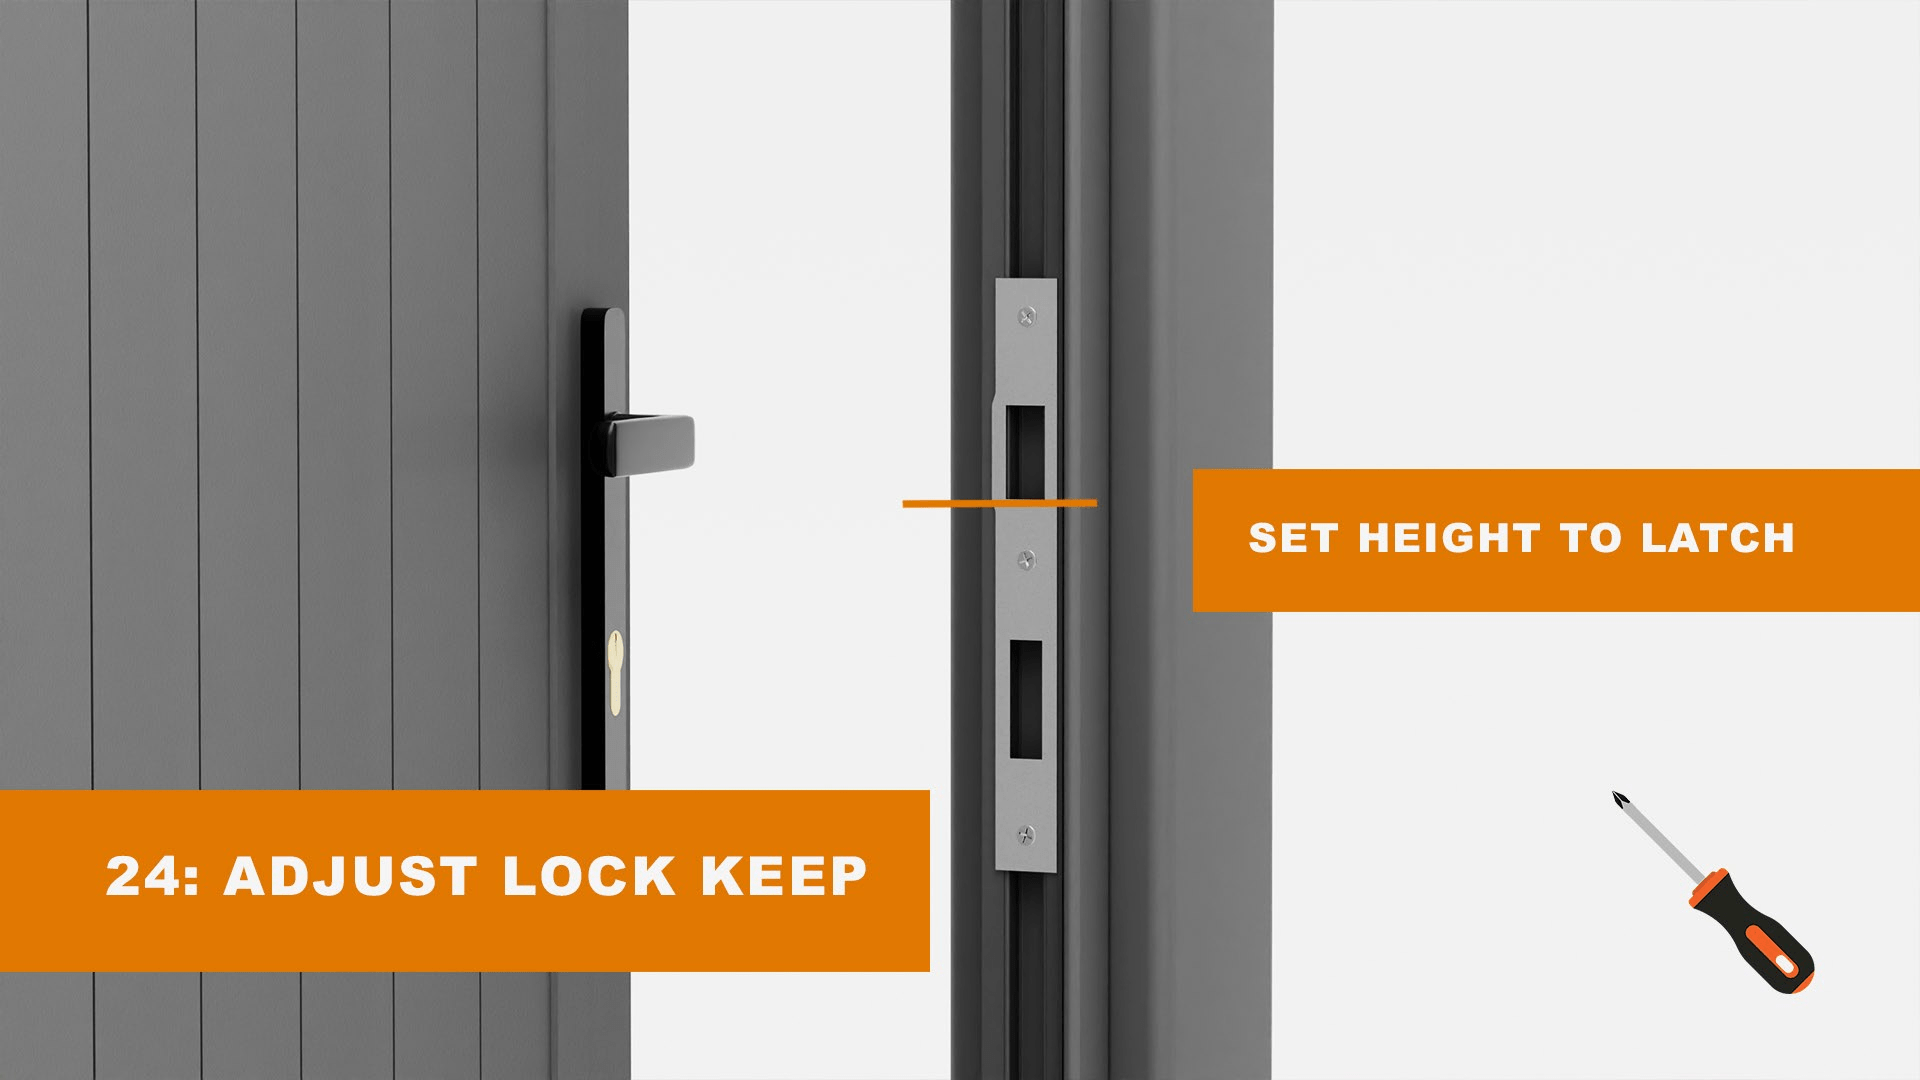
Set the lock plate's height, so the holes line up correctly with the latch and lock throw. You will need to make a few minor adjustments to get the correct alignment.
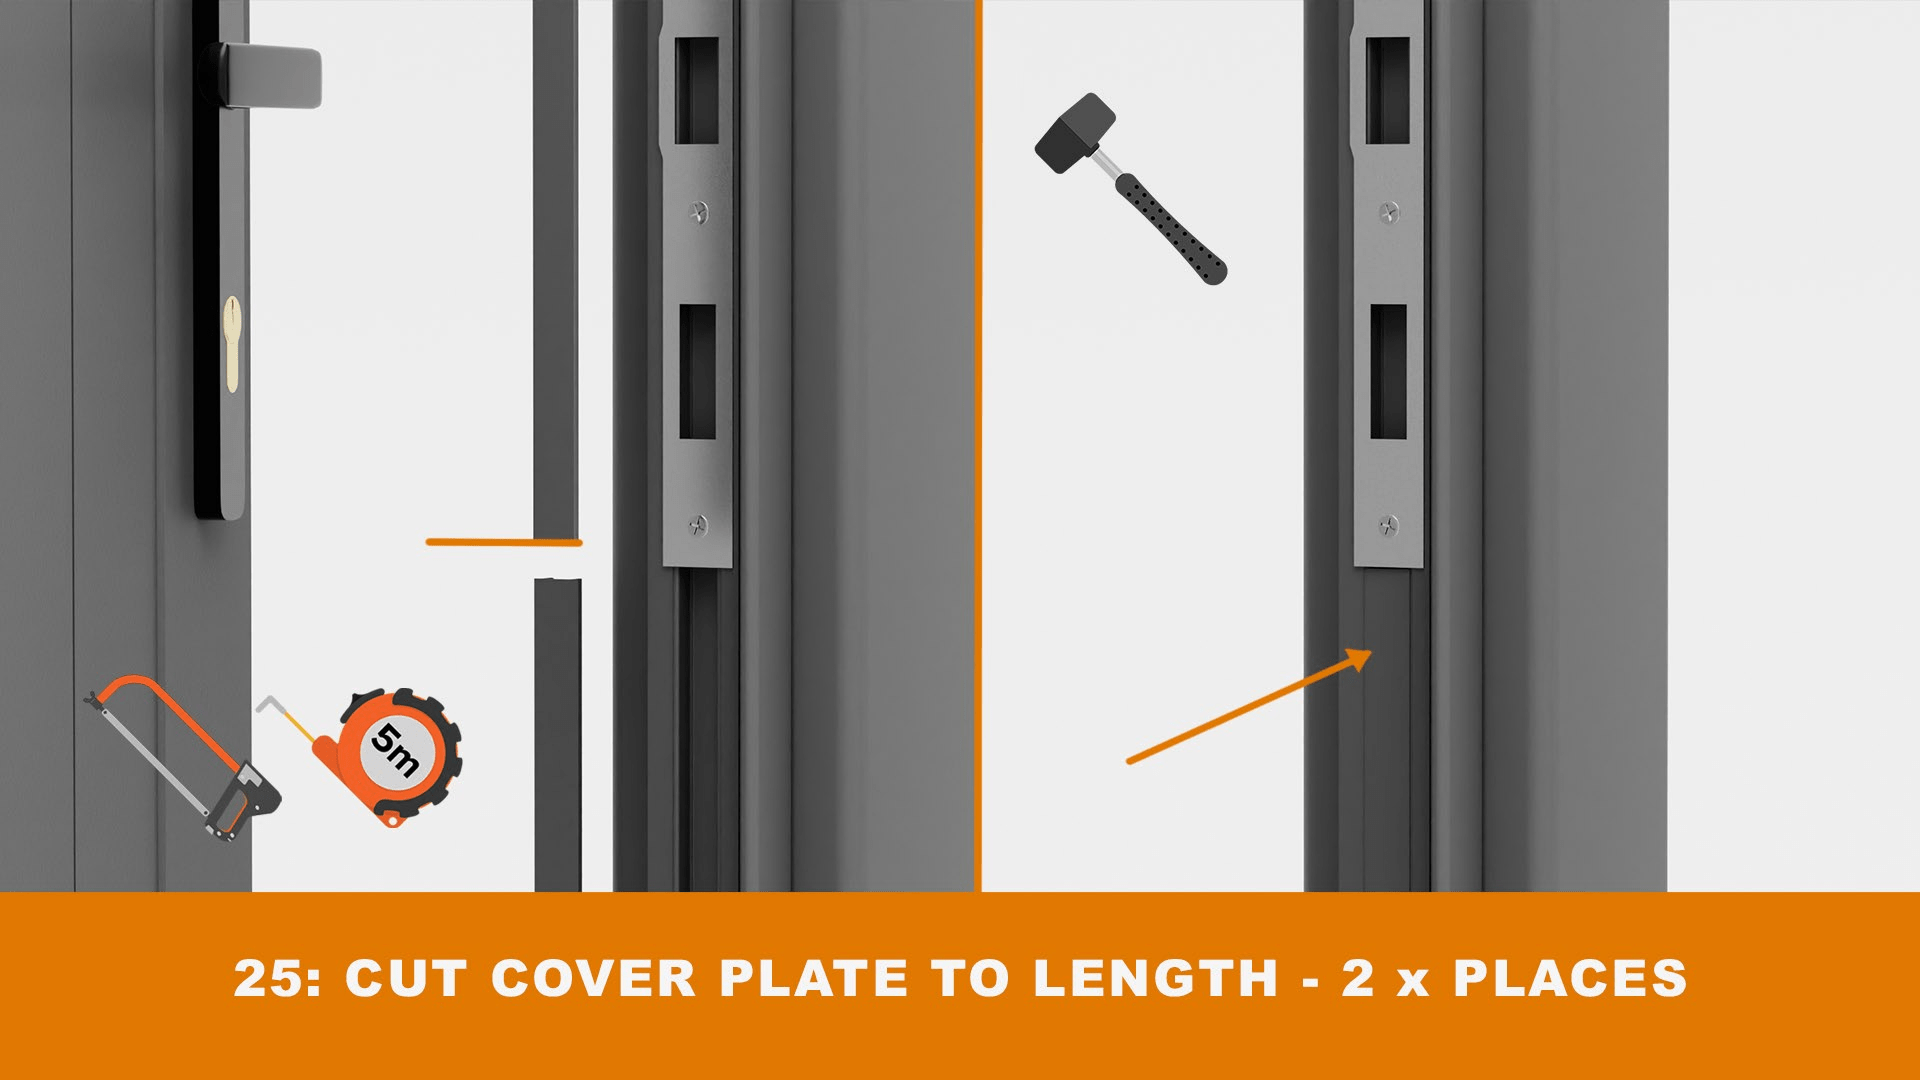
Fit the cover plates into the respective grooves on the lock plate after trimming them to the appropriate length.
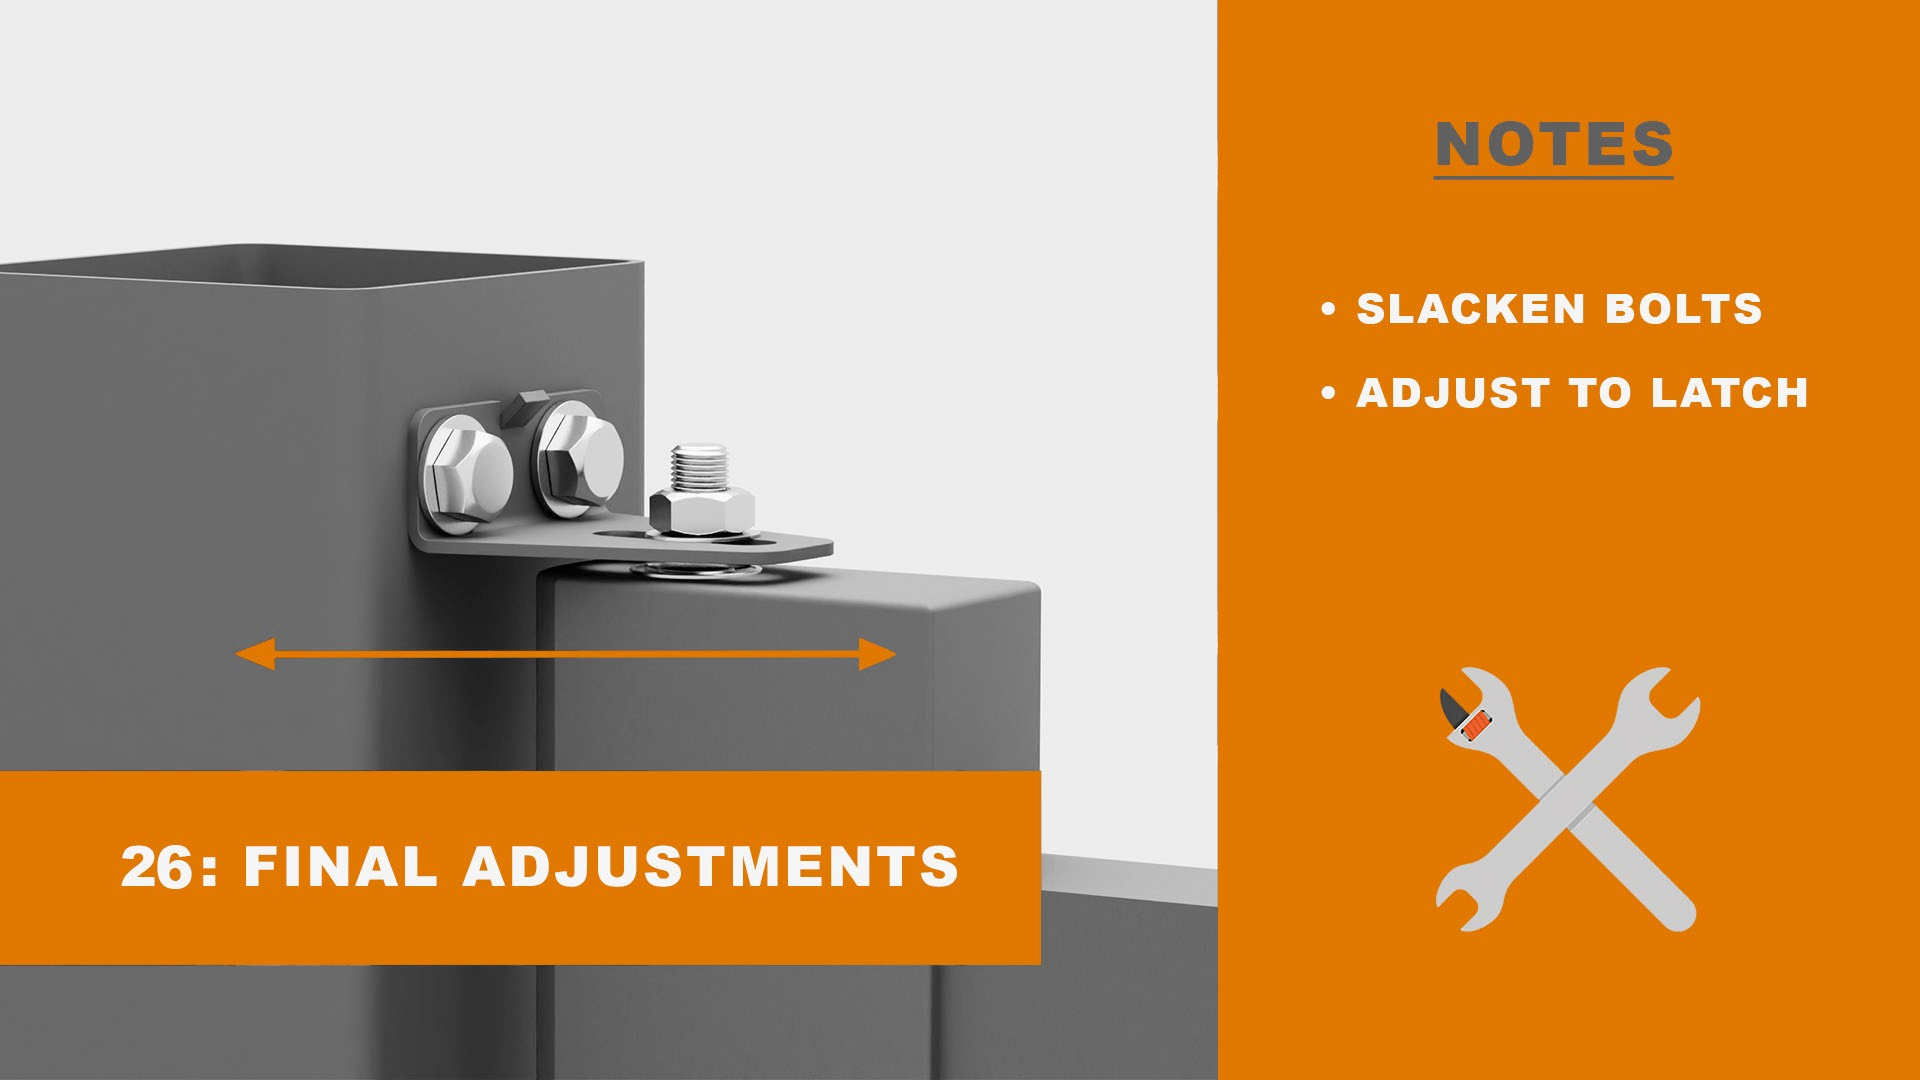
You should now fine-tune the hinges to achieve proper fitment.
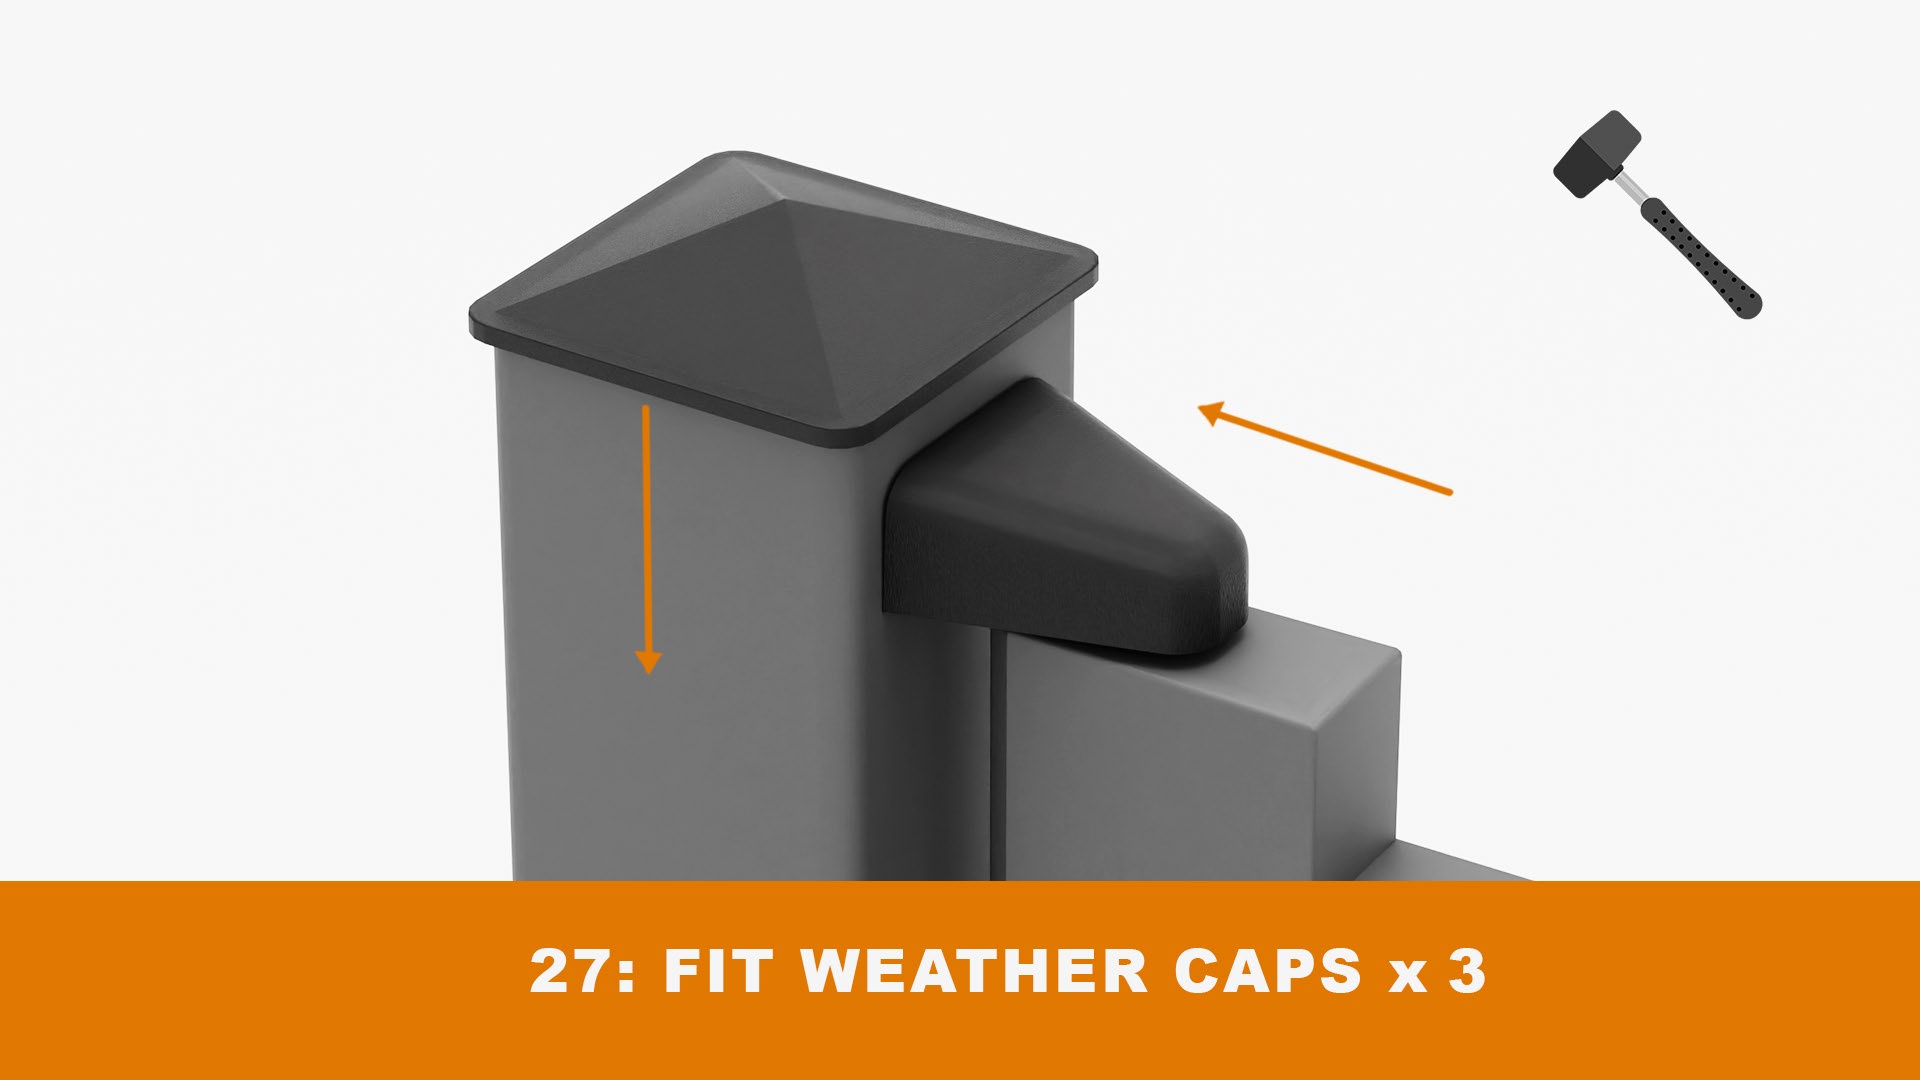
Attach the hinge and post caps.
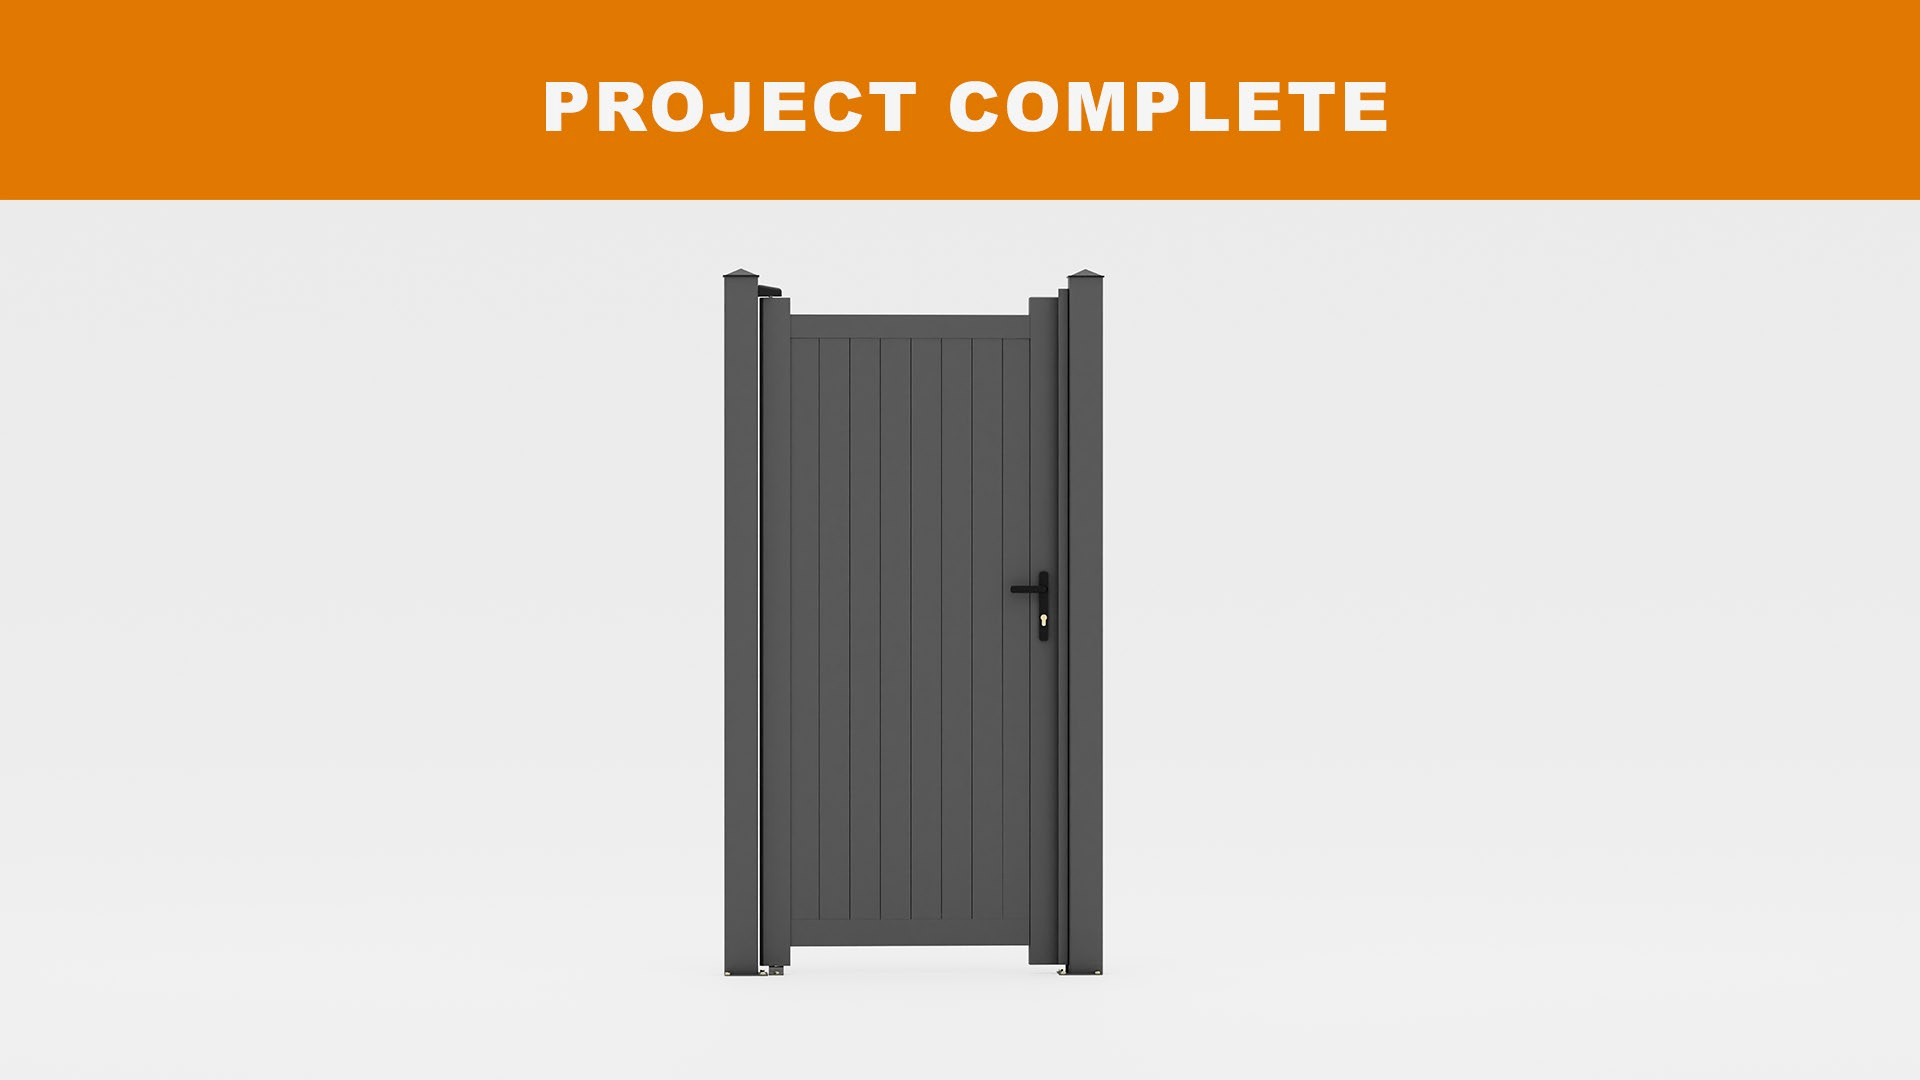
The installation has now been completed.
- Railings


