Garden Gates Direct - How To Fit Your Aluminium Pedestrian Gate To Brickwork
- Gates
- Railings
- Fencing
- Accessories
& Fitting- Sheds
& Storage- Garden Structures
- Design
& StyleMetal Gates & Railings- Info
& HelpHow to Fit Your Aluminium Pedestrian Gate to Brickwork
If you would like to know how to install one of our aluminium pedestrian gates onto brickwork, please refer to the installation instructions in the images below.
Installation Guide
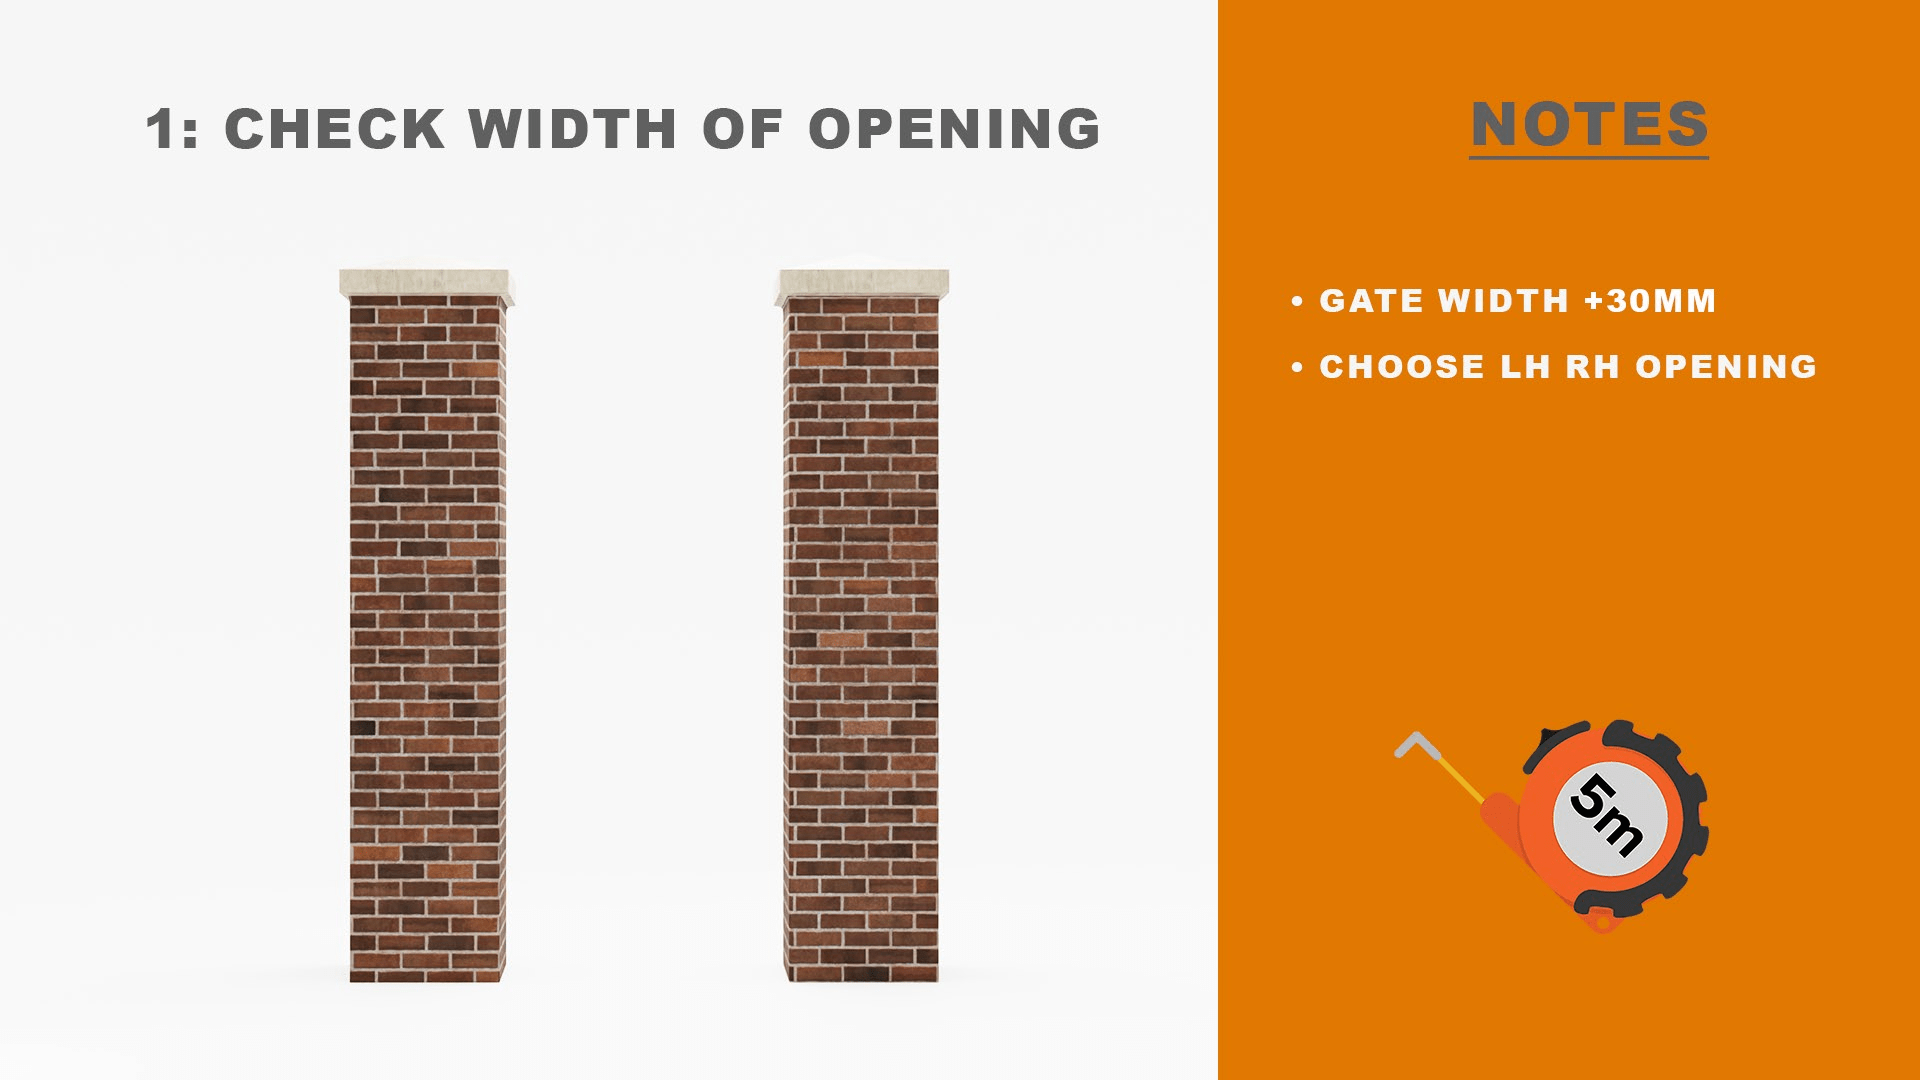
Before you begin your installation, double-check that you have the correct size and that the opening is 30mm wider than the gate you ordered.
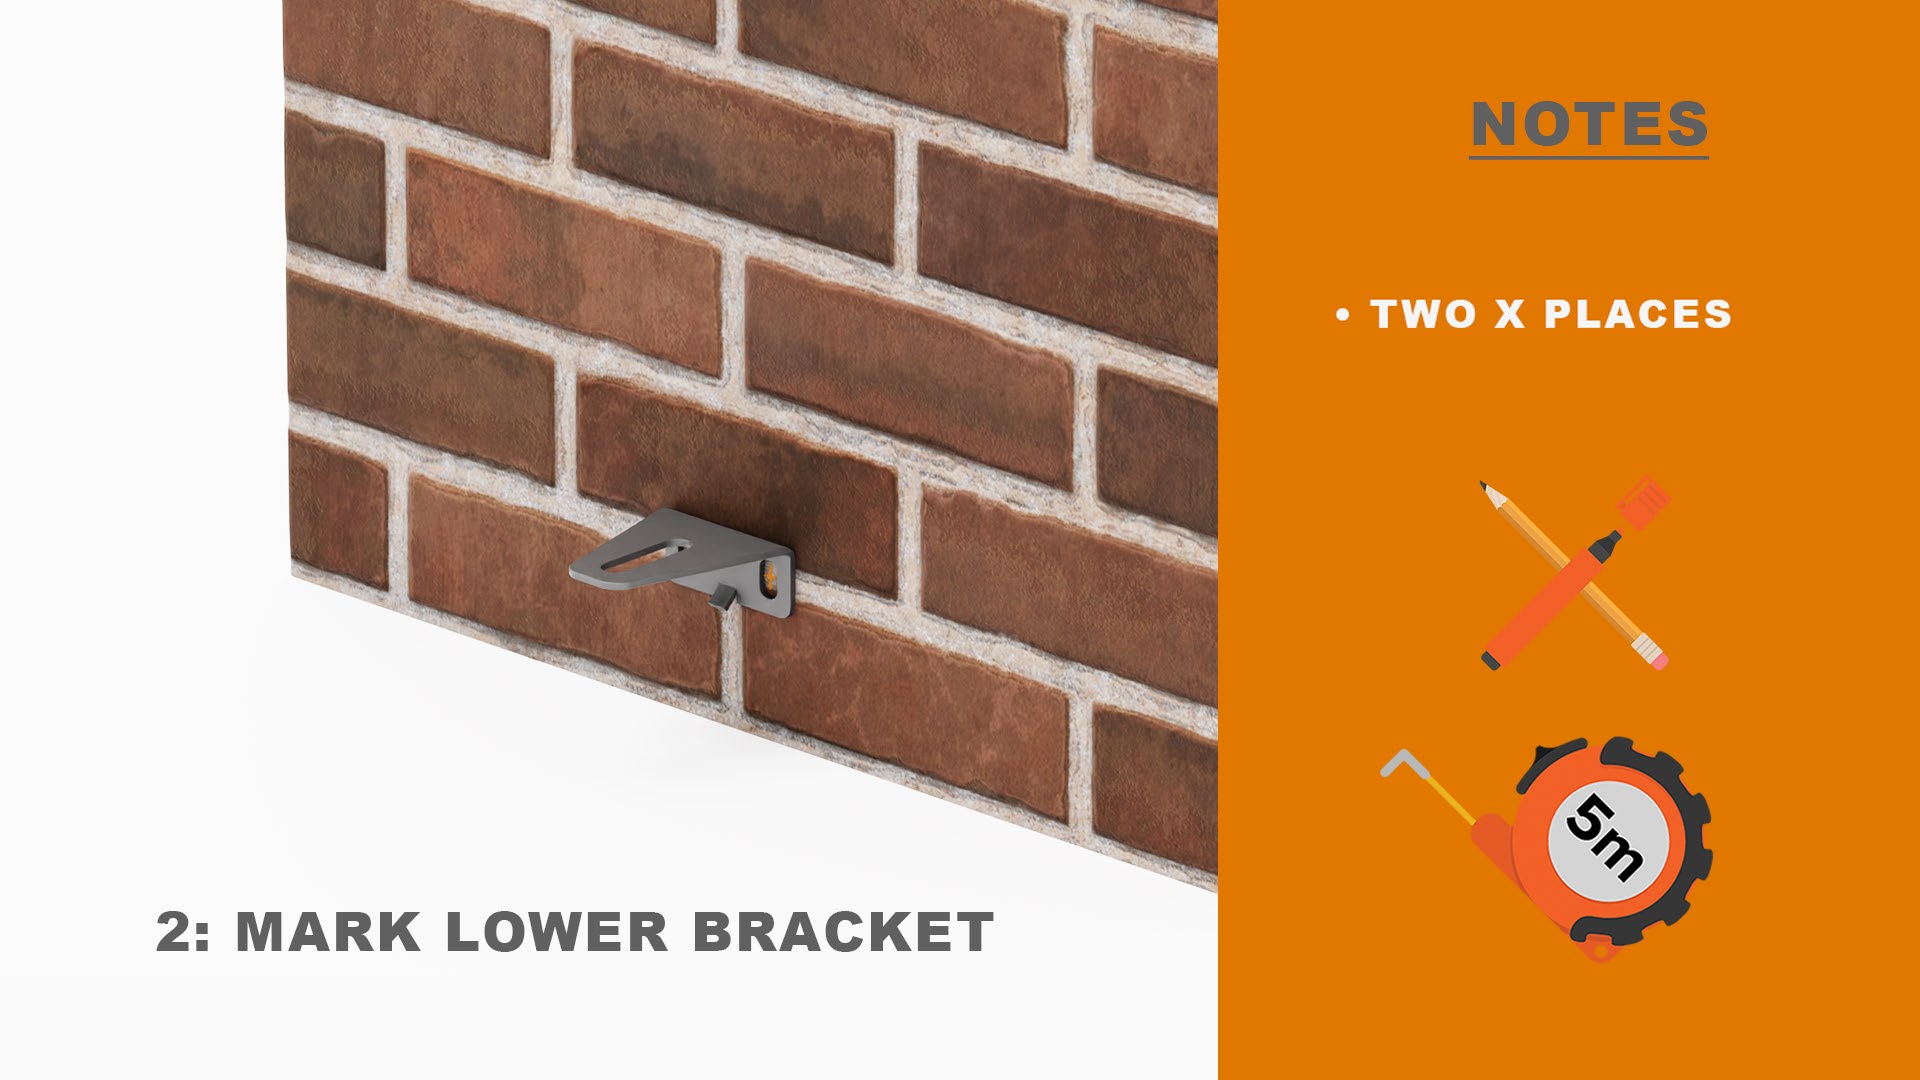
Carefully mark the positon of the bottom bracket, ensuring it is in the correct location to allow space for ground clearance.
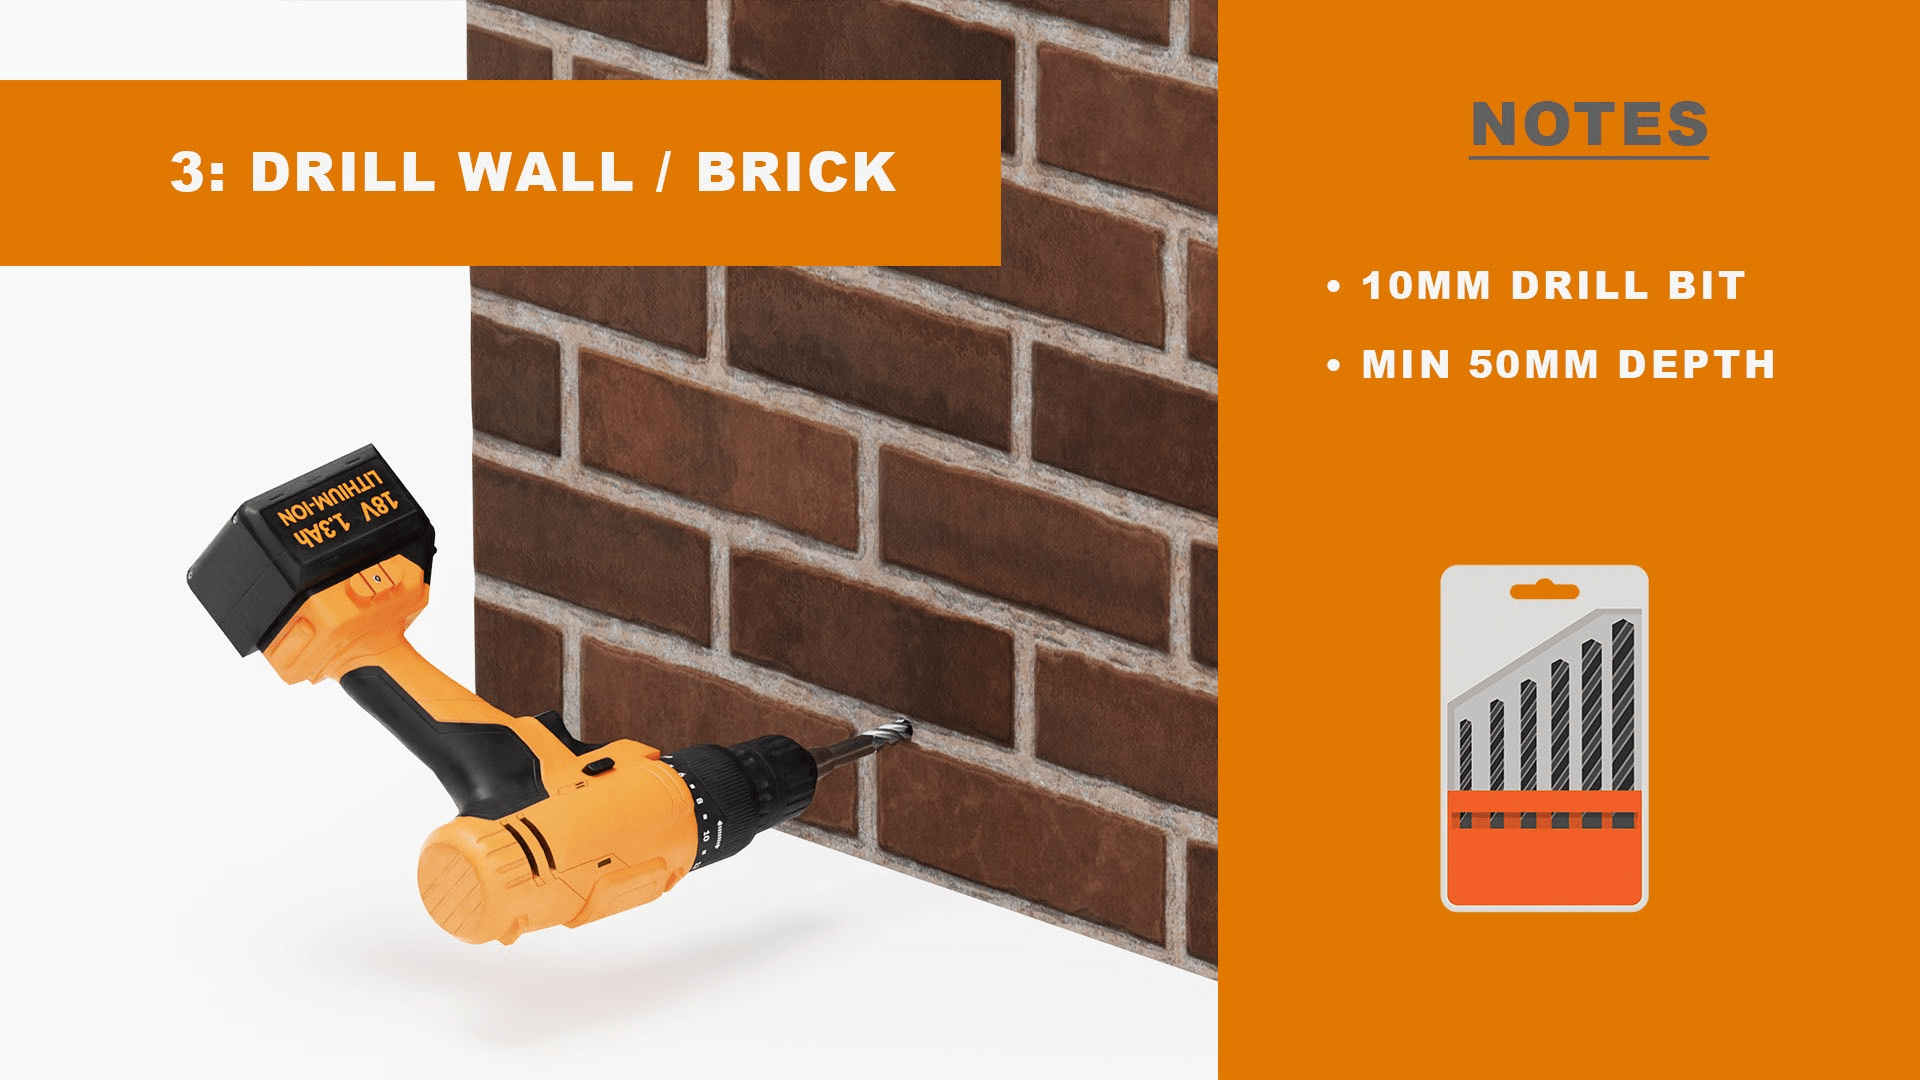
Use a suitable power drill with the right size masonry bits to drill your holes in the marked locations.
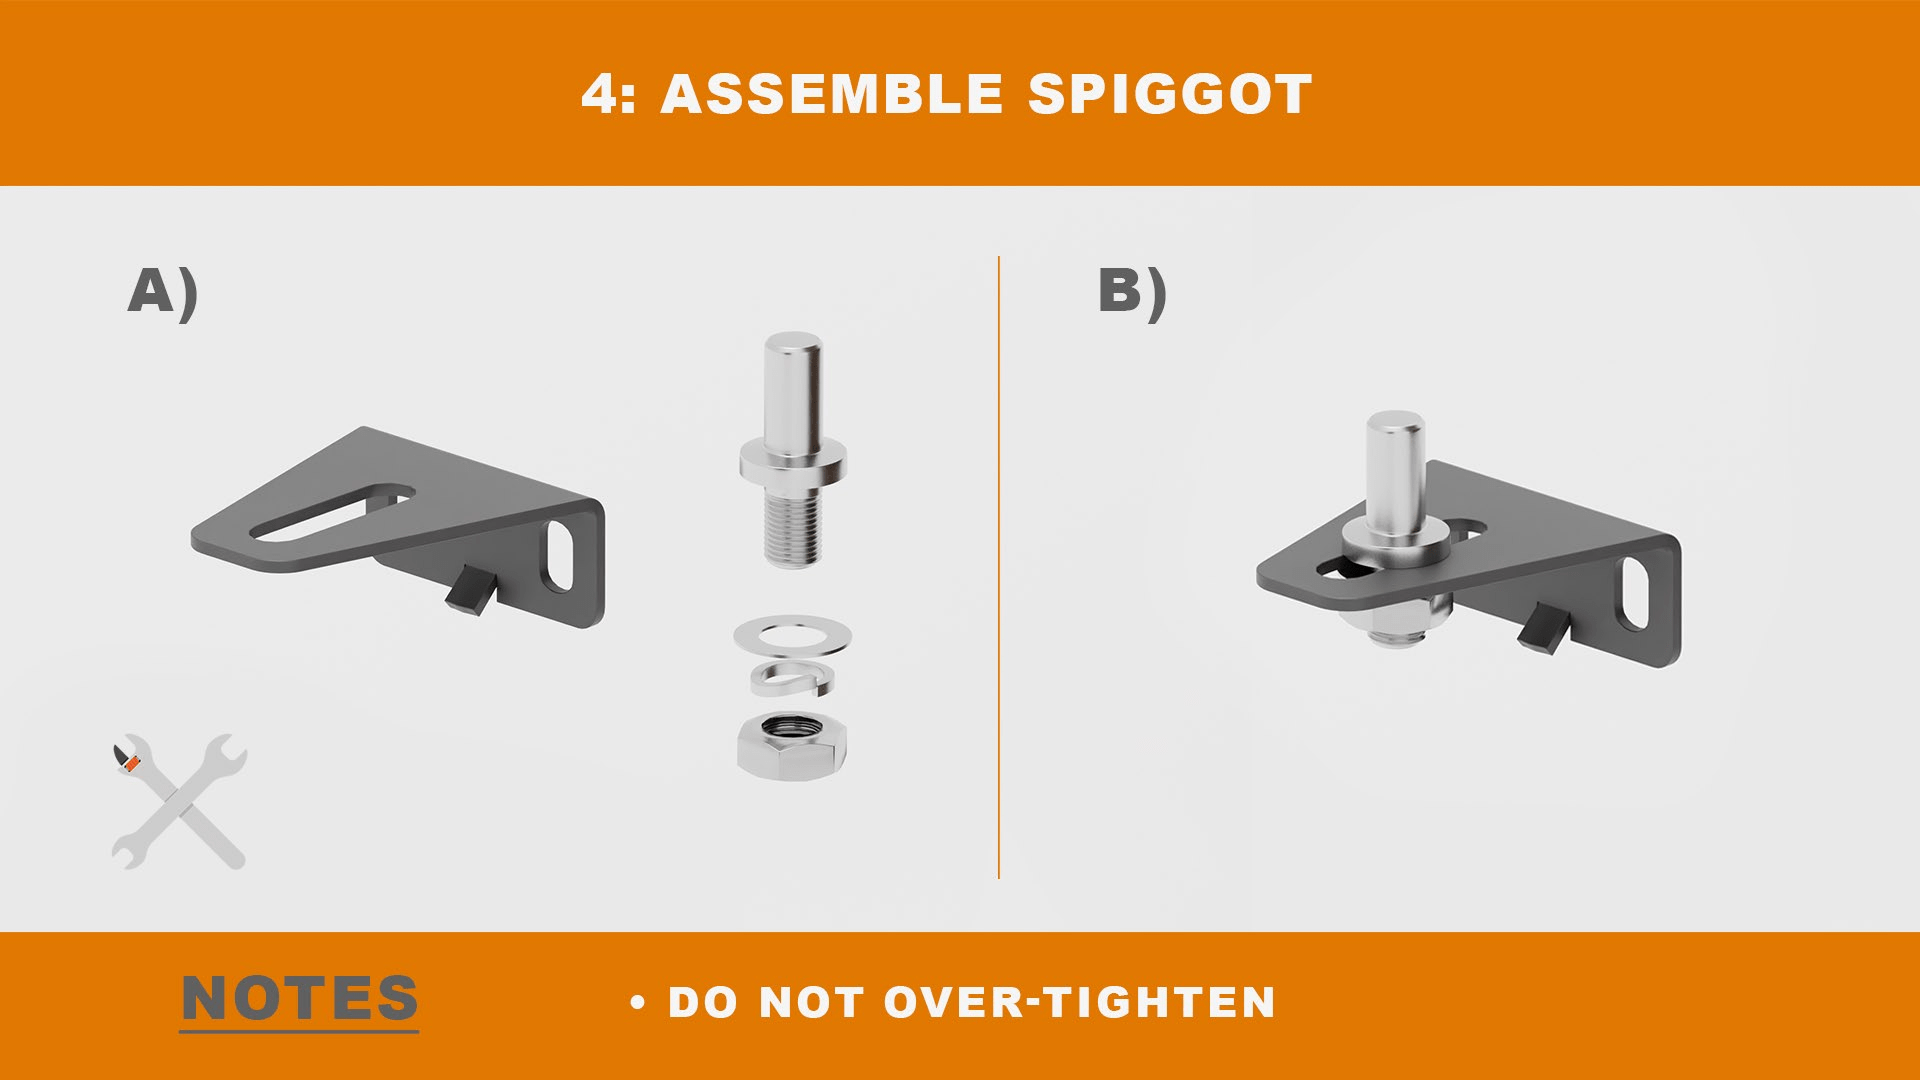
Assemble the lower spigot to accept the gate as depicted above.
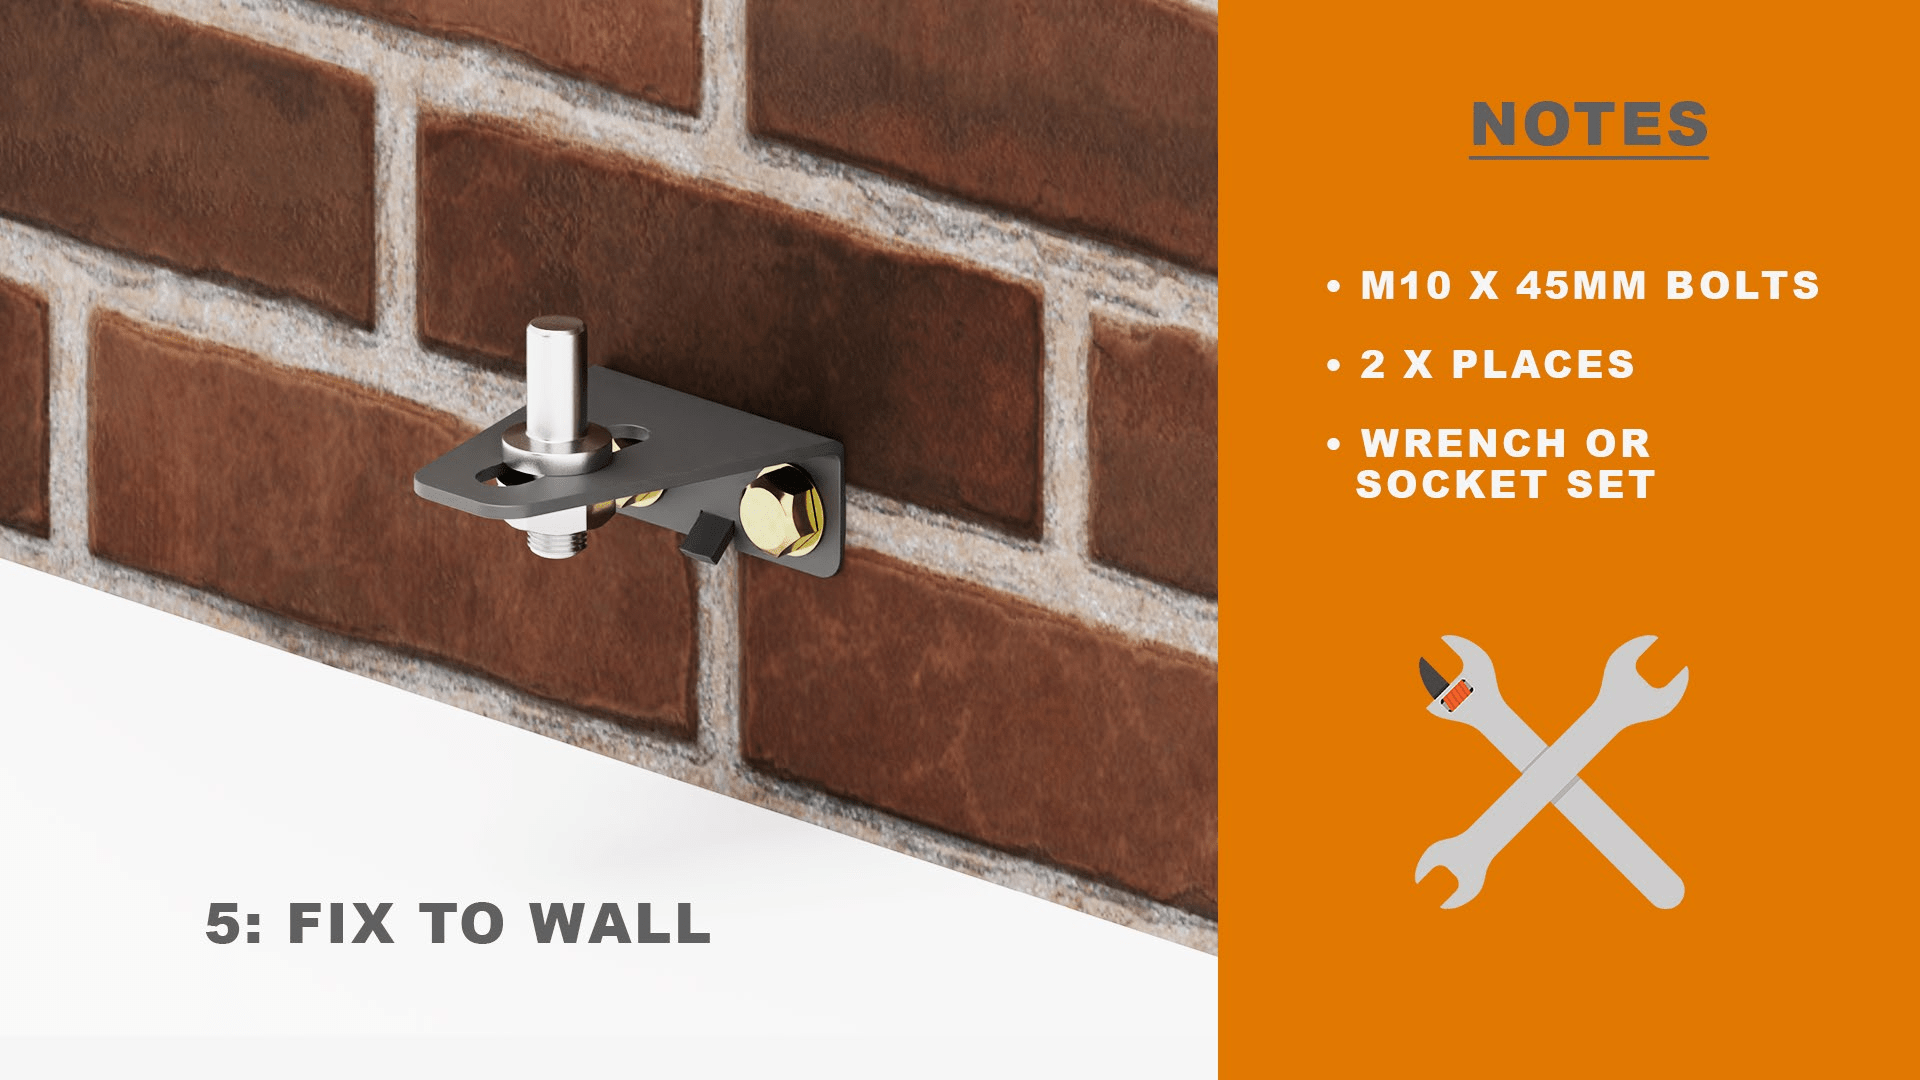
When you have drilled the holes and mounted the spigot to the bracket, you can now attach these to the wall using appropriate mechanical fixings.
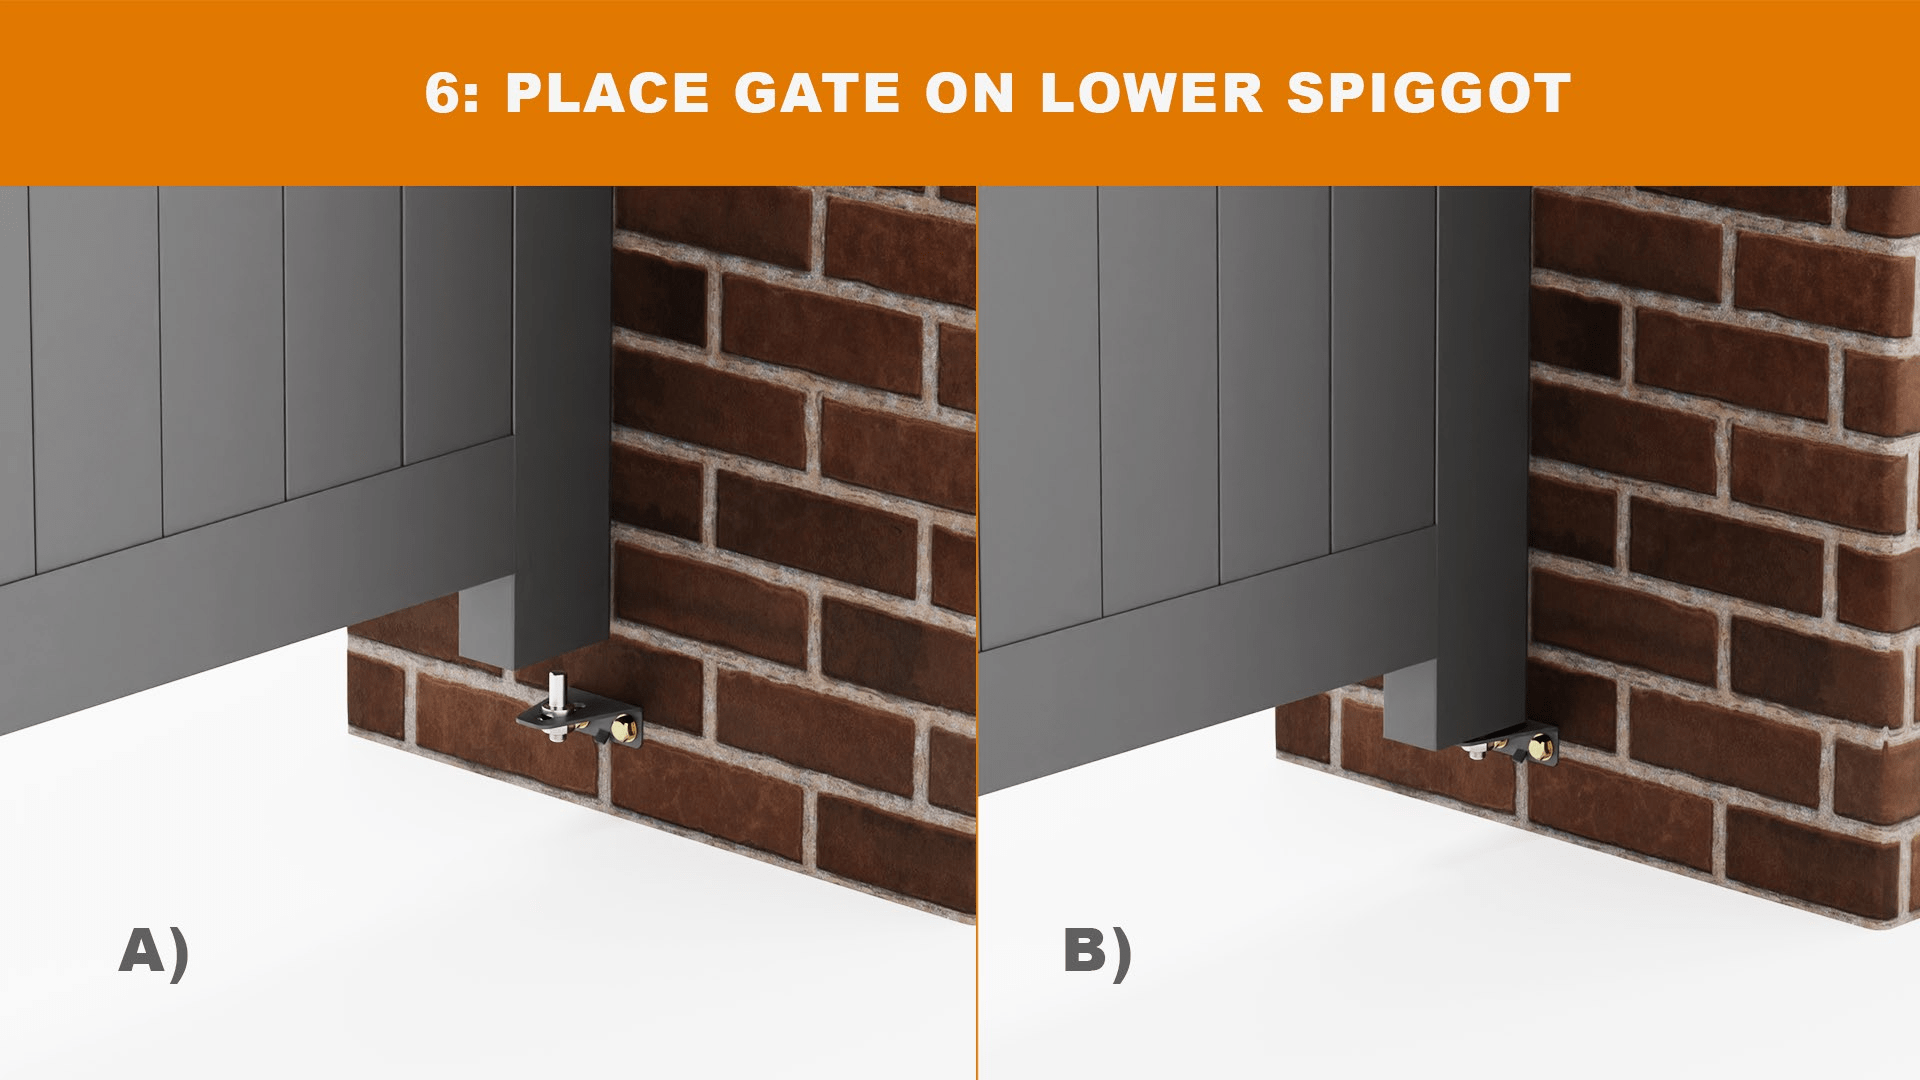
Carefully lift the gate onto the spigot, ensuring it lines up with the hole at the frame's underside.
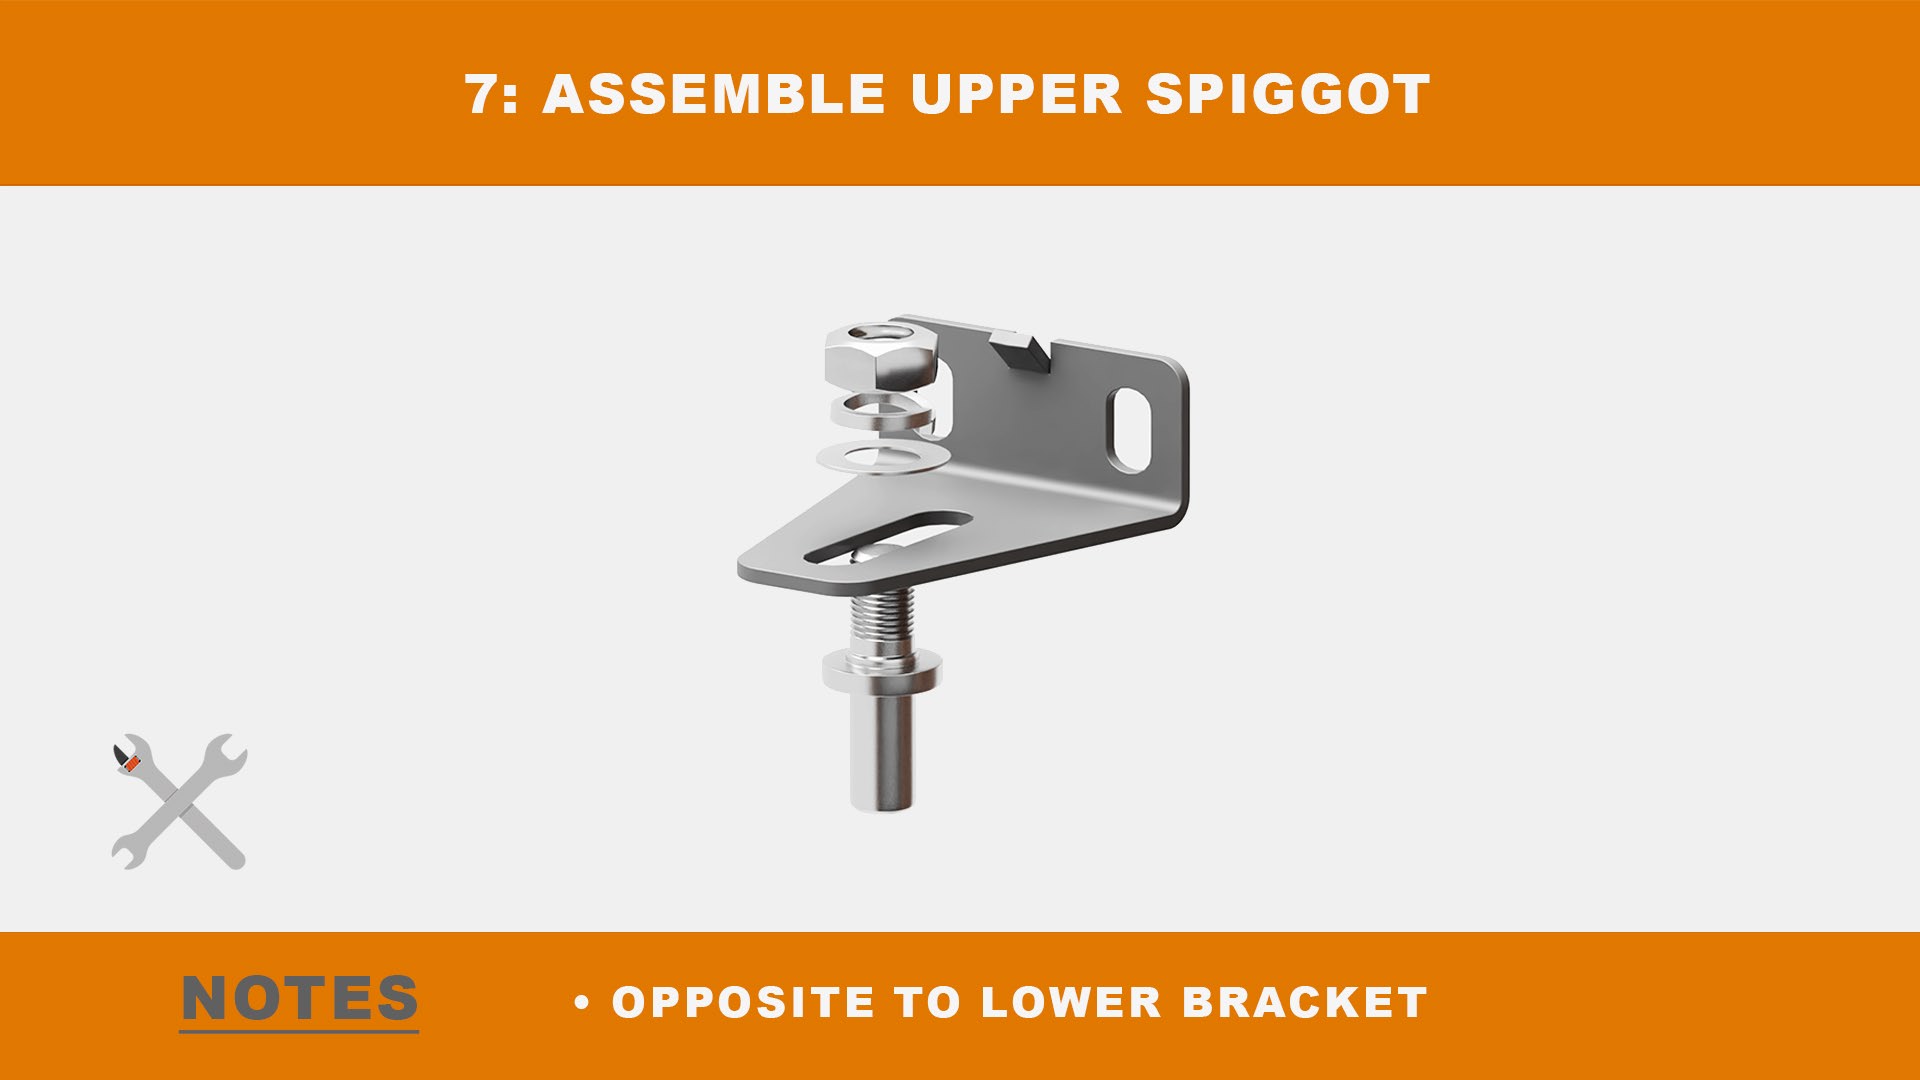
Assemble the top spigot onto the upper wall mounting bracket.
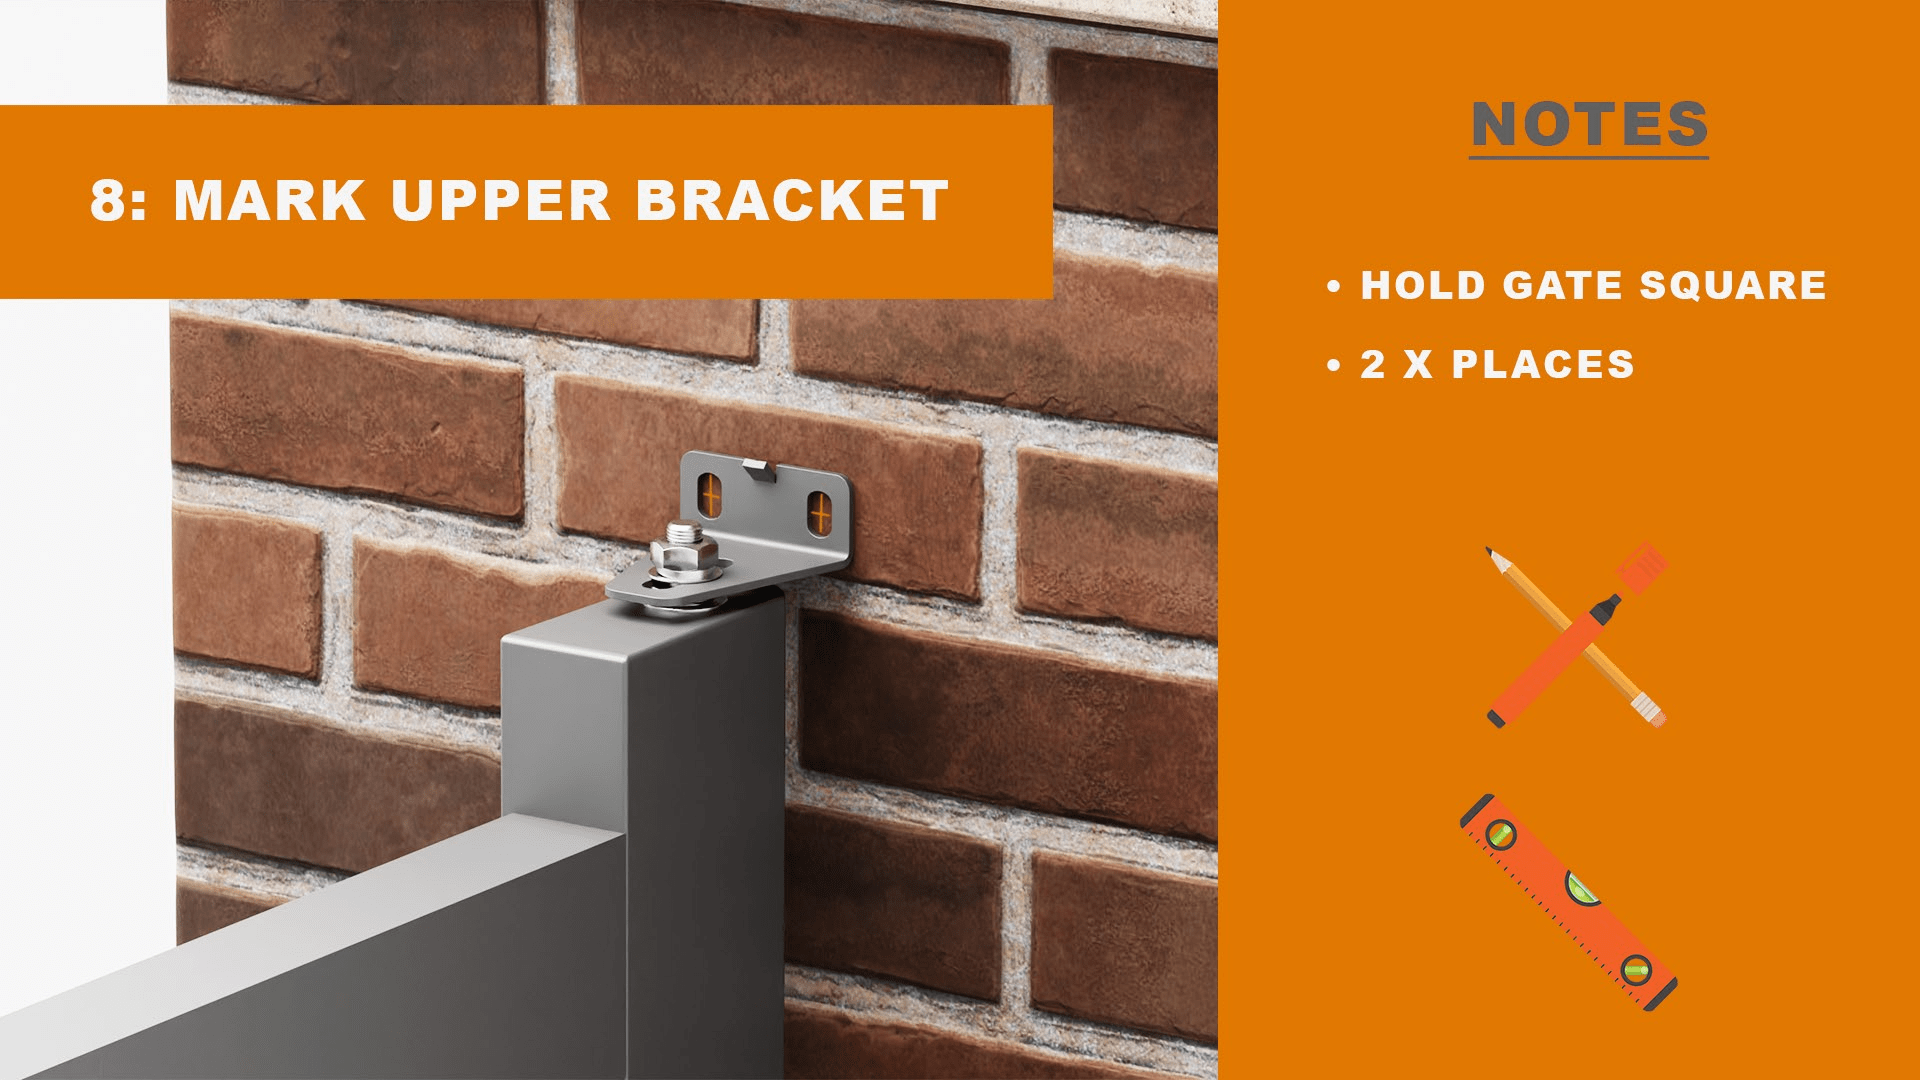
Holding the gate vertically, drop the spigot into the hole in the top of the framework and carefully mark the position of the holes in the wall bracket.
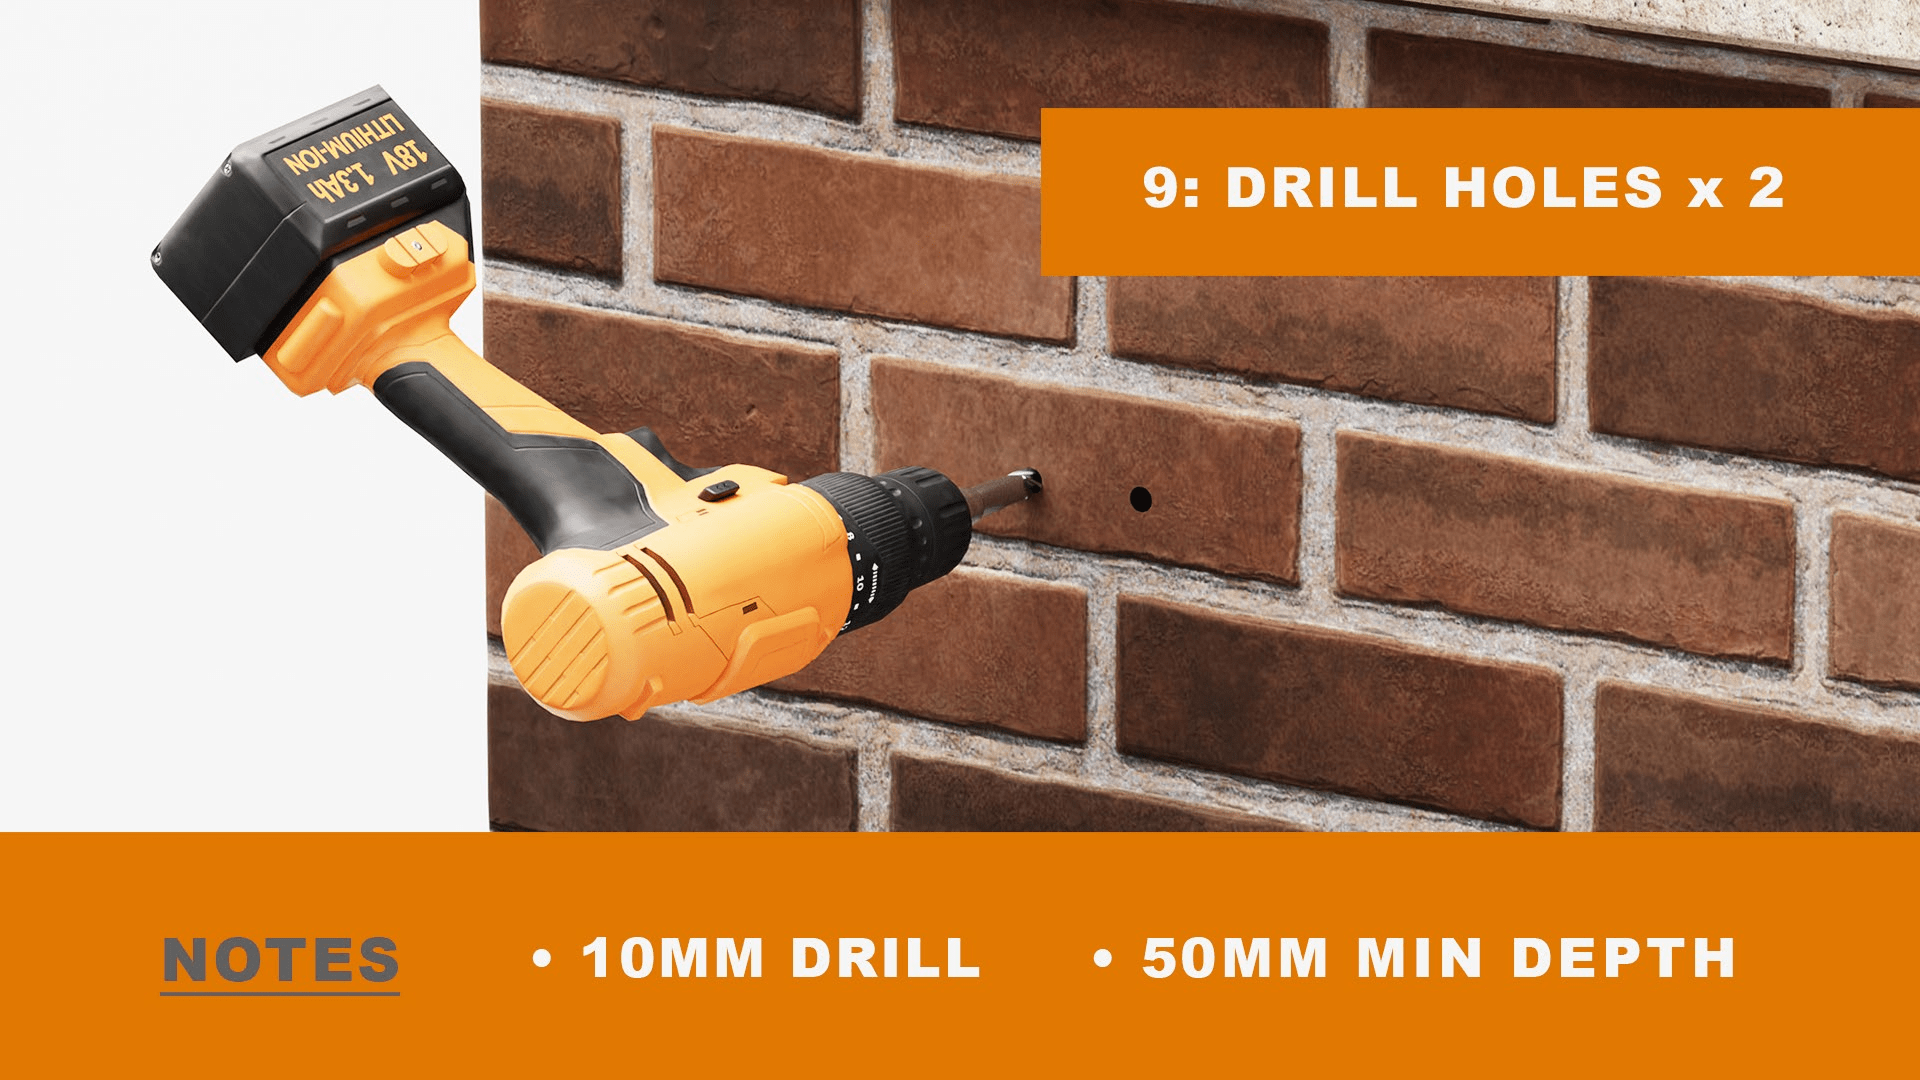
Create holes for the top bracket. Make sure you use the correct size drill bit and go to the proper depth to ensure a secure fixing is possible.
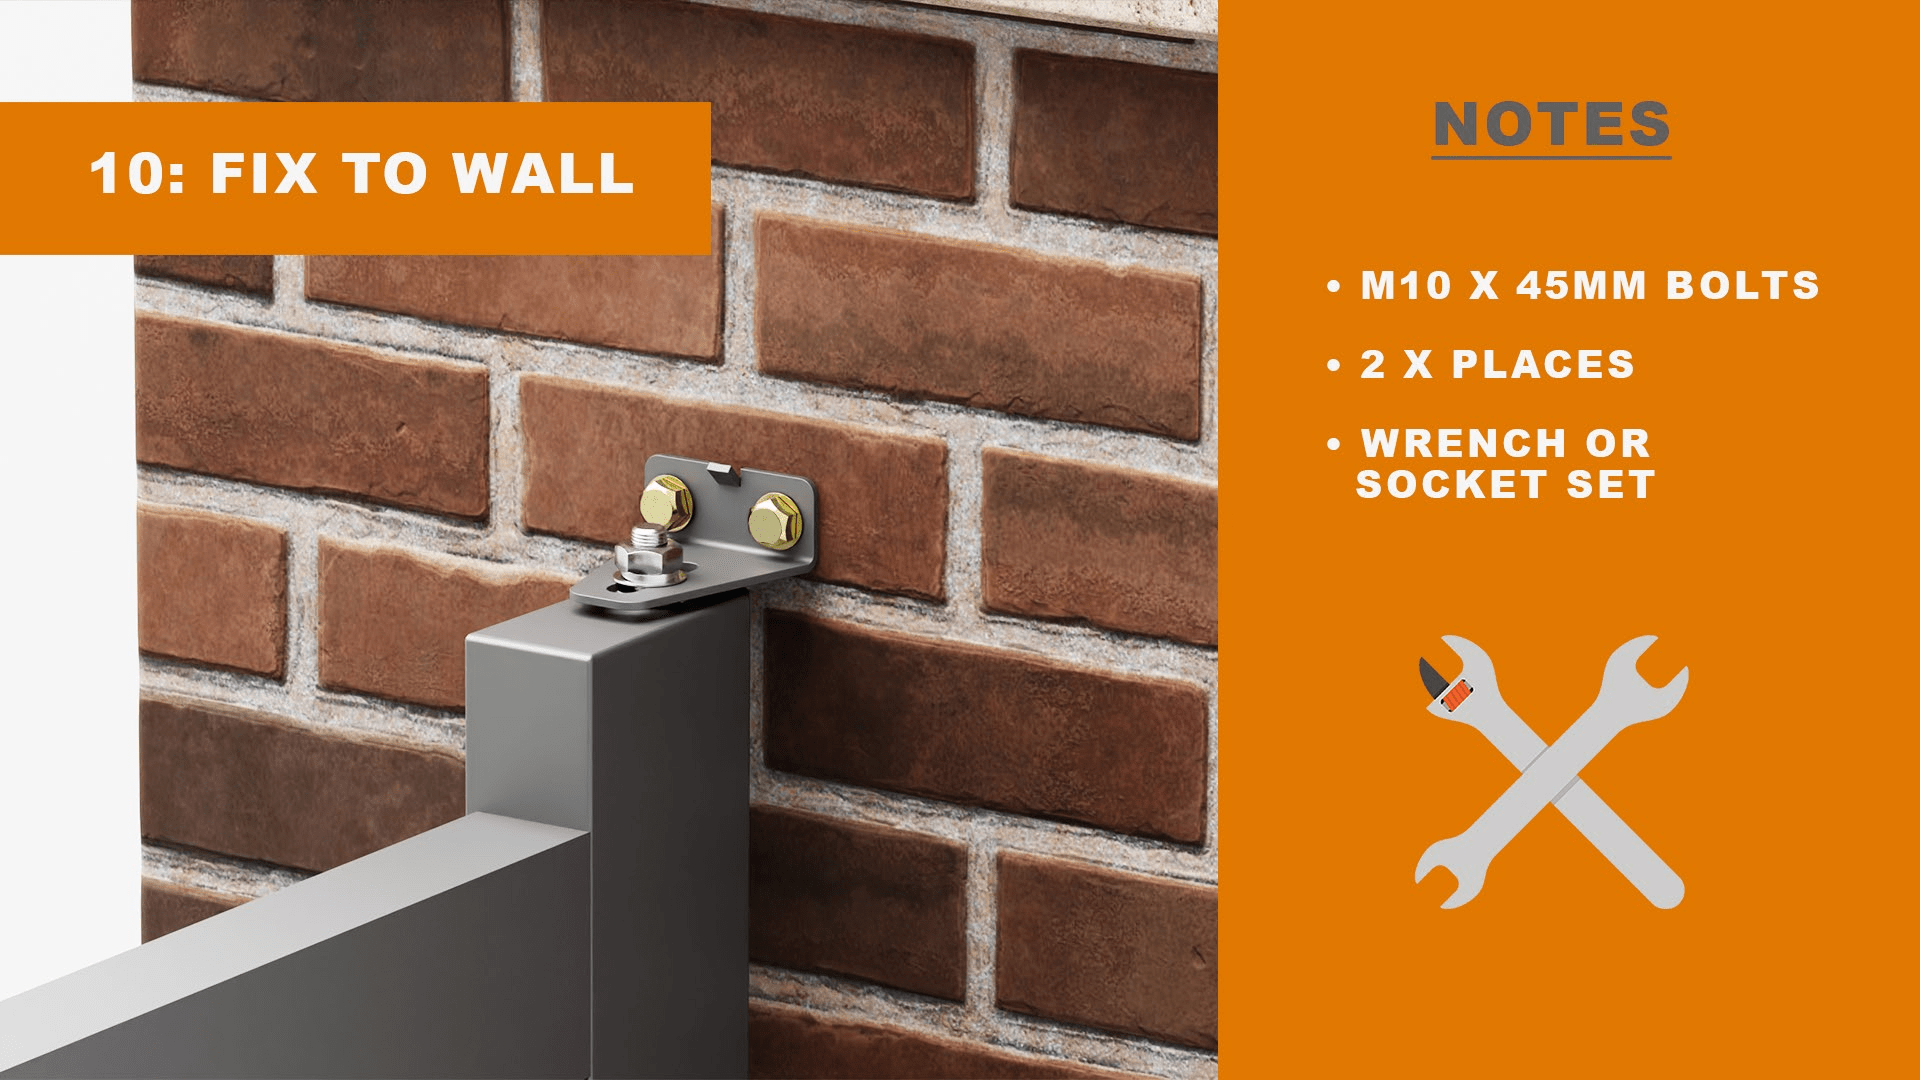
After drilling the holes and mounting the spigot to the bracket, you can now use the proper mechanical fasteners to install these components to the wall.
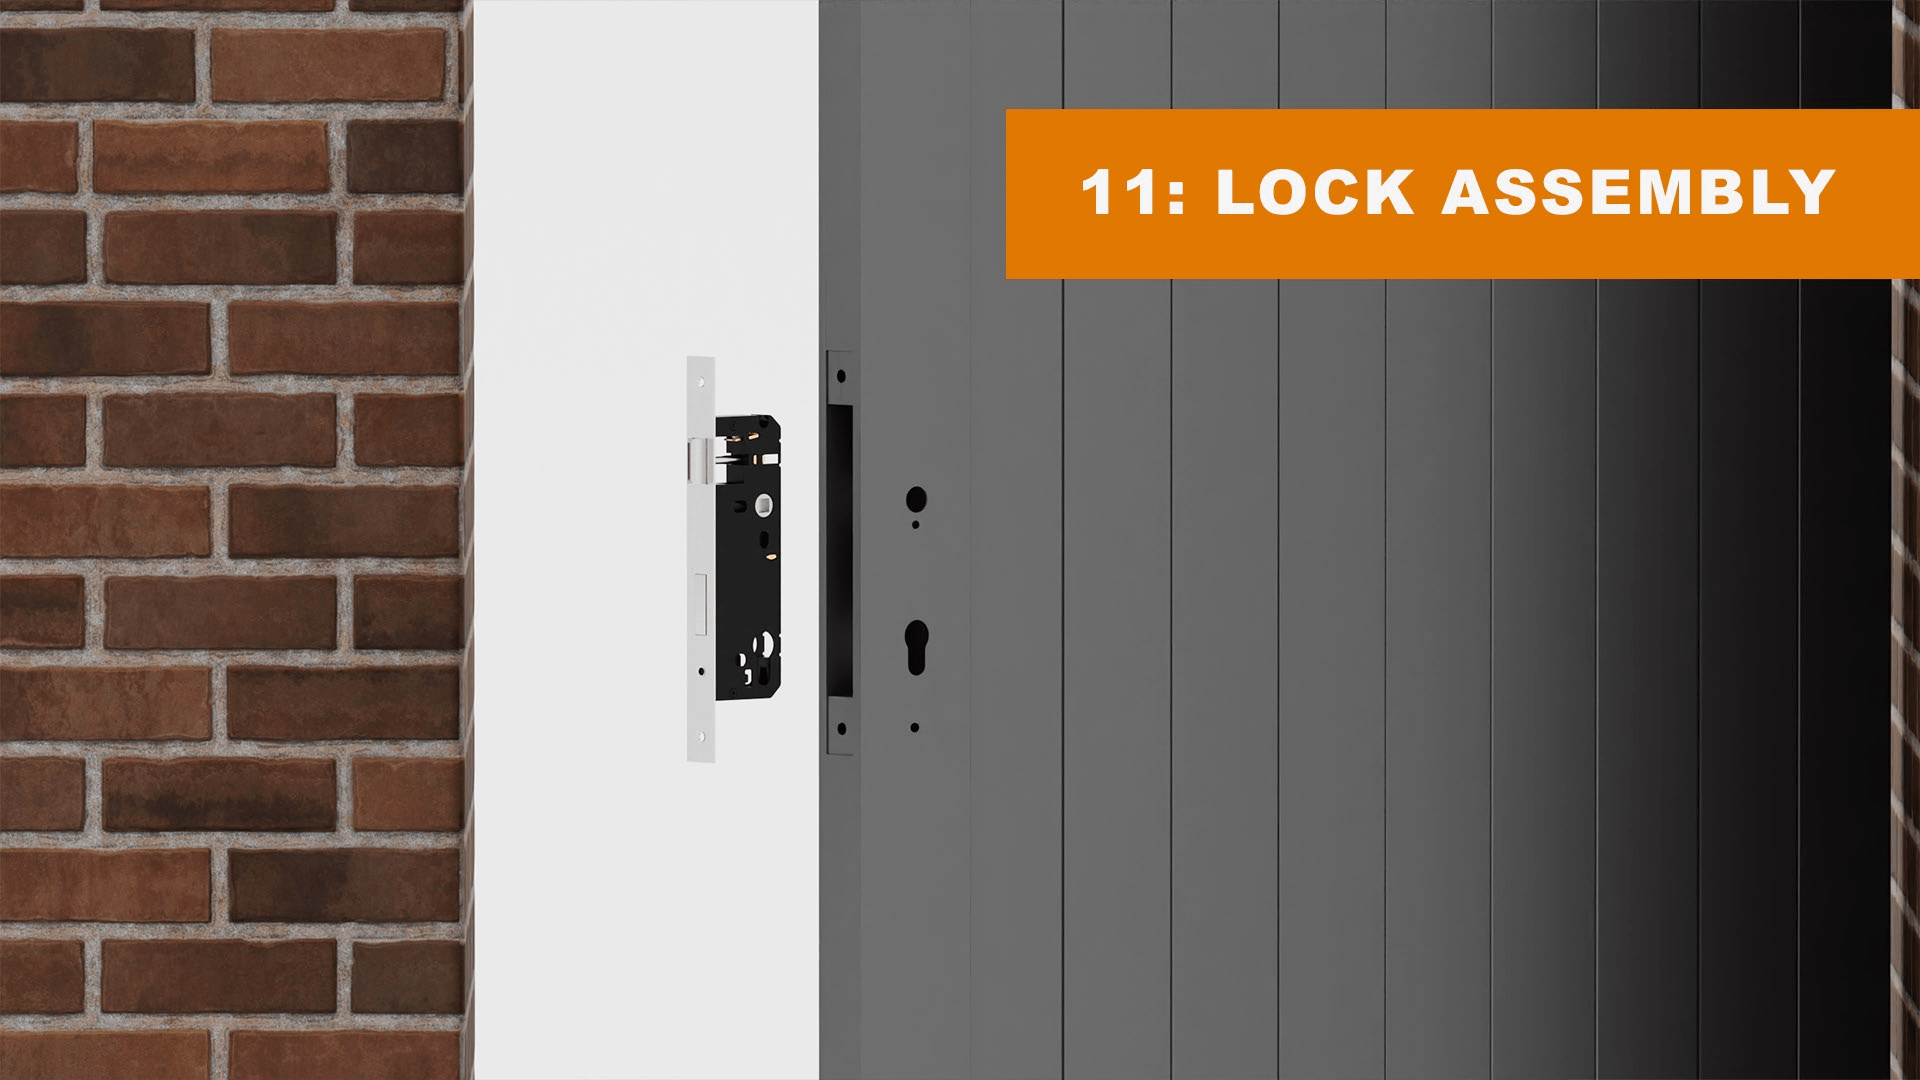
When you have fit the hinges, you are now ready to install the lock and latch mechanism.
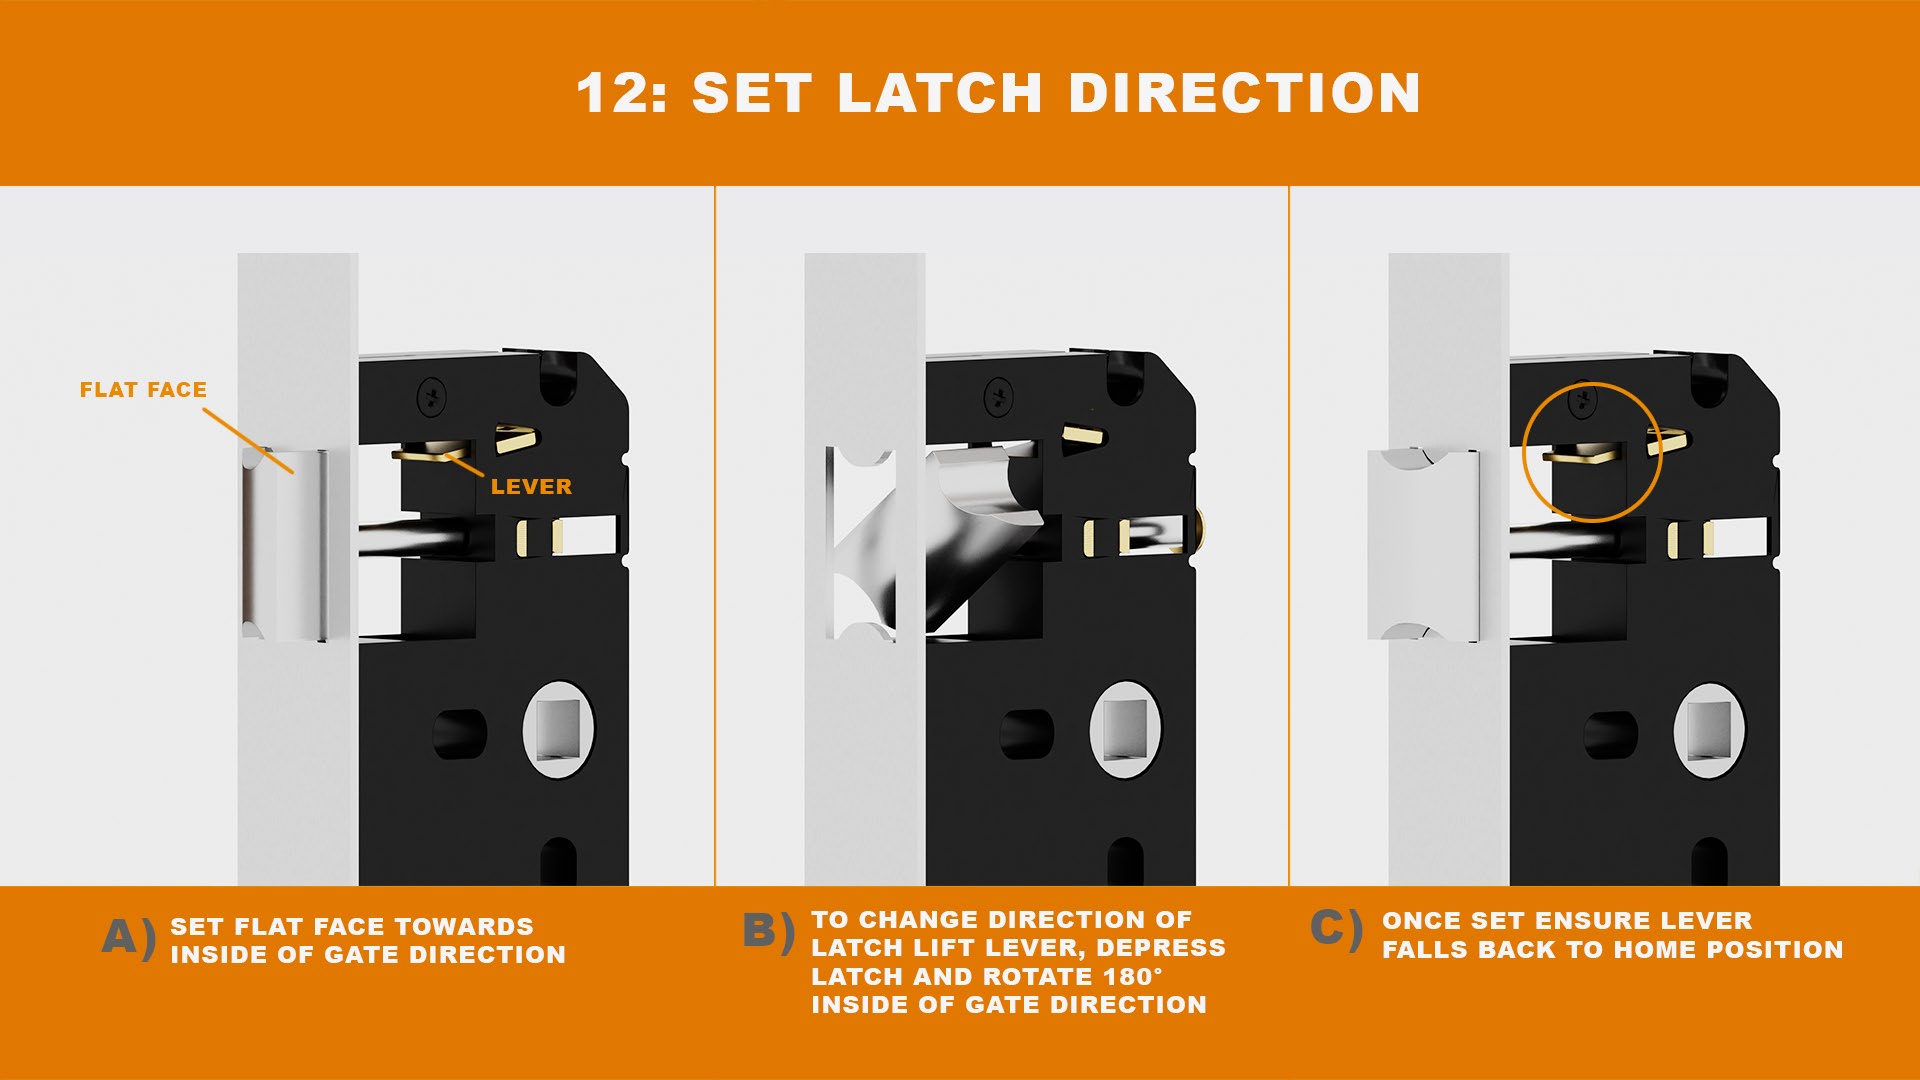
Depending on the opening direction you require, you may need to adjust the orientation of the latch. To do so, please see the illustration above.
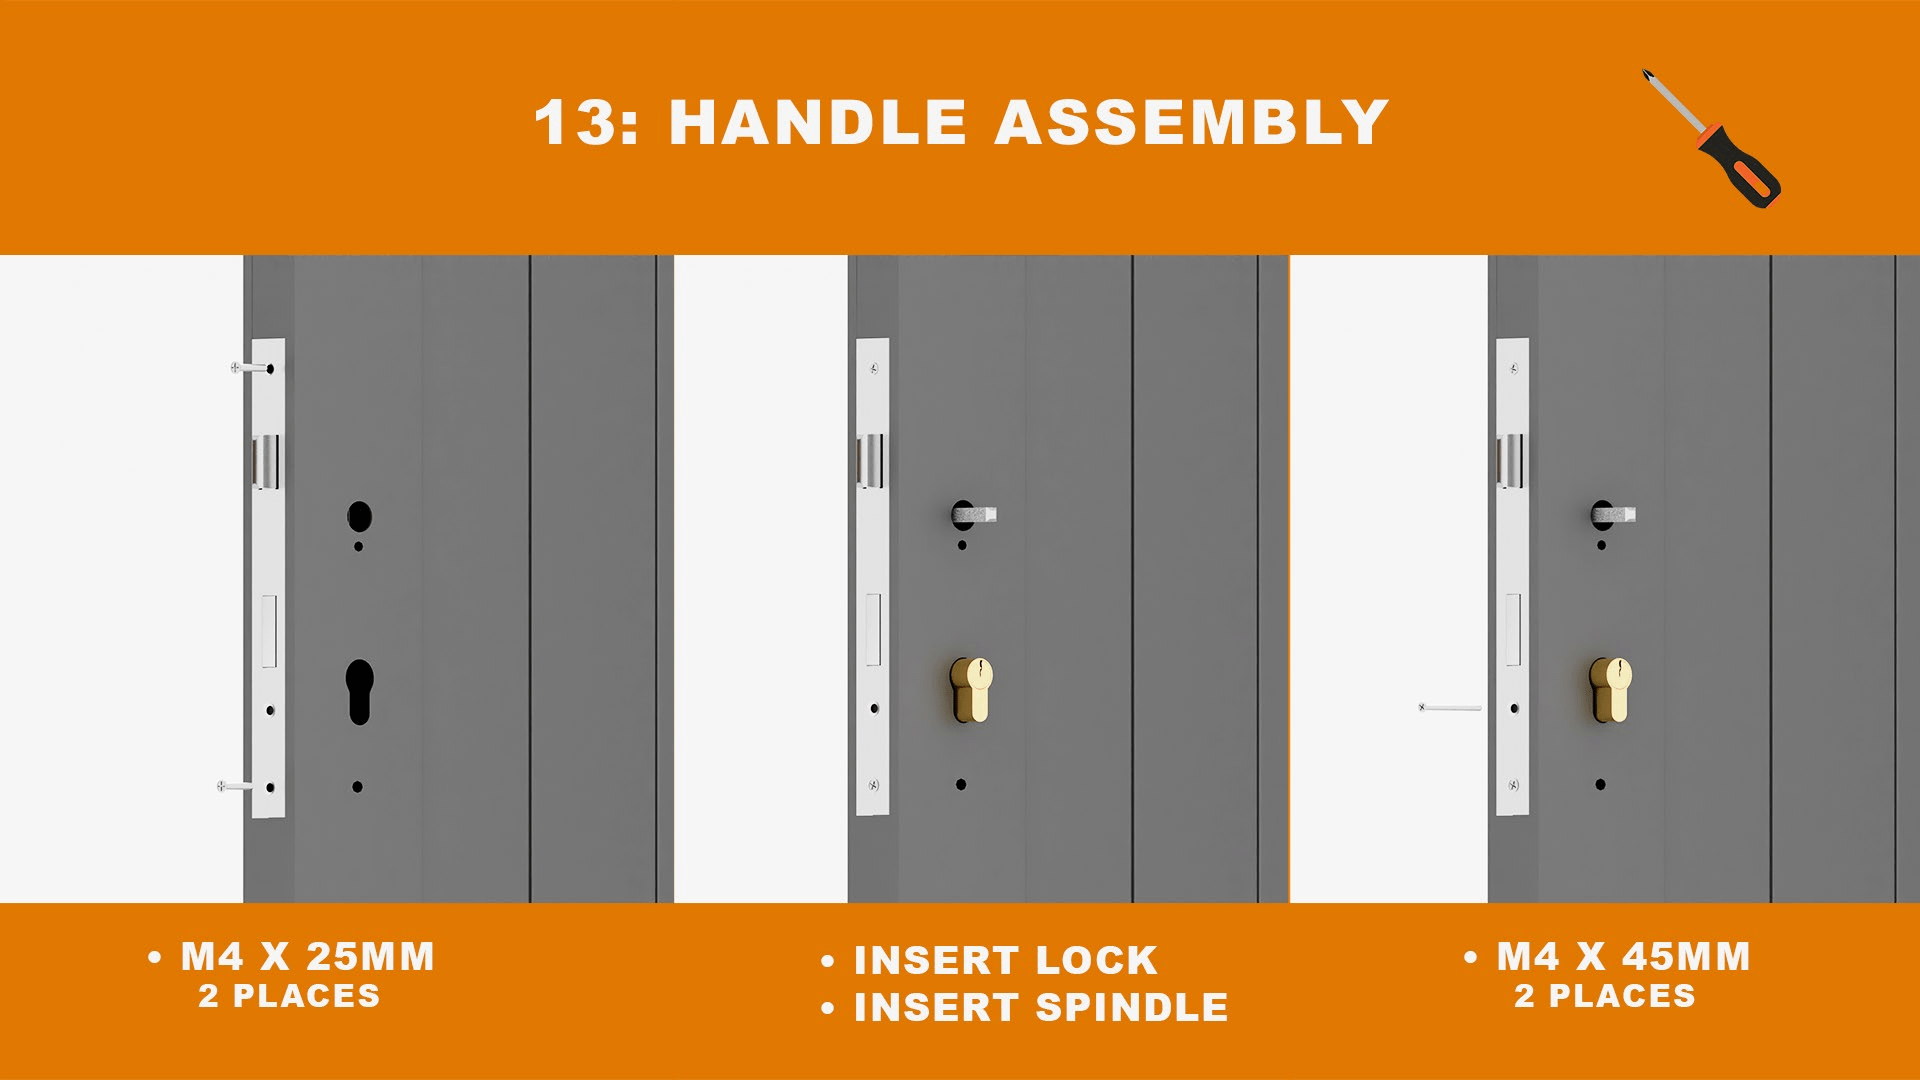
Place the lock mechanism into the pre-cut slot in the gate and secure using 2 x screws. The lock and spindle for the handle can then be slotted into place and secured using the relevant screws.
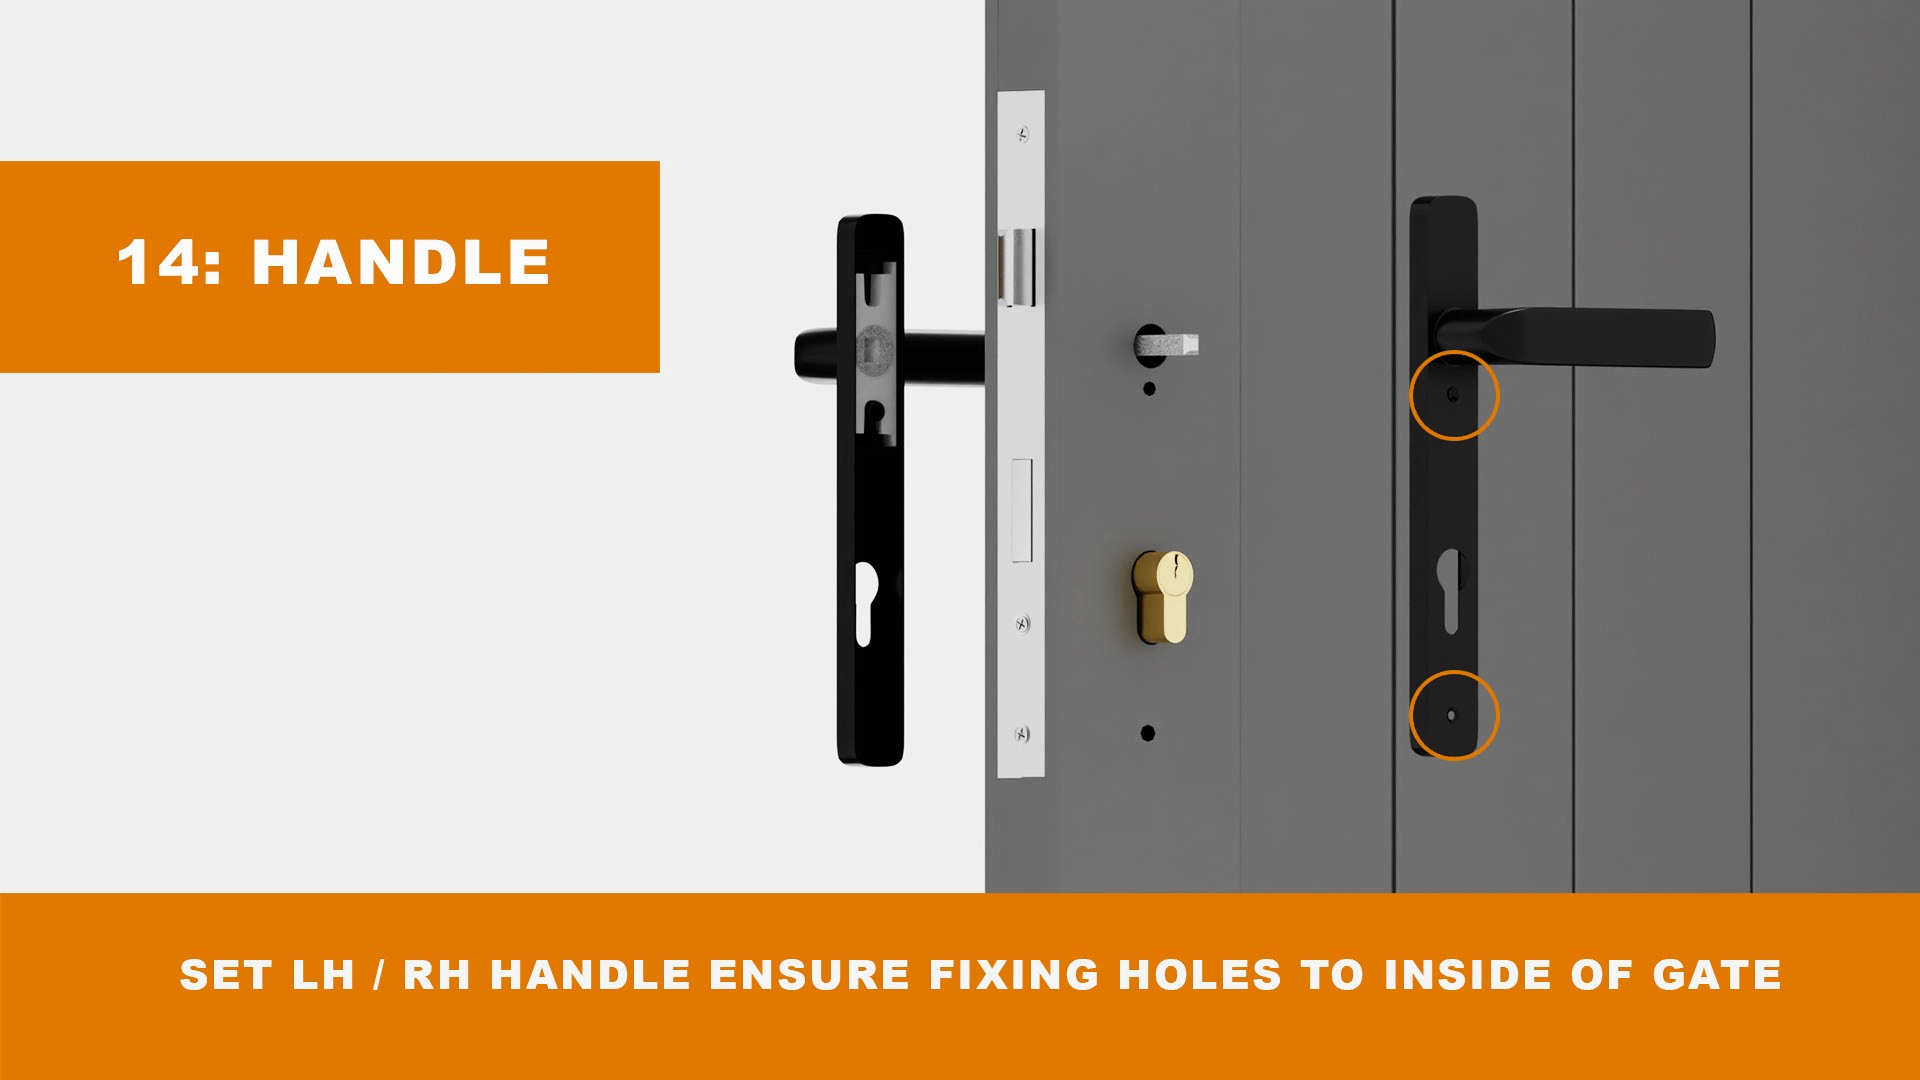
You can now fit the handle into place on the gate, making sure that the screws are located on the inside (safe side) of the opening, as this will prevent them been tampered with.
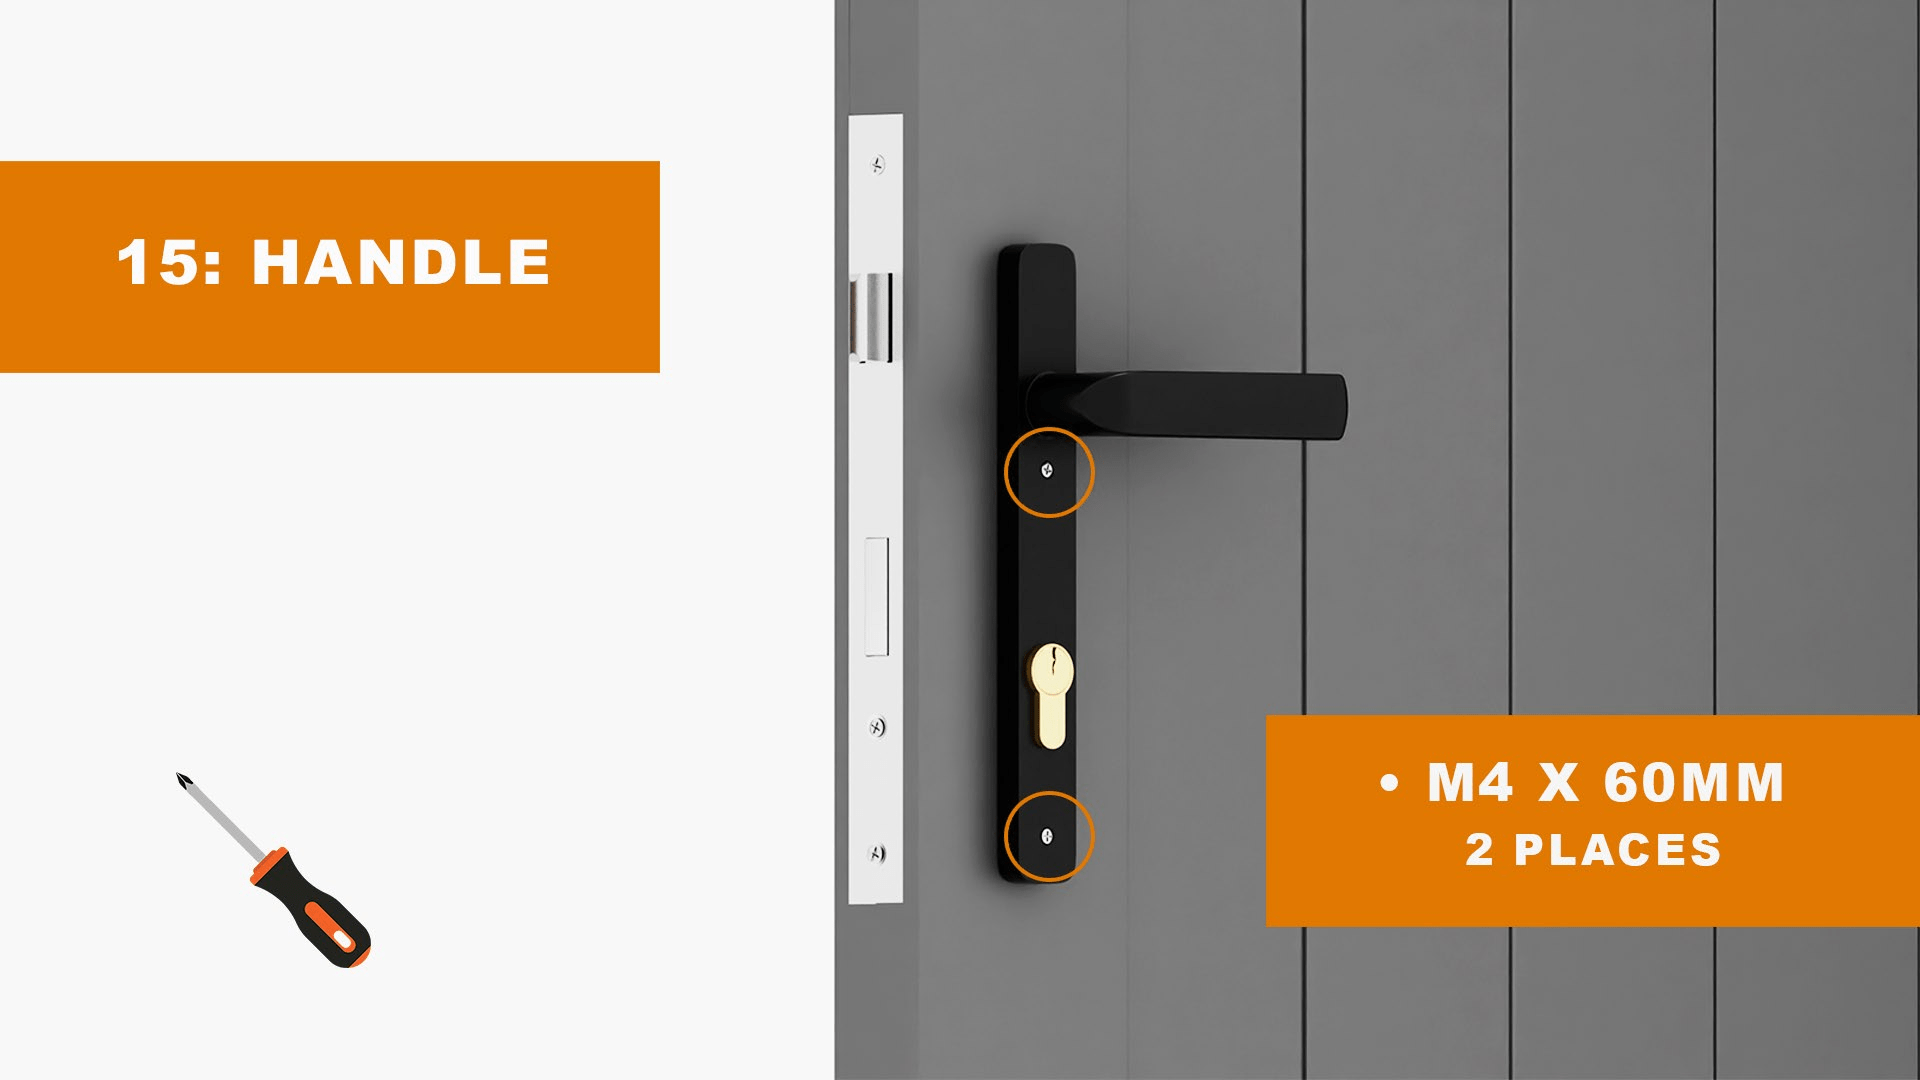
Holding the handle into place, secure it with the fixing screws provided.
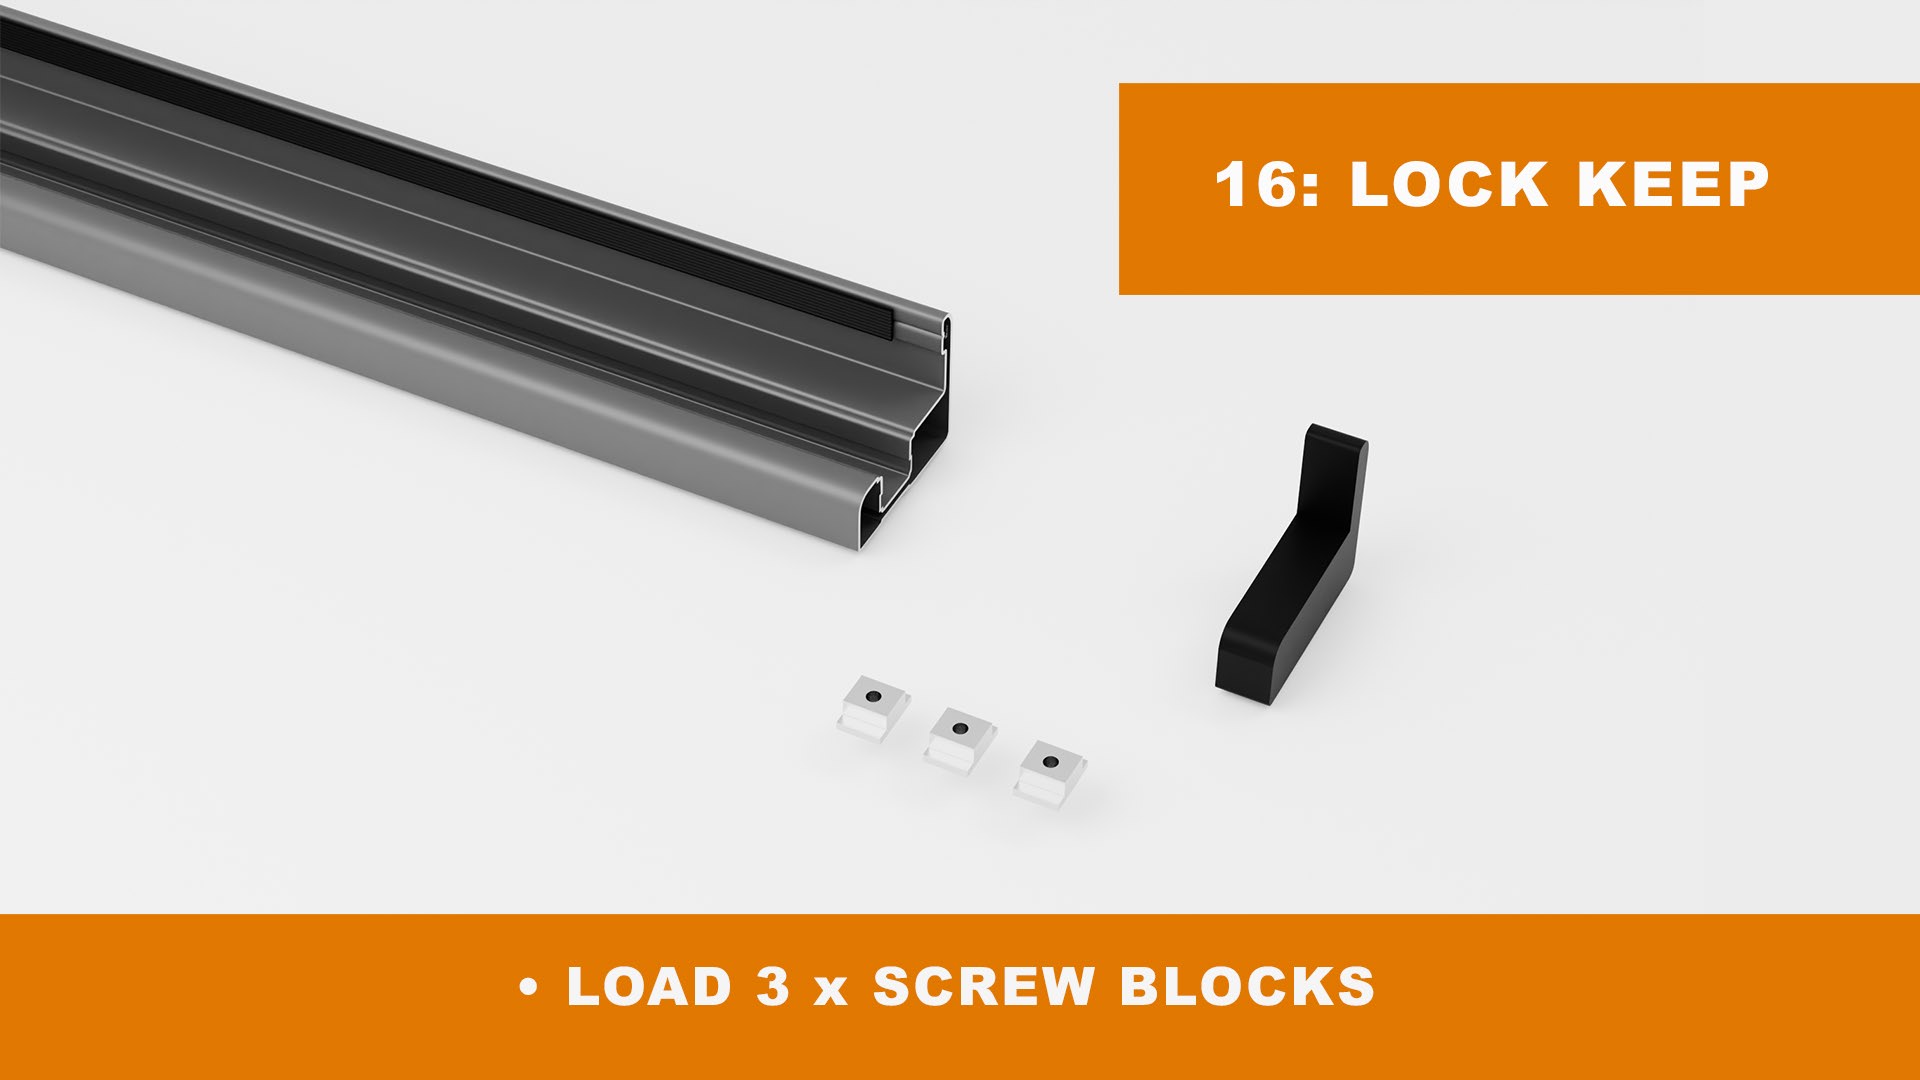
Slide the 3 x screw blocks into the slot located in the lock keep and then insert the plastic end cap.
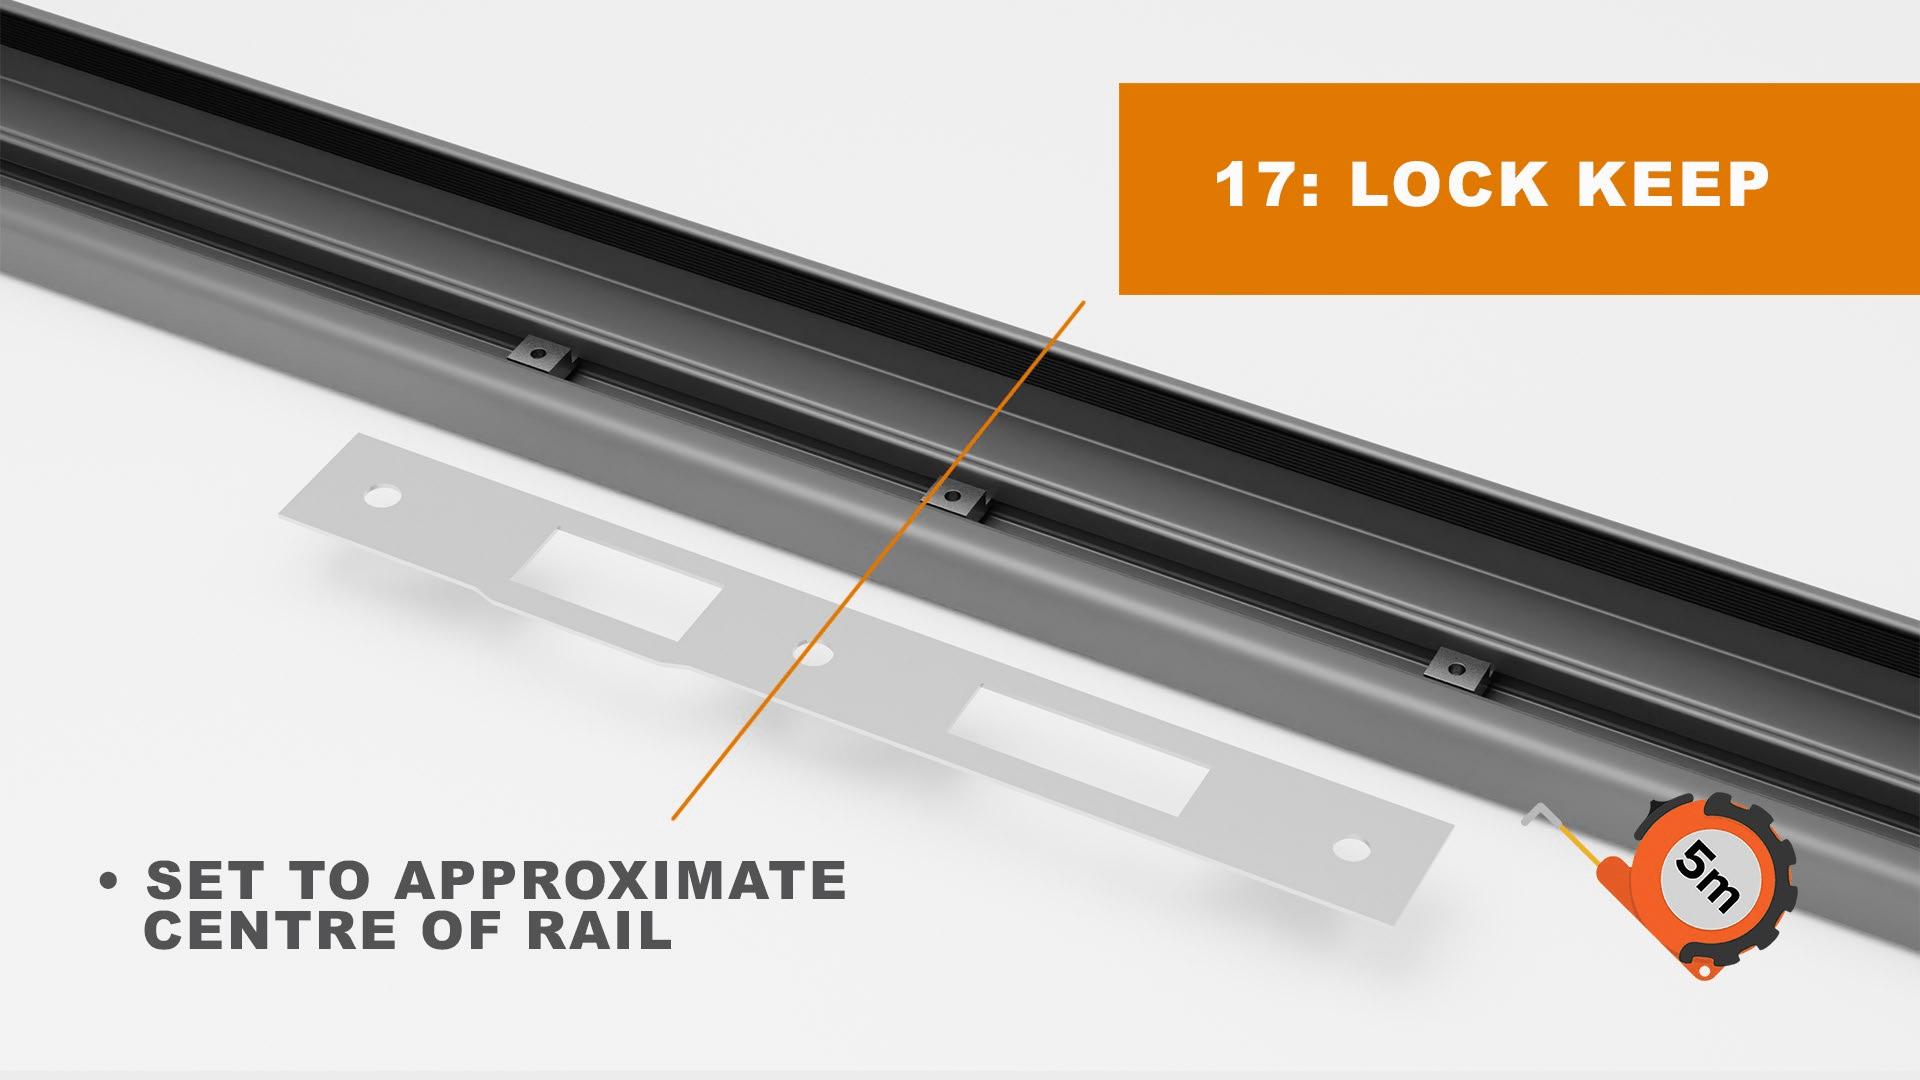
Slide the screw blocks to the approximate centre of the keep.
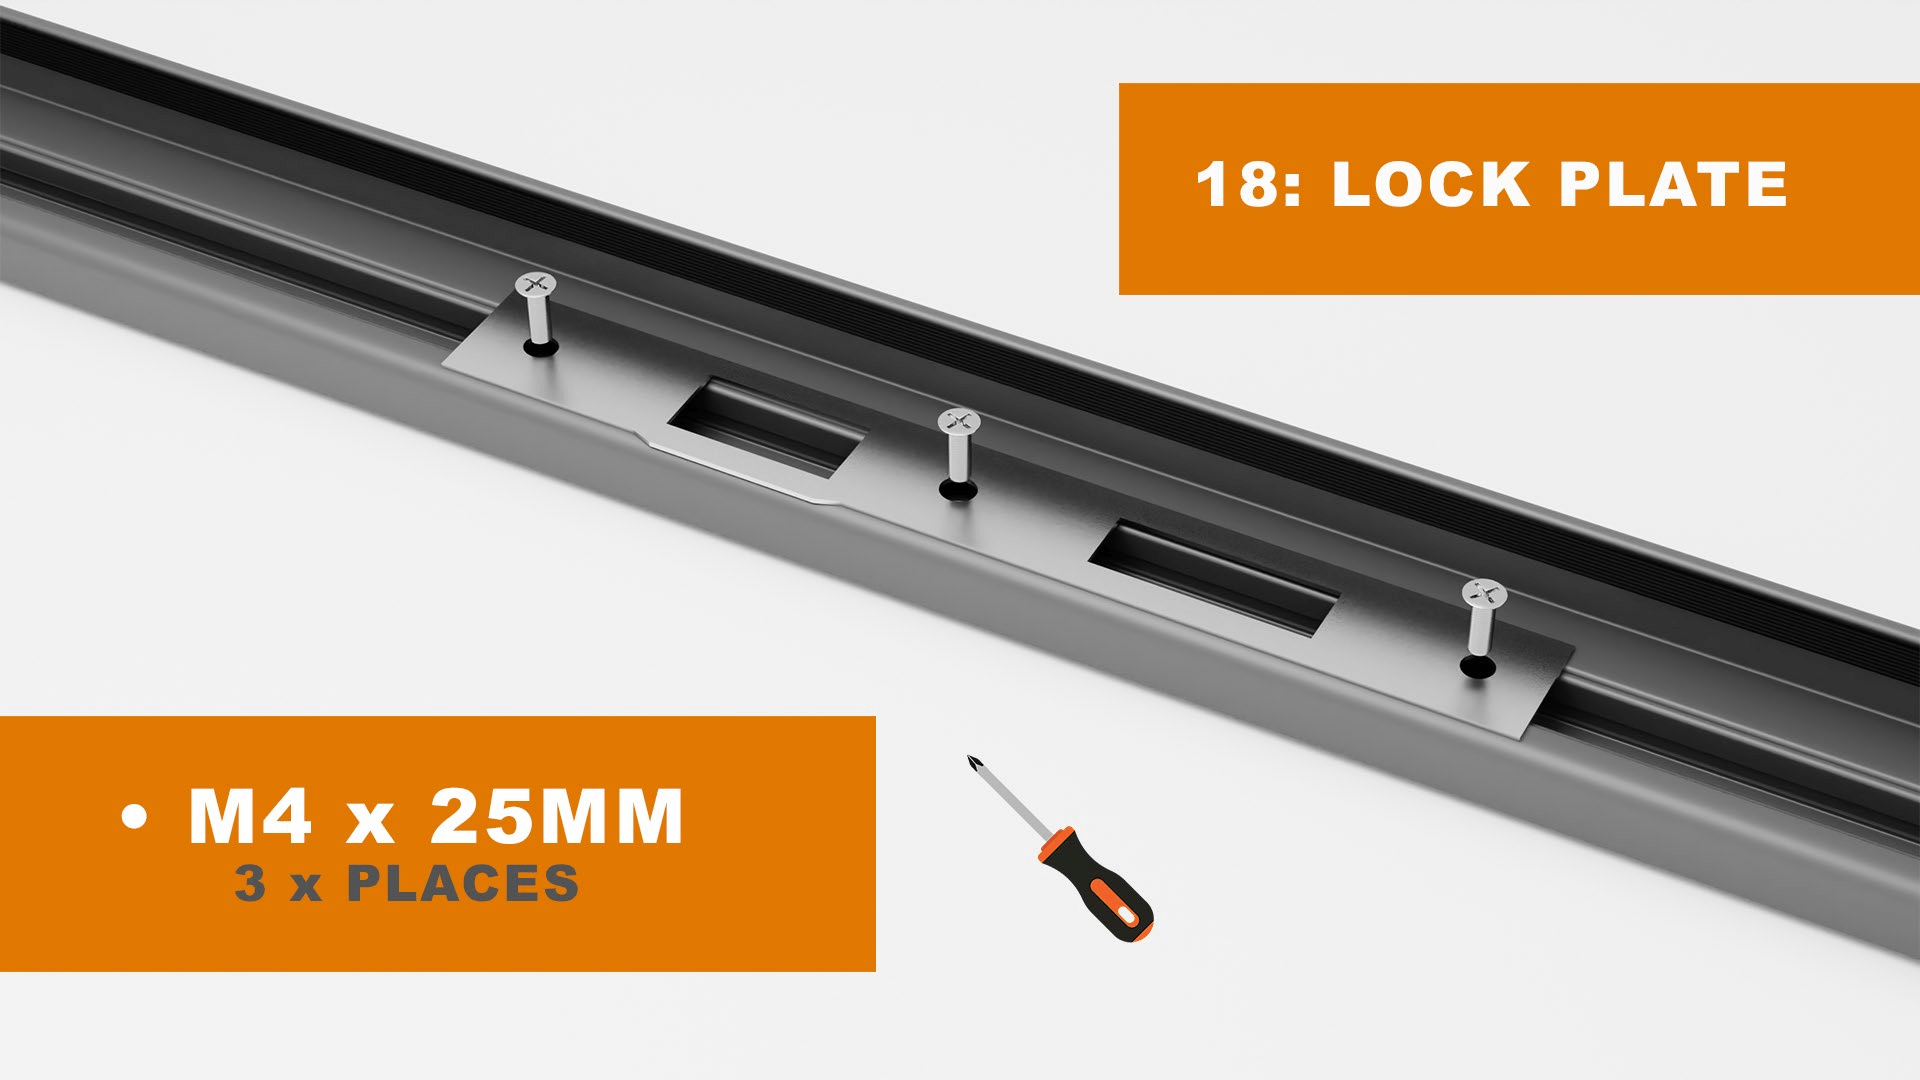
Space the blocks out so they alight with the holes in the lock plate, and screw them into place.
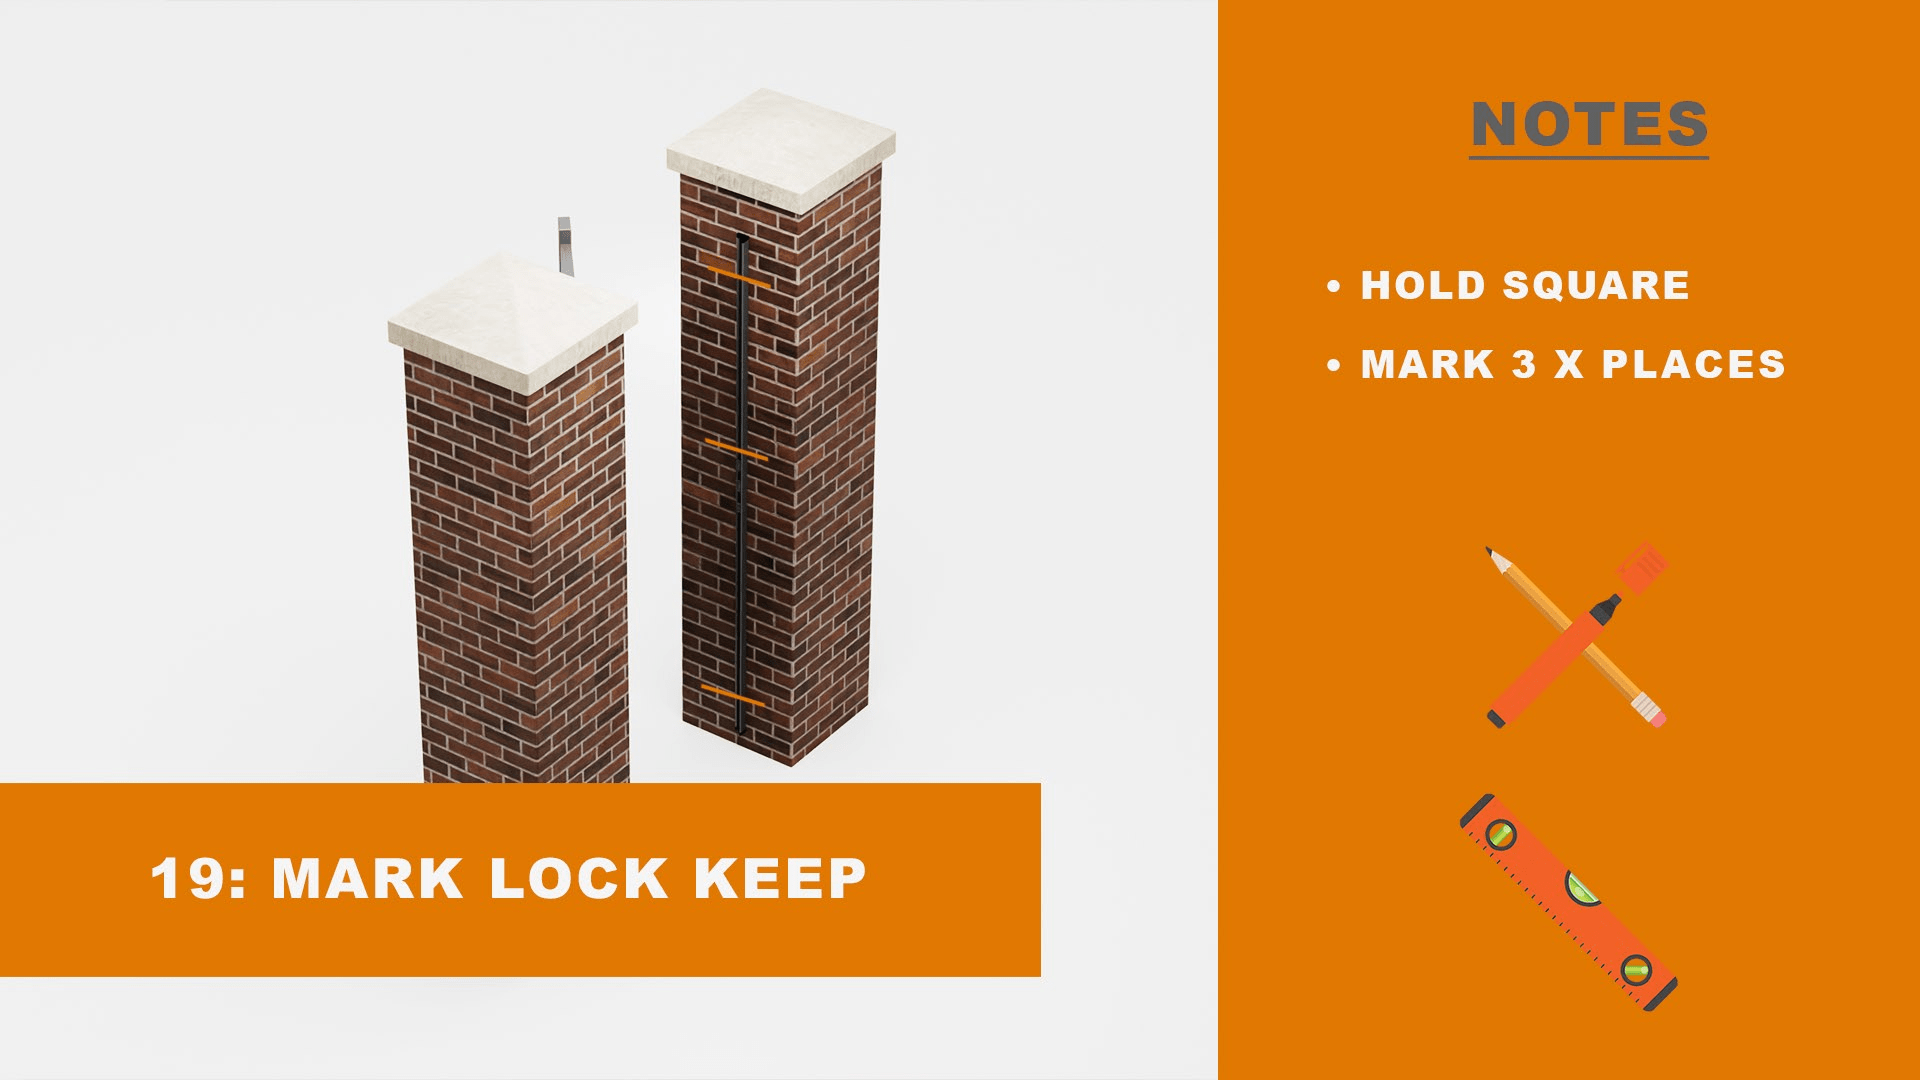
Carefully position the lock and keep against the wall in the required position, ensuring it is plumb and centred correctly to align with the gate. When you are happy with its location, you can mark the fixing holes in the wall.
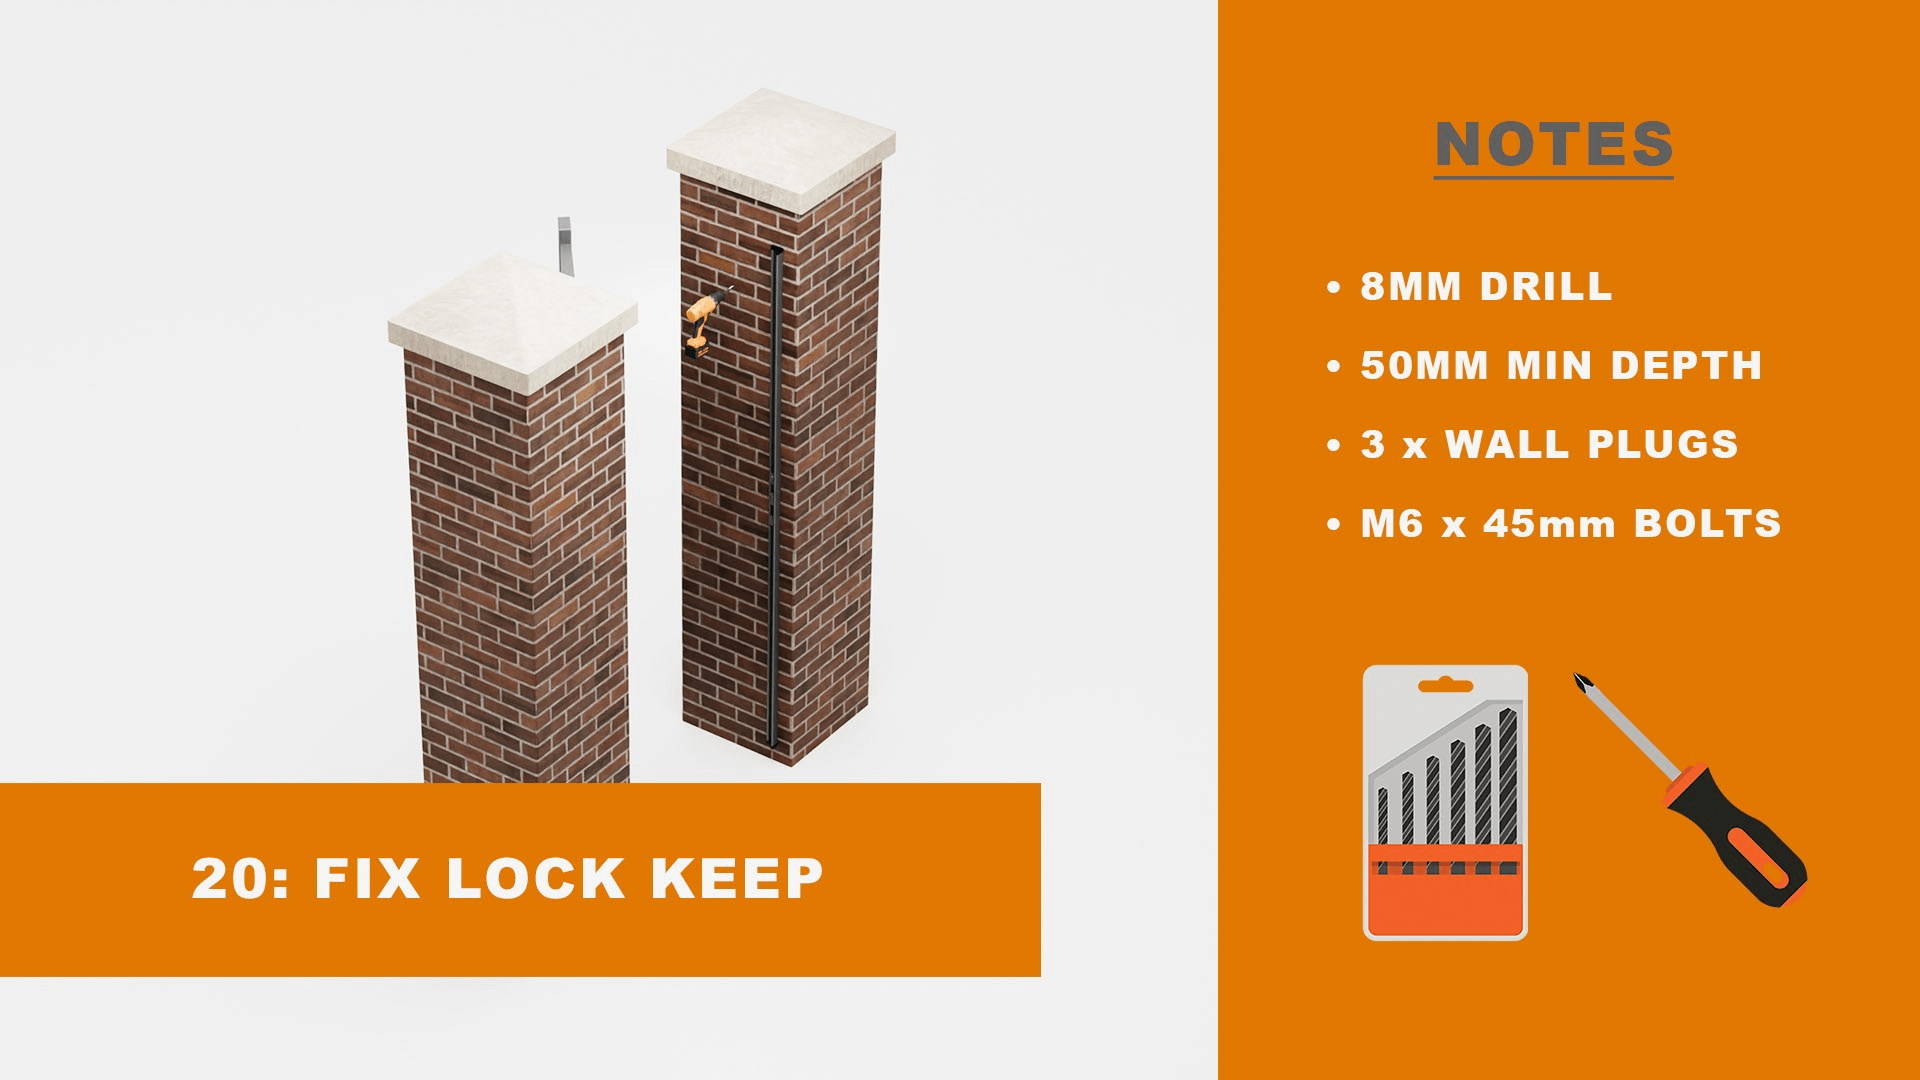
Drill the pre-marked holes in the wall using an appropriate size drill bit, making sure you go to the required depth to allow for secure fixing. When done, you can mount the keep to the wall using the M6 bolts provided.
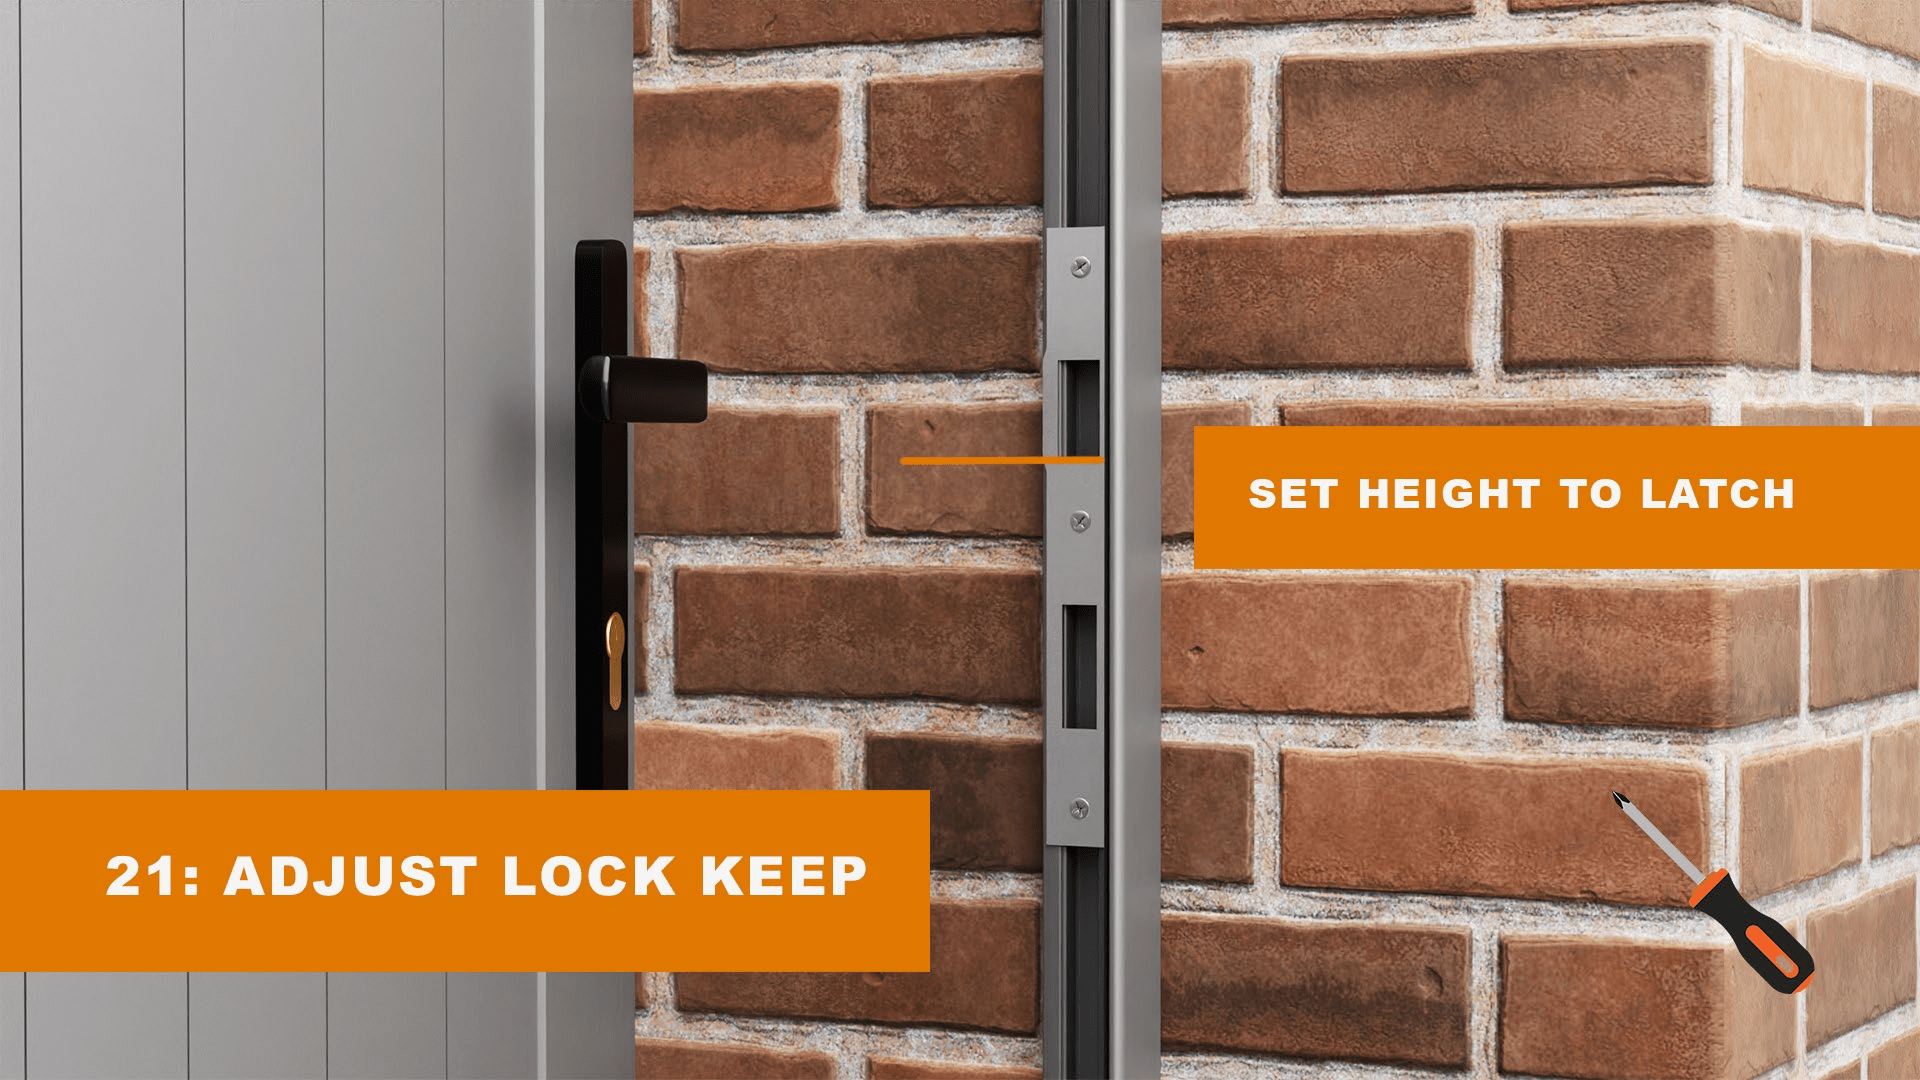
Set the height of the lock plate so the holes align appropriately with the latch and lock throw. You will require some fine adjustments to achieve the proper alignment.
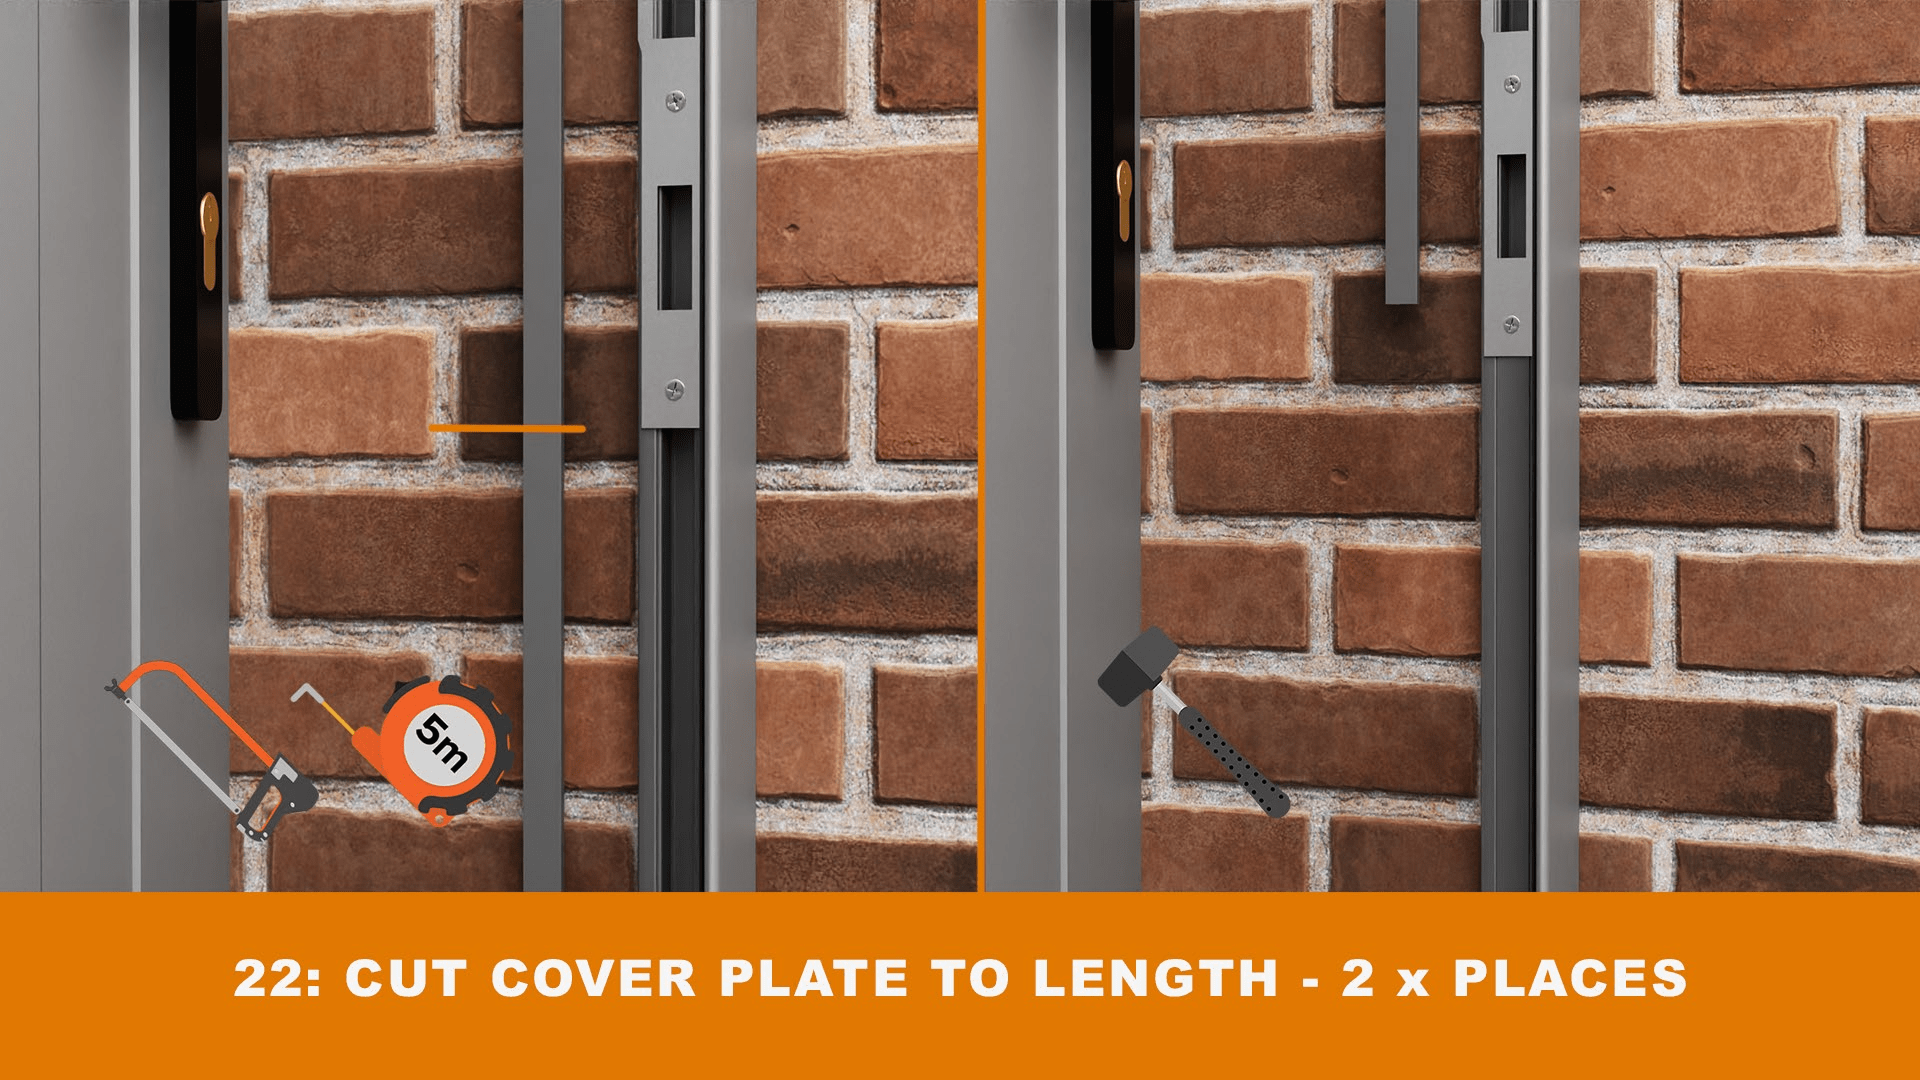
Cut the cover plates to the desired length and fit them into the corresponding slots in the lock plate.
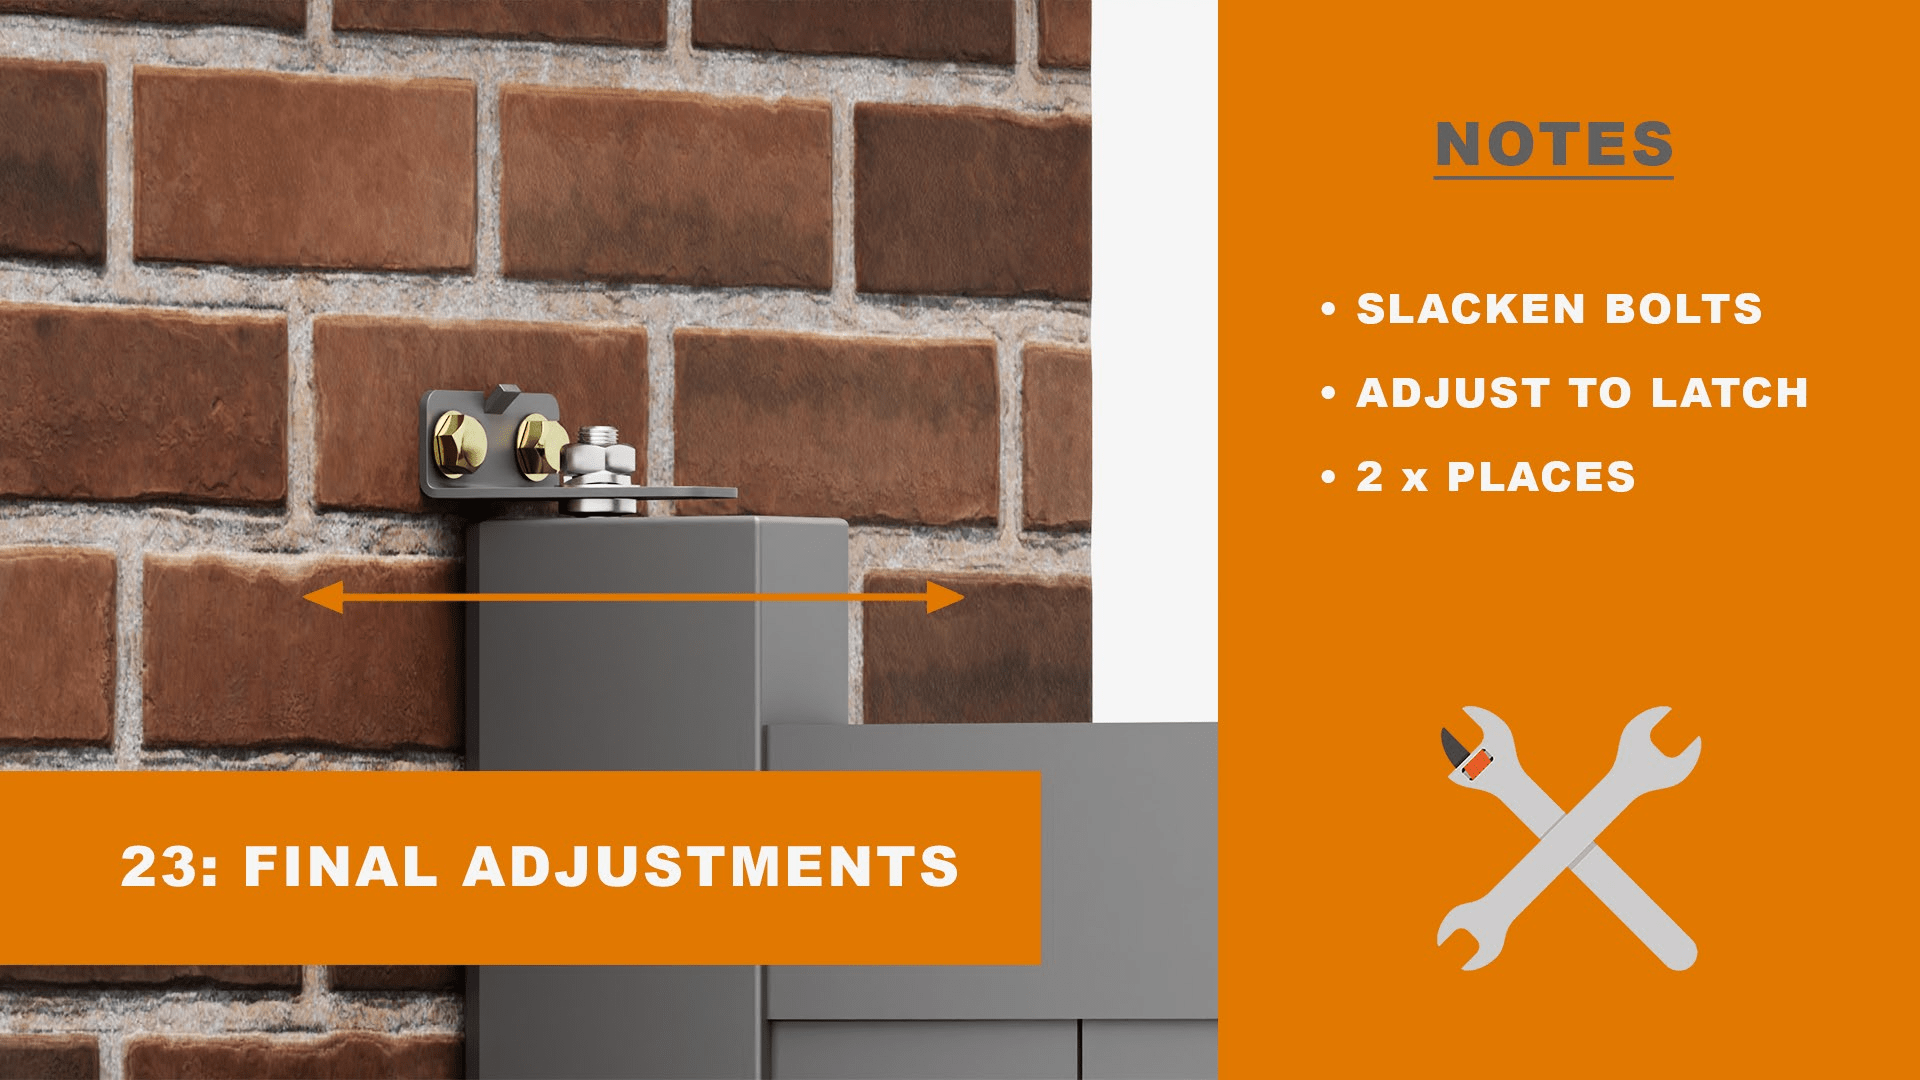
You can now make final adjustments to the hinges.
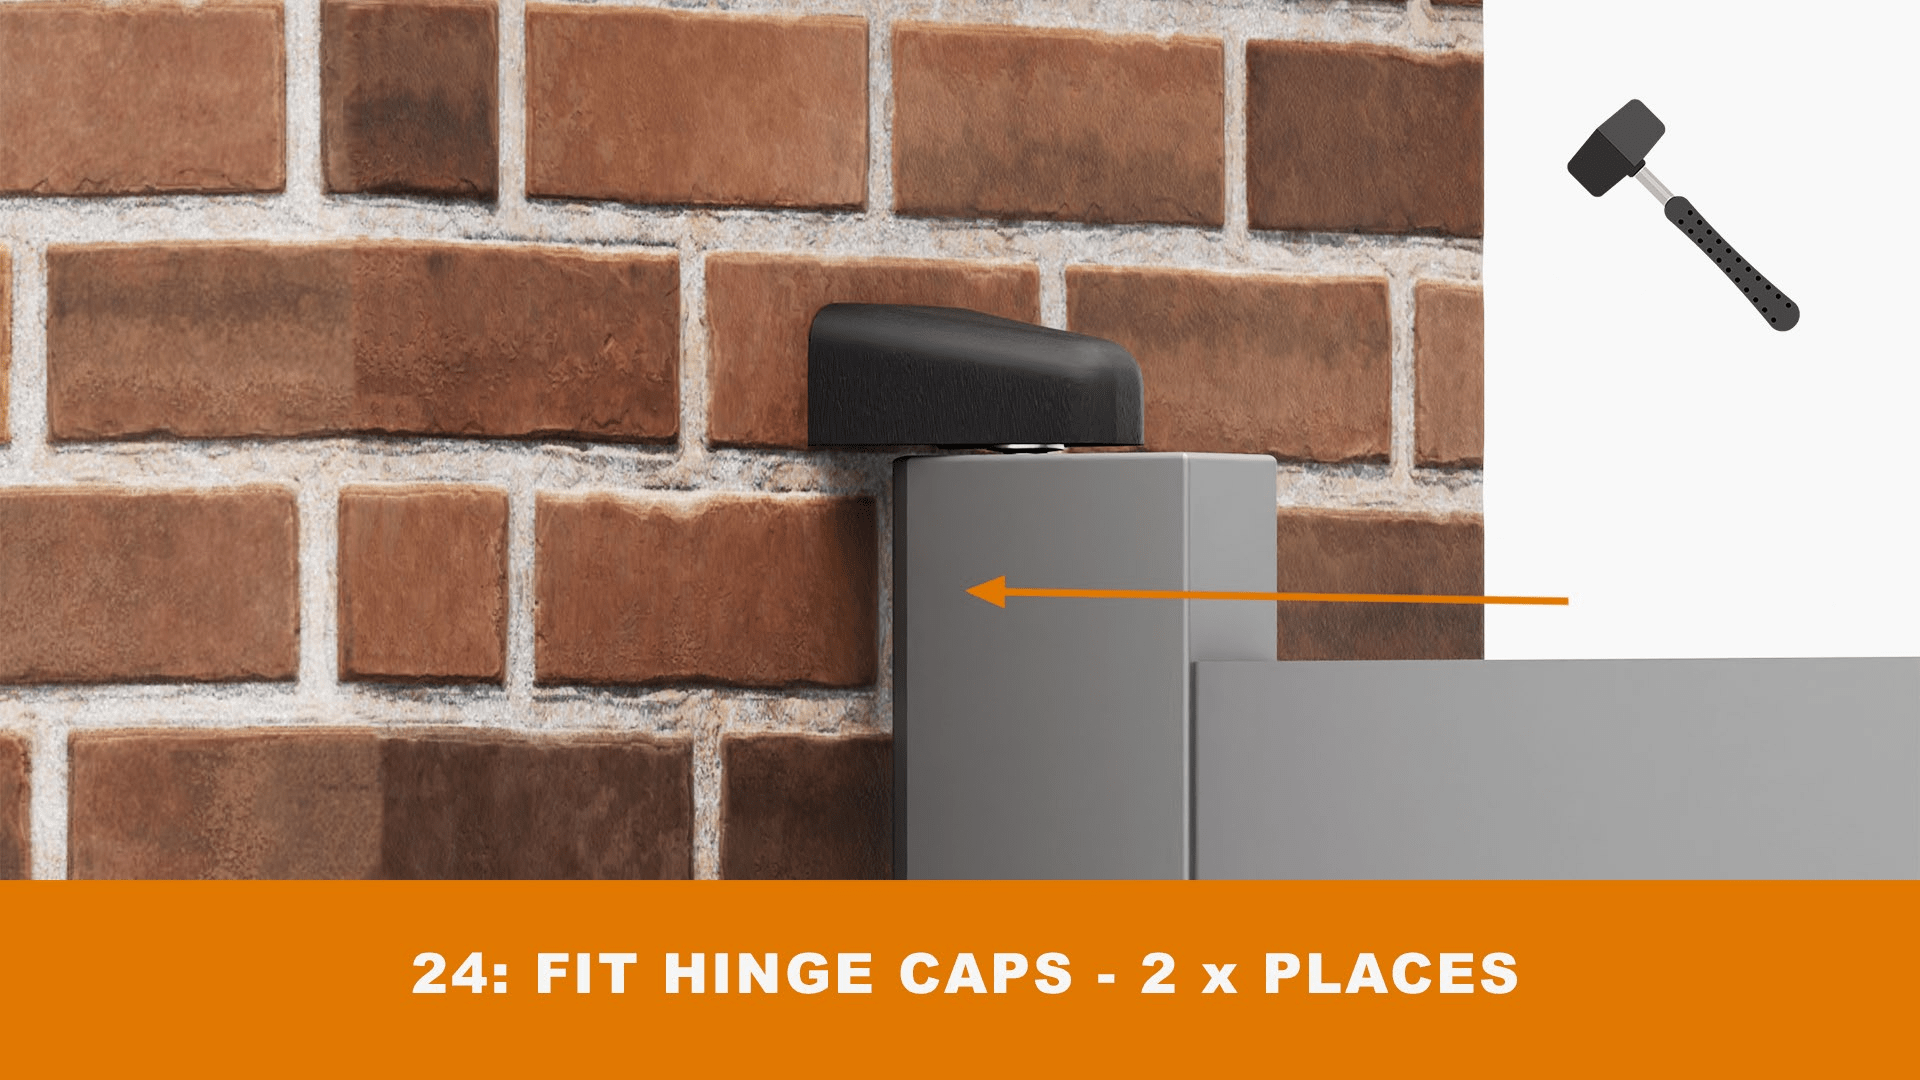
Fit the hinge caps.
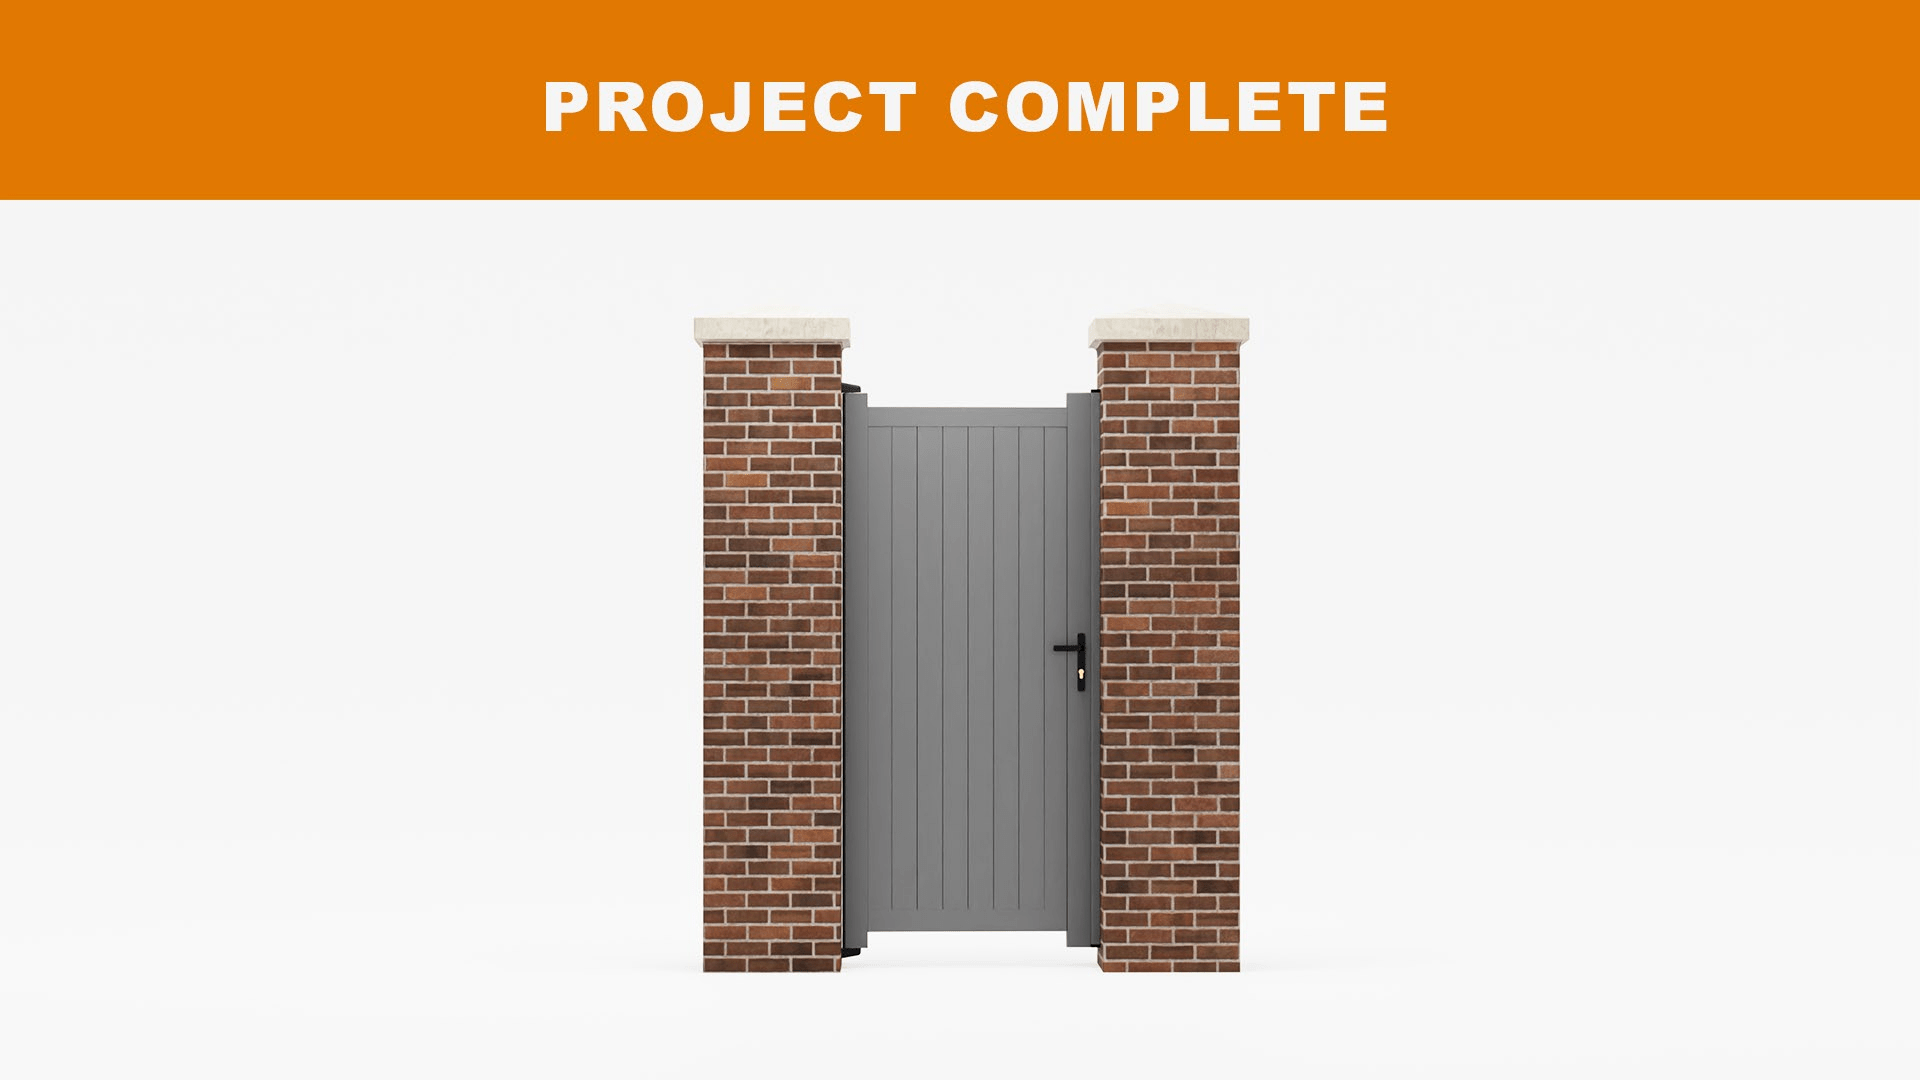
Installation of your gate is now complete.
- Railings


